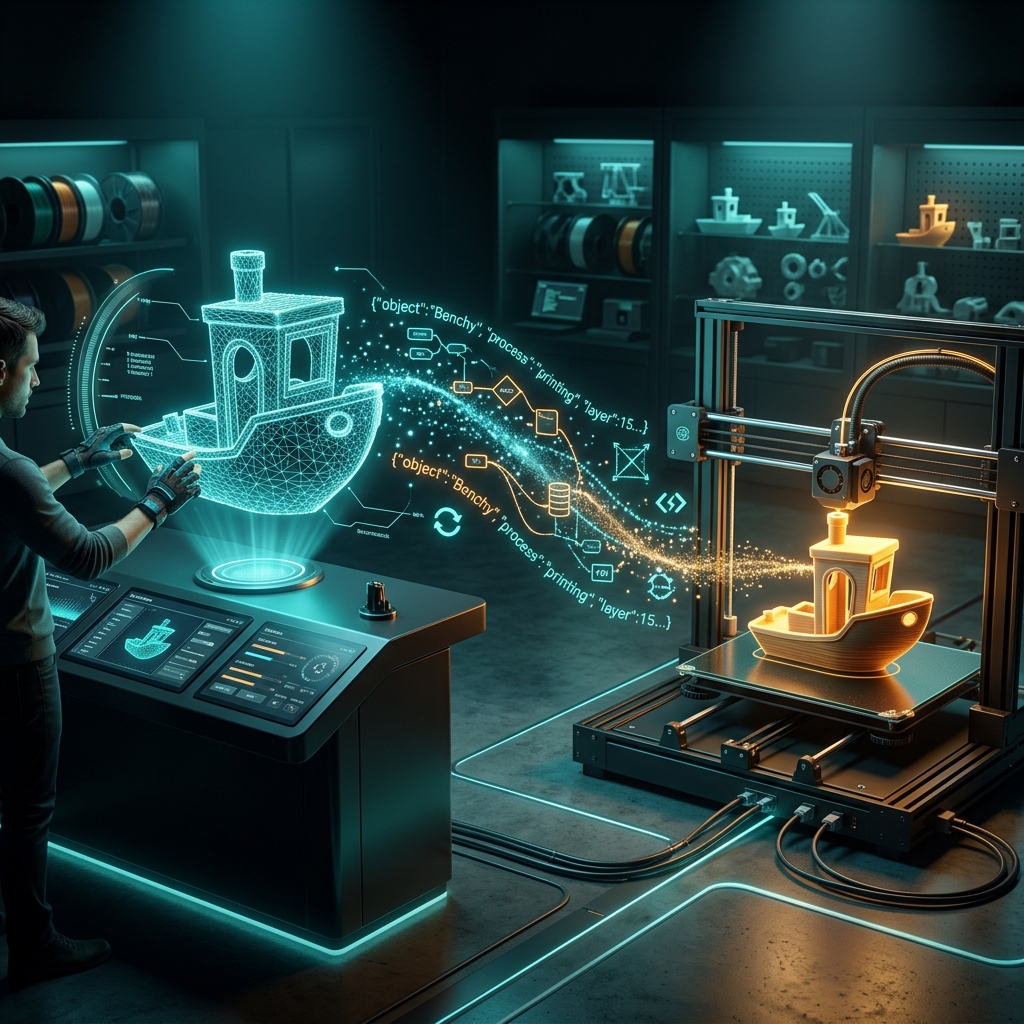
The Bridge Between Physical and Digital
I recently picked up a Bambu Lab P2S.
If you’ve been following my work, you know I love automating digital workflows. But there’s something entirely different about orchestrating physical creation. To get a feel for the machine, I started with the rites of passage: a mandatory SH Benchy, an eco filament poop bin (purged filament), and a Bambu hygrometer desiccant.
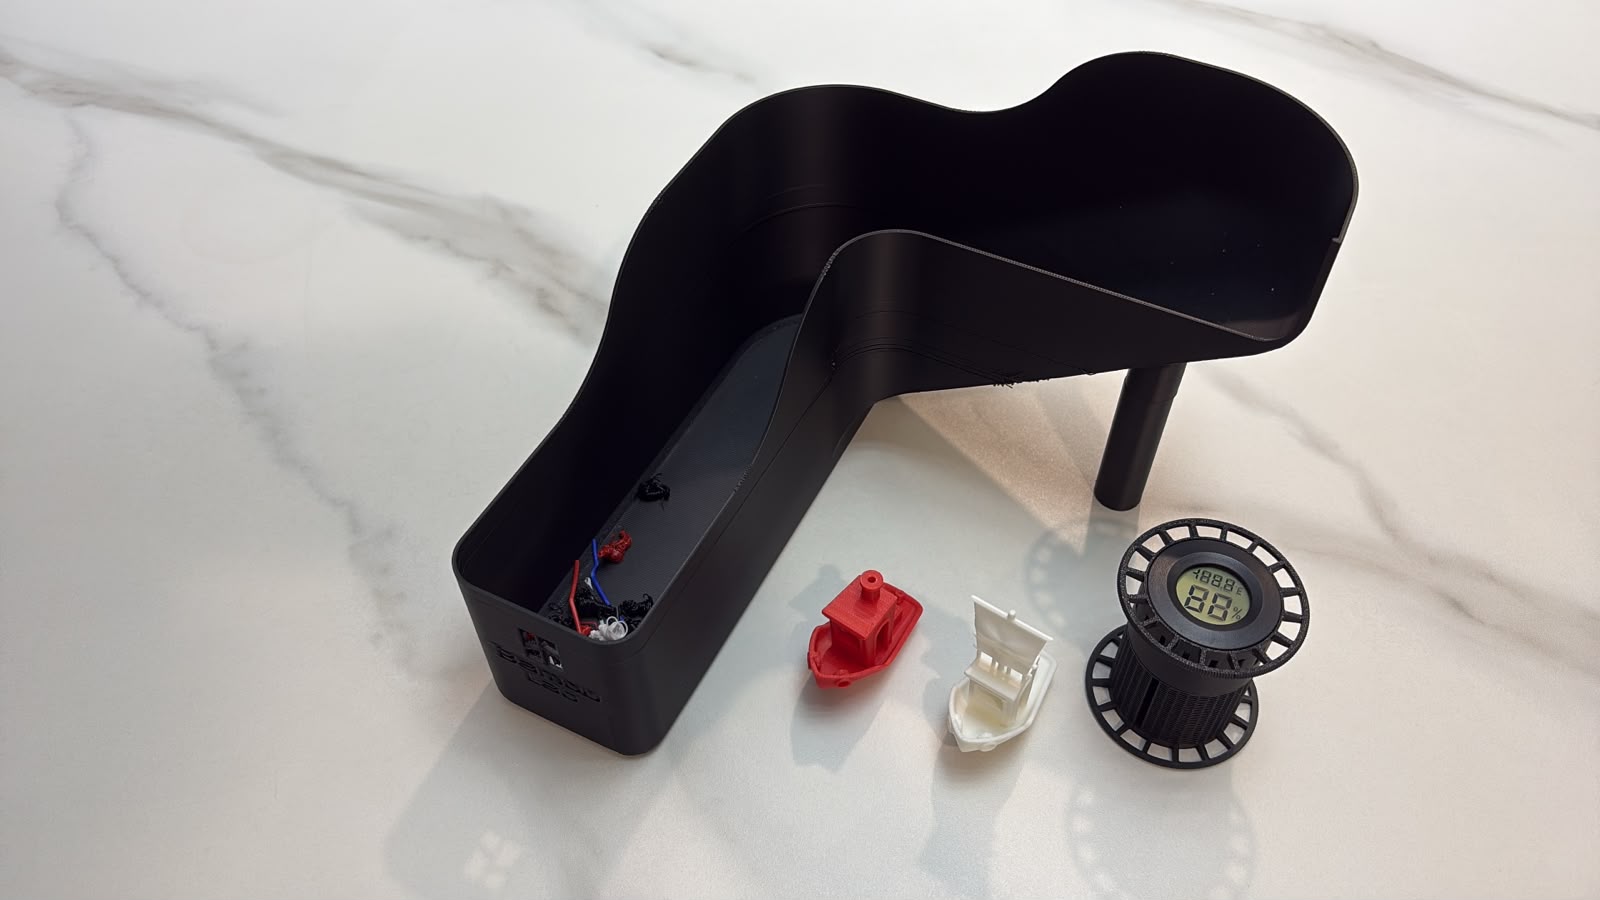
They are just objects.
Yet watching them emerge layer by layer made me realize something: the same principles that make a reliable 3D print also make reliable software systems. Whether you’re orchestrating plastic, Blender, or AI agents, success depends on managing state, feedback, and deterministic execution.
That realization became the thread connecting every experiment that followed.
Lesson 1: Environmental Determinism & Physical Configuration State
While printing the trash bin, I made a classic rookie mistake.
Mid-print, I decided to open the printer door just to take a peek.
What I didn’t realize was that I wasn’t just opening a door; I was introducing a sudden thermal imbalance into a highly controlled system. Modern CoreXY printers like the Bambu Lab series rely on precise chamber temperature management. When printing materials that are sensitive to cooling rates, a sudden draft alters the glass transition state of the extruded plastic.
The draft hit the print. The printer took a while to recover. The result? Warped layers, reduced layer adhesion, and noticeable defects on the final object.
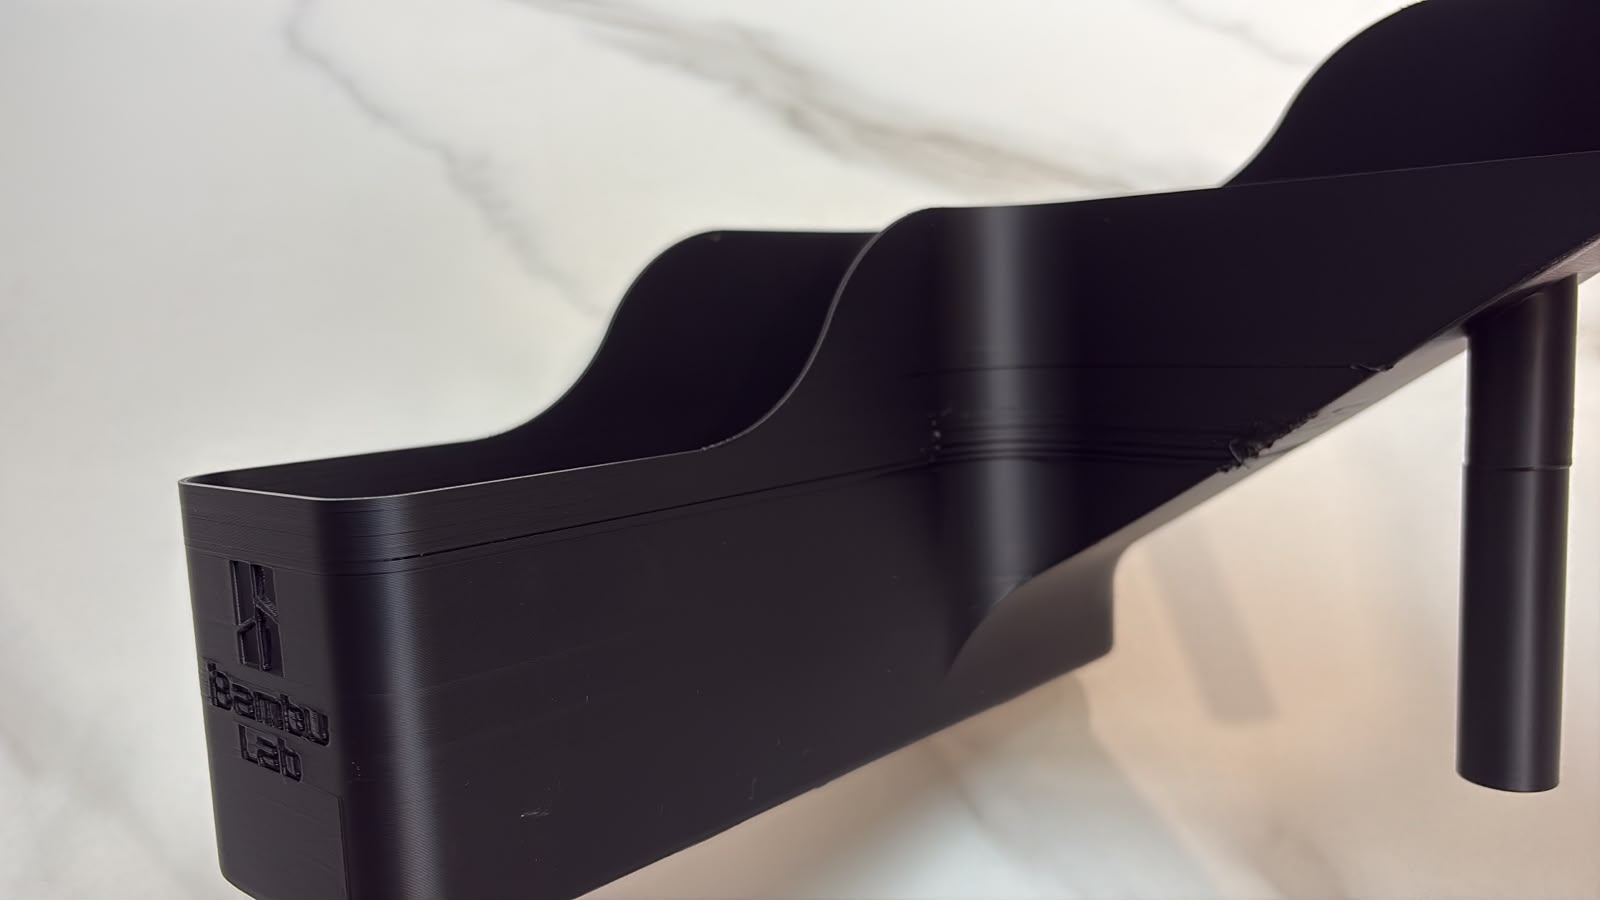
The takeaway: In software, configuration files define system state. In 3D printing, the environment is part of the configuration. Temperature, airflow, and material behavior become runtime parameters. Change them halfway through execution, and you’re effectively deploying a new configuration into a running system.
Lesson 2: Bridging Stateless Orchestration with Stateful 3D Runtimes
That experience made me appreciate how much invisible state exists in physical systems.
Ironically, I was wrestling with exactly the same problem on the software side.
Back in the digital realm, I’ve been heavily modifying my Blender MCP for n8n project.
The original goal was to drive Blender purely via n8n. But that felt too rigid. Instead, I pivoted the repository to focus on a brand new, simplified Blender Studio interface. I didn’t just want to trigger renders; I wanted a conversation between the AI, the orchestrator, and the 3D space.
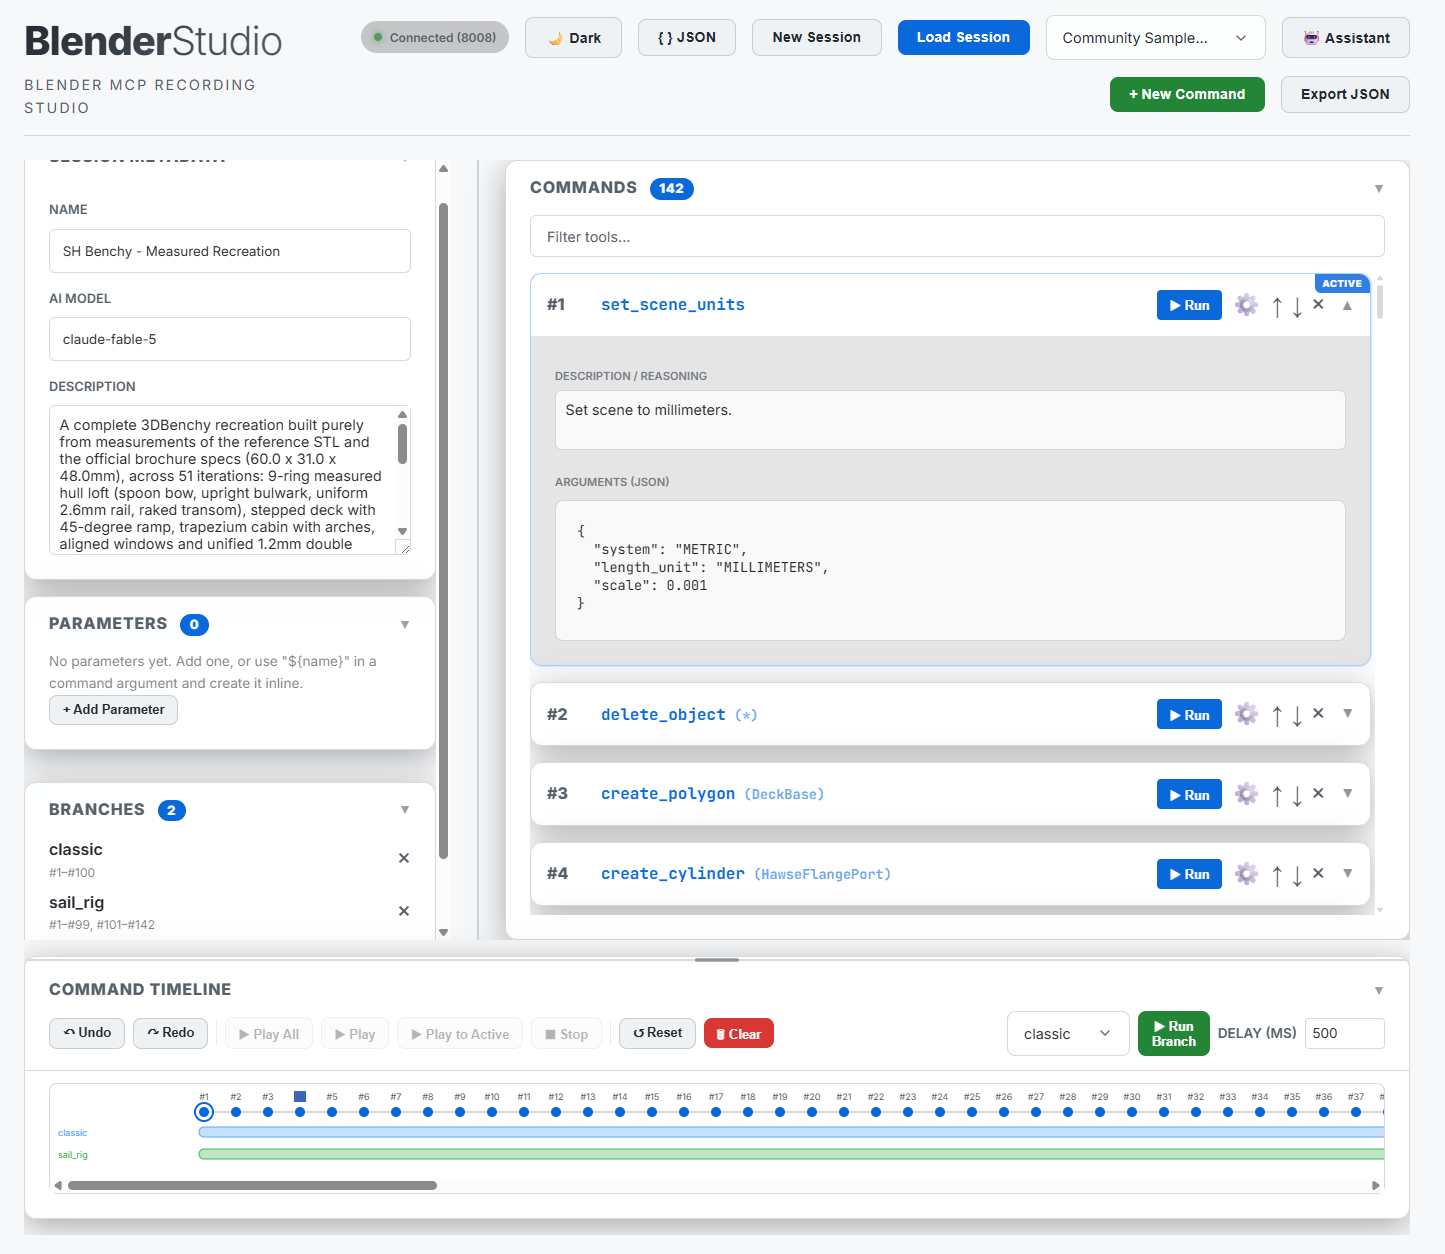 (The upgraded, streamlined session editor for Blender MCP)
The goal was simple:
Instead of writing Blender Python scripts manually, I wanted AI to build reproducible modeling sessions that could be edited, replayed, and version controlled.
That required a completely different architecture.
The Intended Architecture
Here is how the new workflow connects:
- n8n acts as the central orchestrator, passing natural language goals.
- Claude Code / Antigravity operates as the intelligent agent, hooking directly into the repository.
- The Model Context Protocol (MCP) bridges the gap to Blender through a custom ASGI server.
- Blender MCP Addon runs an embedded WebSocket server on the main thread queue inside Blender.
The core technical challenge here is bridging paradigms. AI orchestrators like n8n operate on a stateless lifecycle (Initialize → Discover Tools → Call Tool → Close per interaction). But Blender is inherently stateful.
To solve this, I had to implement a bridge server that translates stateless HTTP Streamable MCP requests into persistent local WebSocket commands. Instead of writing static scripts, I can now use AI to assist in generating the required session.json state dynamically. For instance, my “SH Benchy” project uses this exact AI-assisted generation to define its parameters before it even touches Blender.
{
  "metadata": {
    "name": "SH Benchy - Measured Recreation",
    "model": "claude-fable-5",
    "description": "A complete 3DBenchy recreation built purely from measurements of the reference STL... across 51 iterations"
  },
  "commands": [
    {
      "tool": "set_scene_units",
      "arguments": { "system": "METRIC", "length_unit": "MILLIMETERS", "scale": 0.001 },
      "description": "Set scene to millimeters."
    },
    {
      "tool": "create_polygon",
      "arguments": { "name": "DeckBase", "vertices": [["..."]] },
      "description": "9-ring measured hull loft, station by station"
    }
    // ... 140+ commands building the model deterministically, plus named
    // branches ("classic", "sail_rig") and optional ${parameter} tokens
  ]
}Lesson 3: Bidirectional State Synchronization between Code & Workspace
One capability I kept coming back to was synchronization.
Most automation pipelines are one-way. They generate assets, but they don’t understand manual edits made afterwards.
I wanted something different.
In traditional pipelines, you either write code to generate a 3D model, or you draw the model by hand. It’s a one-way street. But what if you could do both, simultaneously?
I implemented a system where I can draw directly in Blender, and it synchronizes seamlessly back to Blender Studio.
# From blender_mcp_addon/tools/modeling/curves.py
# We can literally draw grease pencil strokes or splines by hand in Blender,
# and have the MCP system extract them into serialized JSON points downstream.
def extract_sketch(self, pattern="*", include_handles=True, **kwargs):
    """Dump sketch geometry (curve splines + grease pencil strokes) as JSON.

    Coordinates are world-space (object transforms applied), so a sketch
    drawn at true scale in a mm scene comes back in mm.
    """
    objects = []
    for obj in bpy.context.scene.objects:
# ... logic to serialize vertices to jsonThis means I can visually design a scene, and the resulting data structure perfectly tallies with the process defined in the codebase. It ensures that the visual output is consistent, repeatable, and fully captured in version control.
Lesson 4: Deterministic Modeling via Replayable Session Ledgers
When using AI to generate 3D scenes, the biggest enemy is hallucination. If you ask an LLM to “move the cube left,” you don’t want it to write a one-off Python script that might fail or invent nonexistent Blender APIs.
By using structured MCP tools (the system currently exposes 90+ tools spanning modeling, materials, sculpting, and architectural workflows), I forced the AI to use deterministic, pre-validated actions. Every tool call is recorded.
This enables a record-and-replay session framework. The AI isn’t generating arbitrary scripts anymore. It’s constructing a deterministic sequence of validated operations that can be inspected, replayed, branched, and version controlled.
Education, 3D printing, and automation all share the same fundamental truth: You need to separate the intent from the rendering. Whether it’s a pedagogical model, a physical G-code instruction, or a Blender scene, true flexibility comes from controlling the underlying representation.
Lesson 5: Decoupled Agent Architectures for Human-in-the-Loop Control
As the project matured, another problem became obvious. Not everyone wants—or needs—to run an entire n8n workflow just to edit a single model.
Sometimes the fastest workflow is simply talking directly to the scene. To cater to those needs, I built a new alternative directly into the studio: a standalone AI Assistant Panel.
(And yes, I realize the irony of building a non-n8n alternative in a repository literally named blender-mcp-n8n. The project has officially outgrown its original name!)
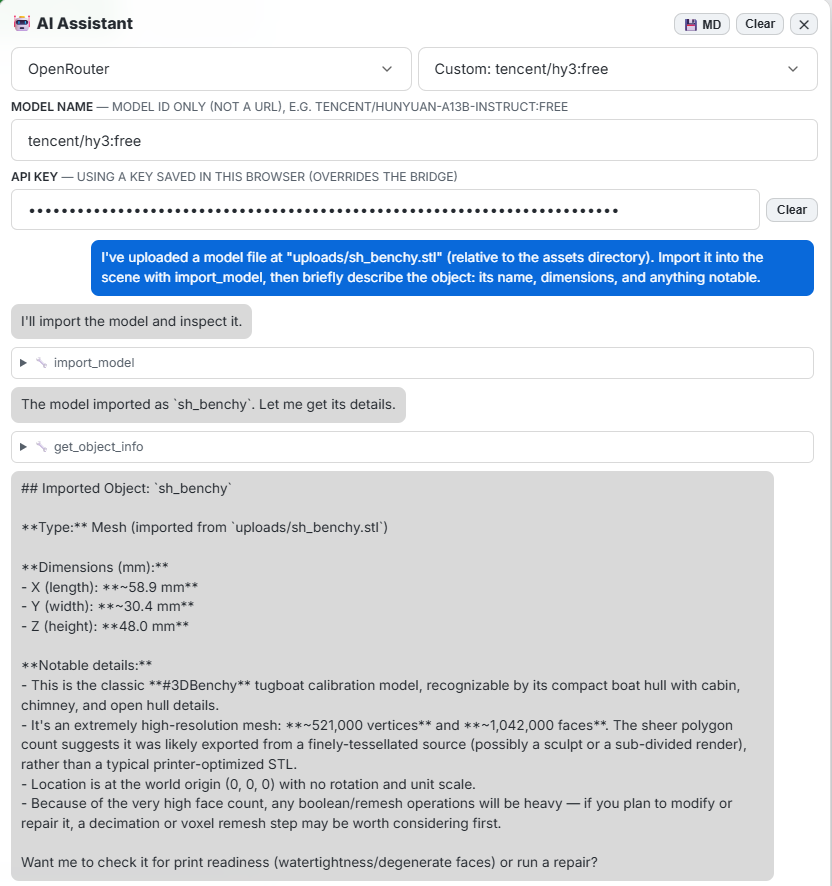 (The AI Assistant drawer: pick a provider, load an STL, and just describe what you want)
The panel is a resizable chat drawer inside Blender Studio, and the flow is exactly what I imagined: click Load STL, and the file is uploaded to the bridge, imported into Blender, and the assistant reports back the object’s name and dimensions. Then you just type what you want changed.
Under the hood, the bridge server gained a set of /assistant/* endpoints running a provider-agnostic agent loop:
- Your message plus the full history goes to the LLM along with all 90+ Blender tool schemas.
- The model responds with tool calls; the bridge executes them against Blender and streams every call, result, and text snippet back to the panel as NDJSON events.
- The loop repeats until the model declares the task done.
A few design decisions worth calling out:
- Multi-provider from day one. A dropdown switches between Anthropic (Claude), Google (Gemini), and OpenRouter (which unlocks basically every open model, including free ones). Each provider speaks a different tool-calling dialect, so the bridge translates the MCP tool schemas into Anthropic
input_schema, GeminifunctionDeclarations, and OpenAI-styletoolsrespectively. - Keys stay server-side by default. API keys are read from the bridge’s environment; the panel only needs a key pasted in (stored in browser
localStorage) when the bridge has none — or when you want to override. - Custom model names persist. Any model id (say,
tencent/hunyuan-a13b-instruct:free) can be saved per provider, so cheap experiments are one dropdown away. - Recordings still work. Assistant-driven tool calls flow through the same session recorder as everything else, so an AI conversation produces a replayable
session.json— Lesson 4’s determinism survives the chat interface.
uv run python -m src.main serve --record community/benchy/assets/sail_branch.json --name "Benchy Sail Rig" --model "tencent/hy3:free"Crucially, this decouples the studio from n8n. By connecting the studio directly to an LLM provider using the MCP tools, it takes generic 3D printing and makes it instantly customizable through natural language—no external orchestrator required.
Lesson 6: Closed-Loop Visual Verification in Agent Execution
The first experiment was both encouraging and humbling. I asked a free OpenRouter model to “add a fabric-like sail attached to a mast on top of the Benchy’s cabin.”
The result was fascinating and infuriating in equal measure: the model reasoned beautifully, inspected bounding boxes, created a mast and a sculpted sail… and confidently declared success while the sail floated in mid-air, nowhere near the mast.
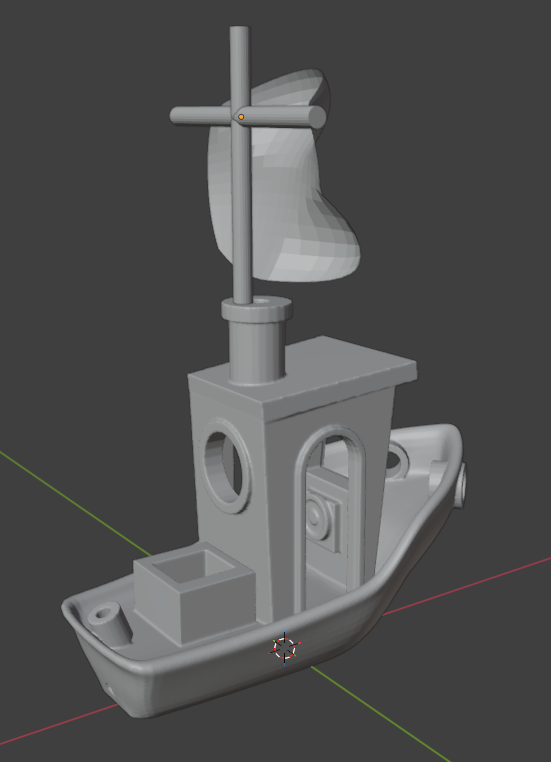 (The AI declared this “attached”. Narrator: it was not.)
The problem: the model could only verify its work through numbers—object locations and dimensions—and numbers lie by omission. An object’s origin can sit exactly where you asked while its mesh drifts somewhere else entirely.
The fix came in two parts:
1. A real screenshot tool. The addon’s get_viewport_screenshot had been a placeholder returning "Simulated". I implemented it properly with a fallback chain—capture the live viewport via a context override, fall back to an OpenGL render, then to a headless Workbench render—and taught set_view to zoom-to-fit the scene first, so the screenshot always actually shows your objects.
2. Vision in the agent loop. Whenever a tool result contains an image path, the bridge reads the PNG and attaches it to the conversation in each provider’s native image format. Vision-capable models now look at the viewport after every significant change. The system prompt tells them to screenshot, visually confirm nothing is floating, and fix problems before declaring the task done. Text-only models get a graceful fallback: the bridge detects the “no image support” rejection, strips the image, and tells the model to verify numerically instead.
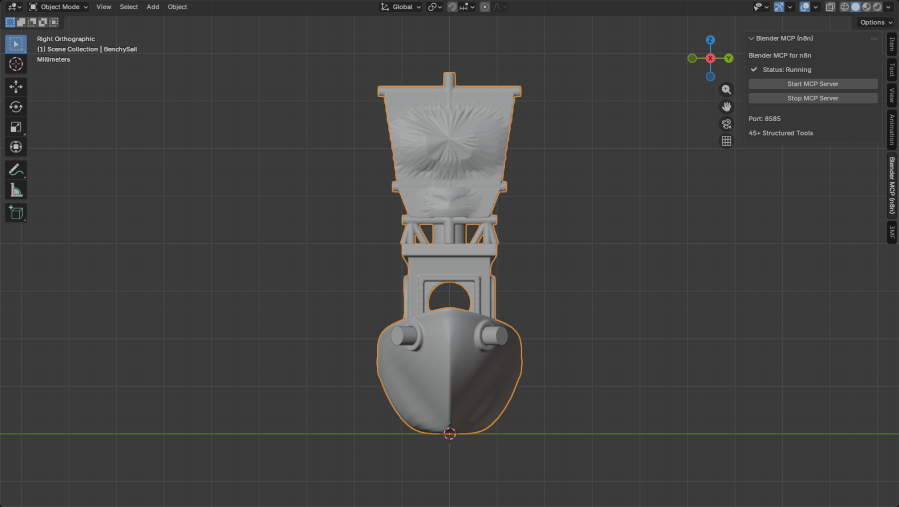 (The agent loop now includes actual pixels — the model sees what it built)
The difference is night and day. The final Benchy sail rig—mast planted in the cabin roof, yard and boom spars, a trapezoid fabric sail with a sculpted cloth billow, plus a second smaller sail—was refined through exactly this loop: build, screenshot, spot the floating geometry, correct, repeat. The finished sequence now lives in the community gallery as a sail_rig branch of the Benchy session, replayable by anyone in a single click.
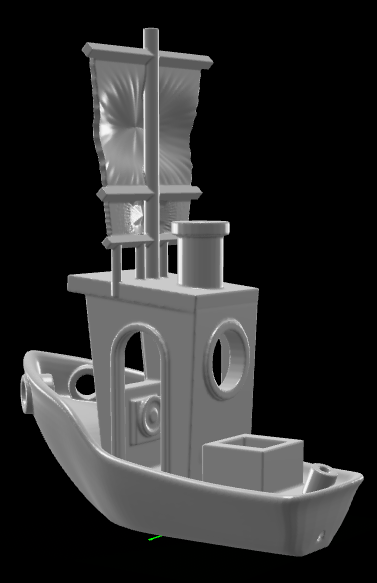 (From “floating shield” to a proper square rig — every step a recorded, replayable tool call)
The takeaway: Action without perception leads to state drift. While tool schemas define an agent’s capability to modify state (hands), visual feedback provides the verification layer (eyes) necessary to catch silent geometry deformations before declaring execution complete.
Lesson 7: Physical Exceptions & Edge Hardware Interrupt Handling
Just when I thought I’d solved the software problems, the hardware reminded me that physical systems fail differently. The machine ground to a halt with HMS error code 0700-6000-0002-0001 flashing on the dashboard:
HMS_0700-6000-0002-0001: The AMS1 slot 1 is overloaded. The filament may be tangled or the spool may be stuck.
In software engineering, when an exception occurs, a stack trace points you to the exact line of code that failed, and you either catch it or let the process crash. In 3D printing, this error is a physical hardware interrupt. The printer’s motor detected excessive resistance (friction) while trying to pull filament from the first slot of the Automatic Material System (AMS).
Following the Bambu Lab troubleshooting guide , I performed a manual check of the physical stack:
- Checked if the filament spool was tangled or bound.
- Verified the spool’s rotation wasn’t obstructed.
- Inspected the PTFE feeding tubes for sharp bends or excessive wear that could introduce extra friction.
Once the spool was freed and the friction bottleneck cleared, the printer’s state machine did something that stateless software often struggles with: it recovered gracefully, picking up the print exactly where it left off, and successfully completed the session.
The takeaway: A physical system has to deal with friction, mechanical wear, and physical tangles. But a robust state machine allows physical “retries” that recover state rather than restarting from scratch. When bridging digital intent and physical reality, your orchestration layer must account for these real-world interrupts and support long-running, resumeable states.
What’s Next?
The standalone Blender Studio has proven that AI-assisted modeling doesn’t require a heavyweight orchestration platform. But I still believe n8n has an important role—not as the user interface, but as the background agent runtime.
The next logical step is to close the loop completely.
Imagine sending a prompt through Slack:
“Create a customized Benchy with my company logo.”
An autonomous workflow could then:
- Use an LLM to generate or modify the Blender scene.
- Validate the geometry through the visual verification loop.
- Slice the model automatically.
- Send the generated G-code directly to the printer.
- Notify you when the print has completed.
From a single chat message to a finished physical object.
That isn’t the destination—it’s simply the next experiment.
Conclusion
Stepping back, I realized this post wasn’t really about a new printer or another Blender plugin.
It was about building systems that can translate intent into reality.
Whether that reality is an educational lesson, a 3D scene, or a physical object sitting on a desk, the same engineering principles keep appearing:
- deterministic representations over ad hoc scripts
- explicit state instead of hidden assumptions
- feedback loops instead of blind execution
- reproducible workflows instead of one-off automation
Those patterns have quietly become the common thread across everything I’m building—from EduVis, to Blender Studio, and now into the physical world of digital fabrication.
The tools change.
The architecture doesn’t.