Building on my previous homelab post , this post walks through deploying Penpot in Kubernetes and connecting it to Claude Code through penpot-mcp . The result is a self-hosted design workflow where Claude can manipulate the Penpot canvas directly through the Plugin API — creating shapes, styling elements, and building layouts without manual UI work.
I use this setup to redesign MergeDocs , a fully client-side PDF merging utility, entirely from the terminal.
Motivation
Most AI-assisted design workflows involve uploading screenshots or design files to a third-party service. That may be fine for public projects, but it becomes much less appealing when the work is internal, proprietary, or simply not meant to leave your network.
Self-hosting Penpot solves the data residency problem: assets, files, and design history stay inside your own cluster. Connecting it to Claude Code through penpot-mcp adds another benefit: the AI can manipulate the canvas directly through the Plugin API instead of generating code that you have to copy, paste, and run yourself.
That collapses the feedback loop from several manual steps into a single prompt.
The practical result is a private, AI-augmented design environment that:
- Keeps data local — no designs or screenshots leave the cluster
- Works from the terminal — Claude Code can issue design commands without opening the Penpot UI
- Persists across sessions — designs live in your self-hosted Penpot project, not in chat history
- Scales with your cluster — storage, compute, and access control remain fully under your control
Architecture
Claude Code  (VS Code)
    │
    │  HTTPS  (mcp.penpot.local/mcp)
    ▼
Caddy (K8s ingress)
    │  HTTP → port 4401 (MCP server)
    │  WSS  → port 4402 (WebSocket)
    ▼
penpot-mcp pod  (penpot-mcp namespace)
    │
    │  WebSocket  (wss://mcp.penpot.local)
    ▼
Penpot Plugin (browser)   ◄── loaded from https://plugin.penpot.local/manifest.json
    │
    │  Plugin API
    ▼
https://penpot.local (your canvas)The browser plugin acts as the bridge between Claude Code and the Penpot canvas. All design operations — creating shapes, adding text, creating frames, and applying styles — are executed as JavaScript inside the plugin context running in the browser.
Deployment
1. Caddy ingress
Three TLS certificates are needed — one for each subdomain. Run the following commands to generate them with mkcert, then load them into the cluster as Kubernetes secrets:
# Generate TLS certs in current directory
mkcert -cert-file penpot-tls.pem -key-file penpot-tls-key.pem penpot.local
mkcert -cert-file penpot-mcp-tls.pem -key-file penpot-mcp-tls-key.pem mcp.penpot.local
mkcert -cert-file penpot-plugin-tls.pem -key-file penpot-plugin-tls-key.pem plugin.penpot.local

# Load certs into cluster
kubectl create secret tls penpot-tls ^
  --cert=penpot-tls.pem ^
  --key=penpot-tls-key.pem ^
  --namespace=caddy ^
  --dry-run=client -o yaml | kubectl apply -f -

kubectl create secret tls penpot-mcp-tls ^
  --cert=penpot-mcp-tls.pem ^
  --key=penpot-mcp-tls-key.pem ^
  --namespace=caddy ^
  --dry-run=client -o yaml | kubectl apply -f -

kubectl create secret tls penpot-plugin-tls ^
  --cert=penpot-plugin-tls.pem ^
  --key=penpot-plugin-tls-key.pem ^
  --namespace=caddy ^
--dry-run=client -o yaml | kubectl apply -f -Each mkcert command generates a locally trusted certificate, and each kubectl pipeline loads it into the caddy namespace as a TLS secret.
Then append the following to your existing all-in-one.yaml to mount the certificates and add the required virtual host blocks:
all-in-one.yaml — Caddy
apiVersion: v1
kind: ConfigMap
metadata:
  name: caddy-config
  namespace: caddy
data:
  # Append these to existing Caddyfile
  Caddyfile: |
    penpot.local {
      tls /certs/penpot/tls.crt /certs/penpot/tls.key
      reverse_proxy penpot.penpot.svc.cluster.local:8080
    }
    mcp.penpot.local {
      tls /certs/penpot-mcp/tls.crt /certs/penpot-mcp/tls.key
      @websocket {
        header Connection *Upgrade*
        header Upgrade websocket
      }
      reverse_proxy @websocket penpot-mcp.penpot-mcp.svc.cluster.local:4402
      reverse_proxy penpot-mcp.penpot-mcp.svc.cluster.local:4401
    }
    plugin.penpot.local {
      tls /certs/penpot-plugin/tls.crt /certs/penpot-plugin/tls.key
      reverse_proxy penpot-mcp.penpot-mcp.svc.cluster.local:4400 {
        header_up Host "localhost"
      }
    }
---
apiVersion: apps/v1
kind: Deployment
metadata:
  name: caddy
  namespace: caddy
spec:
  replicas: 1
  selector:
    matchLabels:
      app: caddy
  template:
    metadata:
      labels:
        app: caddy
    spec:
      containers:
      - name: caddy
        image: caddy:2-alpine
        imagePullPolicy: IfNotPresent
        ports:
        - containerPort: 443
        - containerPort: 80
        volumeMounts:
        # Existing volumeMounts
        - name: certs-penpot
          mountPath: /certs/penpot
          readOnly: true
        - name: certs-penpot-mcp
          mountPath: /certs/penpot-mcp
          readOnly: true
        - name: certs-penpot-plugin
          mountPath: /certs/penpot-plugin
          readOnly: true
      volumes:
      # Existing volumes
      - name: certs-penpot
        secret:
          secretName: penpot-tls
      - name: certs-penpot-mcp
        secret:
          secretName: penpot-mcp-tls
      - name: certs-penpot-plugin
        secret:
secretName: penpot-plugin-tlsAdd all three hostnames to your Windows hosts file, pointing them to the Caddy LoadBalancer IP:
192.168.68.220 penpot.local mcp.penpot.local plugin.penpot.localCaddy routes traffic as follows:
https://penpot.local→ Penpot frontend on port 8080https://mcp.penpot.local→ MCP HTTP server on port 4401, with WebSocket upgrades routed to port 4402https://plugin.penpot.local→ Vite plugin server on port 4400, withHost: localhostforwarded to satisfy Vite host checks
2. Penpot
Penpot is deployed with Helm using a custom values.yaml. In this setup, SMTP is not configured, so email verification is disabled and open registration is enabled for initial setup.
This is the custom values.yaml:
values.yaml — Penpot
config:
  # Public URL — must match your ingress host
  publicUri: "https://penpot.local"

  # Feature flags
  # disable-email-verification: skip email confirm step (no SMTP in homelab)
  # After creating your admin account add "disable-registration" to close sign-ups
  flags: "enable-registration enable-login-with-password disable-email-verification"

# ---------------------------------------------------------------------------
# Bundled dependencies
# ---------------------------------------------------------------------------
global:
  postgresqlEnabled: true
  valkeyEnabled: true

# ---------------------------------------------------------------------------
# Asset persistence (uploaded files, images, fonts)
# ---------------------------------------------------------------------------
persistence:
  assets:
    enabled: true
    storageClass: "nfs"
    accessModes:
      - ReadWriteMany
    size: 5Gi

# ---------------------------------------------------------------------------
# Bundled PostgreSQL
# ---------------------------------------------------------------------------
postgresql:
  auth:
    username: penpot
    password: penpot
    database: penpot
  primary:
    persistence:
      enabled: true
      storageClass: "nfs"
      accessModes:
        - ReadWriteMany
      size: 2Gi
    initContainers:
      - name: fix-permissions
        image: busybox
        command: ["sh", "-c", "chown -R 999:999 /bitnami/postgresql"]
        volumeMounts:
          - name: data
            mountPath: /bitnami/postgresql

# ---------------------------------------------------------------------------
# Bundled Valkey (Redis-compatible)
# ---------------------------------------------------------------------------
valkey:
  primary:
    persistence:
      enabled: true
      storageClass: "nfs"
      accessModes:
        - ReadWriteMany
      size: 1Gi

# ---------------------------------------------------------------------------
# Ingress — disabled, Caddy handles TLS termination and reverse proxy
# ---------------------------------------------------------------------------
ingress:
enabled: falseInstall Penpot with:
helm repo add penpot https://helm.penpot.app
helm repo update
kubectl create ns penpot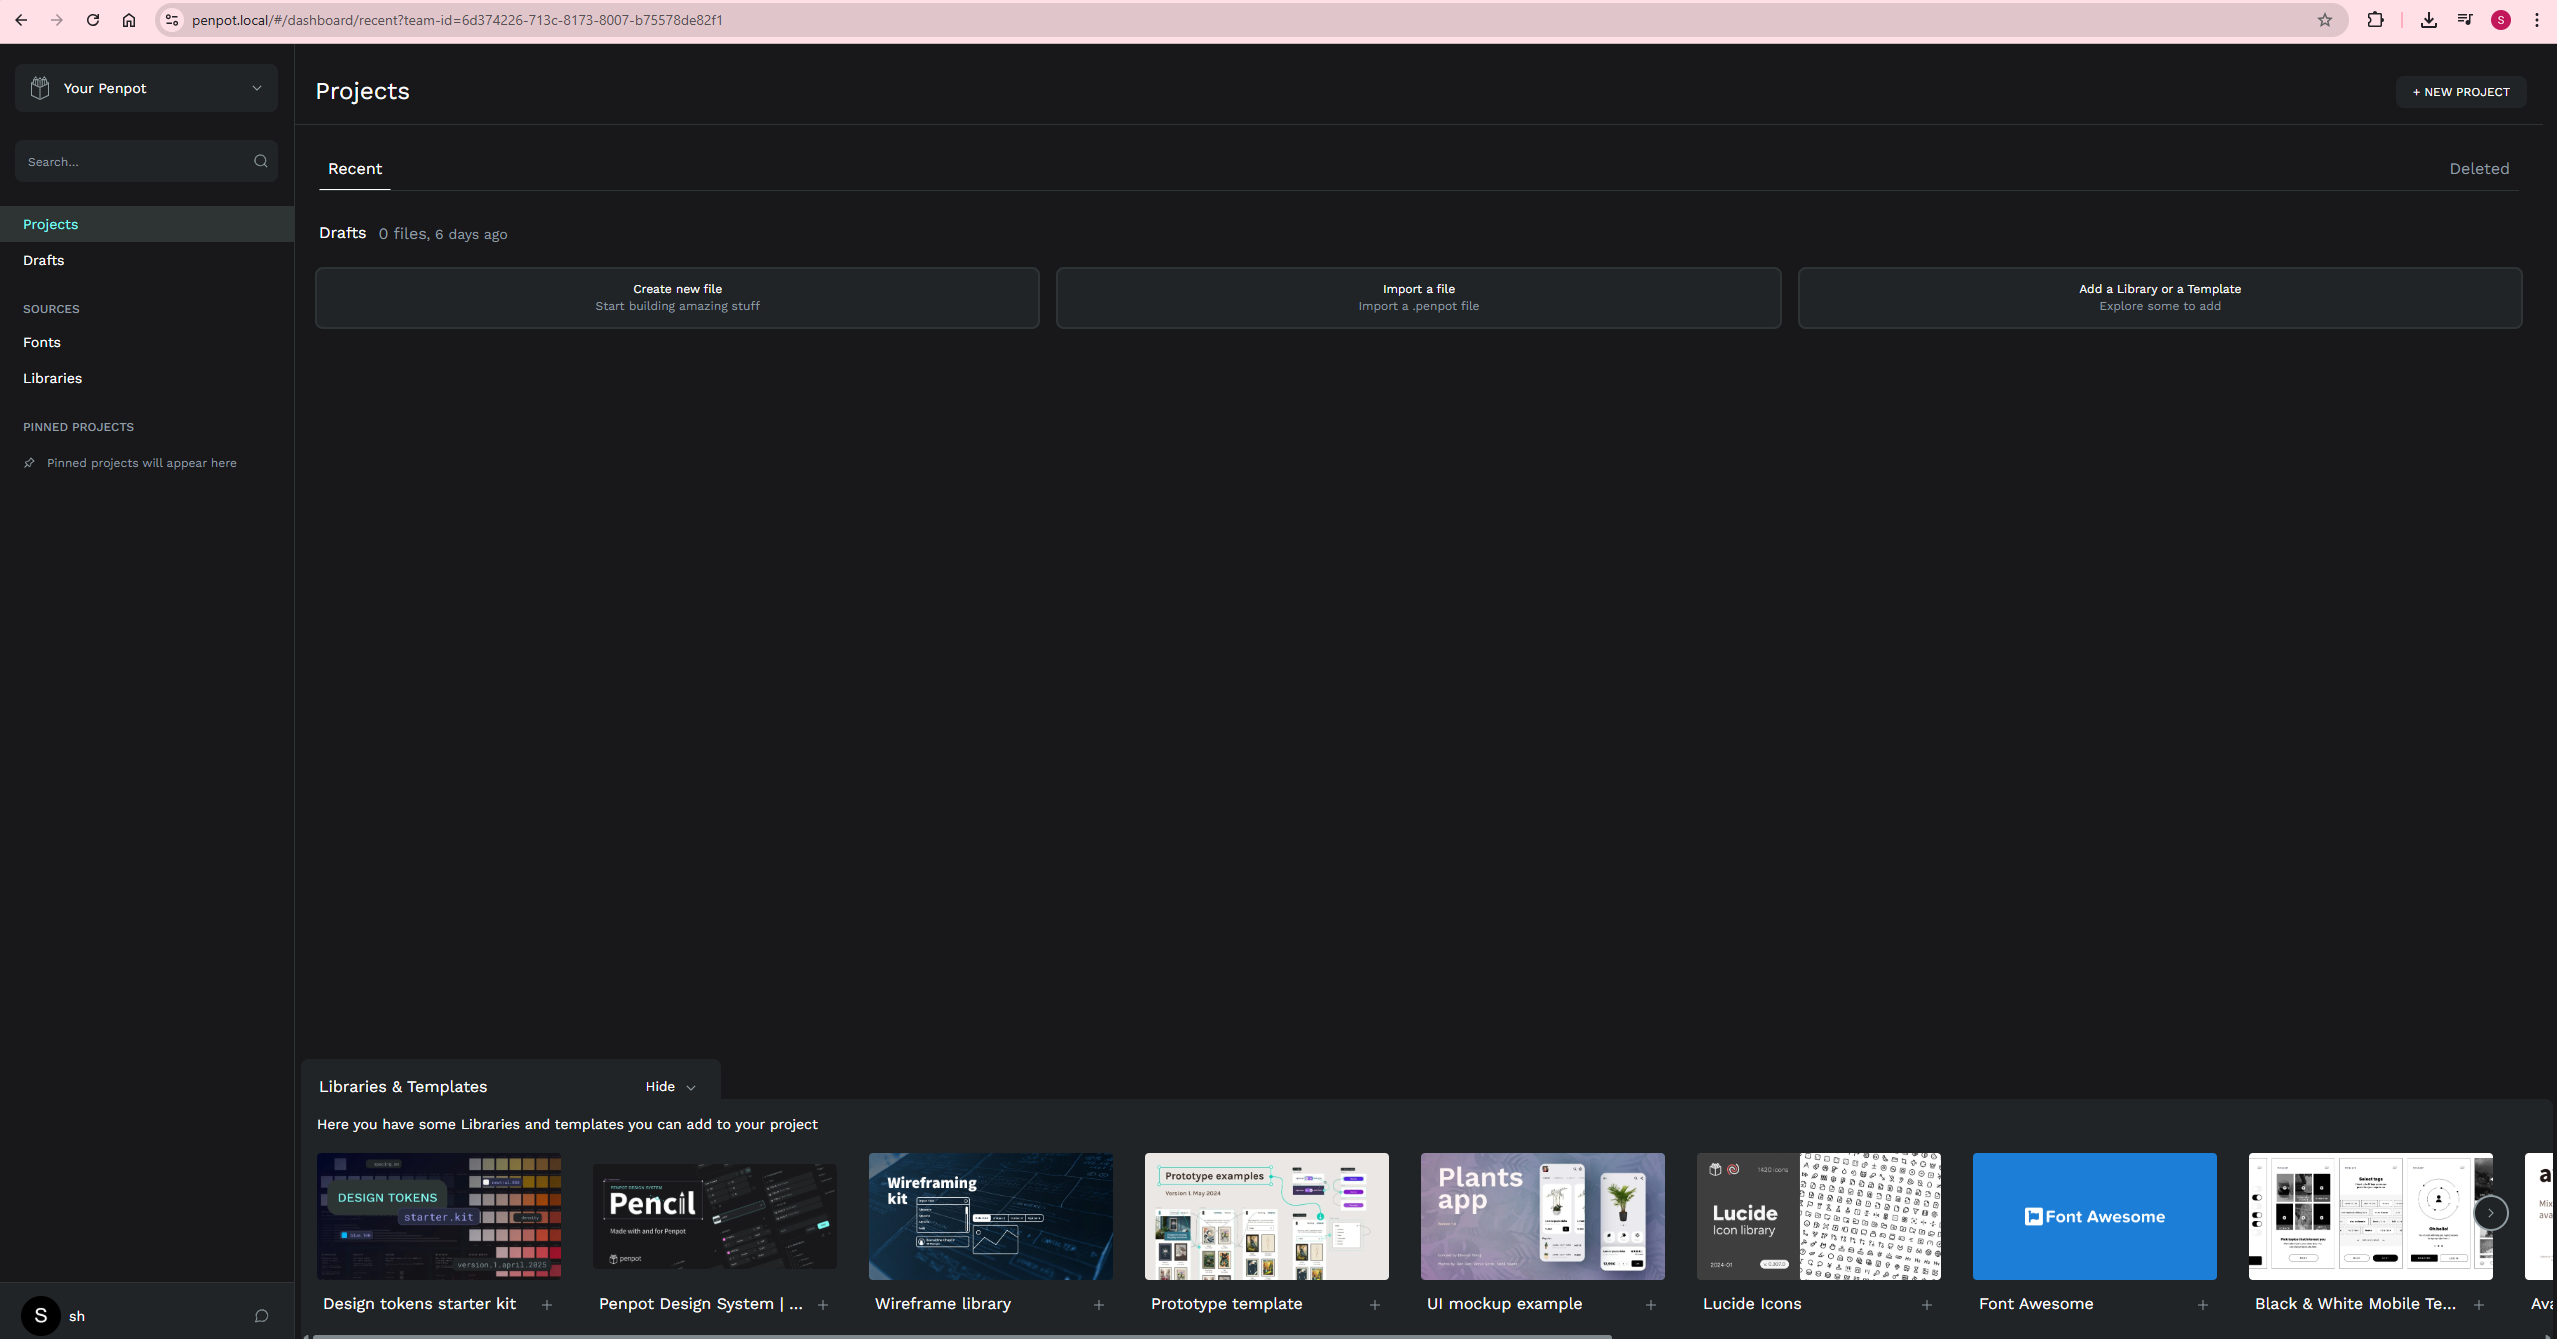
helm install penpot penpot/penpot --namespace penpot -f values.yamlThen open https://penpot.local in your browser and register an account.
3. Penpot MCP
penpot-mcp is Penpot’s MCP server. It exposes a persistent HTTP server on port 4401 and a WebSocket server on port 4402, which the browser plugin connects to. Claude Code communicates with the MCP server over HTTP, while the plugin relays commands into the live Penpot canvas.
Since this cluster runs on Talos — an immutable OS with no SSH access and no direct image import workflow — I build the image locally, push it to Docker Hub, and let Kubernetes pull it at deploy time.
3.1. Build and push the image
Save the following Dockerfile in your working directory, which should be the parent directory of the penpot-repo/ clone. The line COPY penpot-repo/mcp/ . assumes that penpot-repo/ exists in the build context root, so both the Git clone and the docker build command must be run from the same parent directory.
Dockerfile — Penpot MCP
FROM node:22-alpine

# Required for the 'sharp' native module (image processing)
RUN apk add --no-cache python3 make g++ vips-dev

# Match the packageManager specified in package.json
RUN npm install -g pnpm@10.28.2

WORKDIR /app

# Copy the penpot mcp workspace
COPY penpot-repo/mcp/ .

# Install all workspace dependencies at image build time
RUN pnpm -r install

# Default ports and WebSocket URL (can be overridden by K8s env vars)
ENV PENPOT_MCP_SERVER_PORT=4401
ENV PENPOT_MCP_WEBSOCKET_PORT=4402
ENV PENPOT_MCP_REPL_PORT=4403
ENV WS_URI=wss://mcp.penpot.local

EXPOSE 4400 4401 4402

# At container start: build plugin (bakes WS_URI into JS), then start all services
CMD ["sh", "-c", "pnpm run build && pnpm run start"]Make sure you are logged in to Docker Hub first with docker login, then run:
# Sparse-clone only the mcp/ directory from the mcp-prod branch
git clone --branch mcp-prod --depth 1 --filter=blob:none --sparse https://github.com/penpot/penpot.git penpot-repo
cd penpot-repo
git sparse-checkout set mcp
cd ..

# Build from the parent directory so COPY penpot-repo/mcp/ resolves correctly
docker build -t seehiong/penpot-mcp:latest .
docker push seehiong/penpot-mcp:latest3.2. Deploy to Kubernetes
This is my all-in-one.yaml:
all-in-one.yaml — Penpot MCP
apiVersion: v1
kind: Namespace
metadata:
  name: penpot-mcp
---
apiVersion: apps/v1
kind: Deployment
metadata:
  name: penpot-mcp
  namespace: penpot-mcp
spec:
  replicas: 1
  selector:
    matchLabels:
      app: penpot-mcp
  template:
    metadata:
      labels:
        app: penpot-mcp
    spec:
      containers:
      - name: penpot-mcp
        image: seehiong/penpot-mcp:latest
        imagePullPolicy: Always
        ports:
        - containerPort: 4400
          name: plugin
        - containerPort: 4401
          name: mcp-http
        - containerPort: 4402
          name: websocket
        env:
        - name: WS_URI
          value: "wss://mcp.penpot.local"
        - name: PENPOT_MCP_SERVER_PORT
          value: "4401"
        - name: PENPOT_MCP_WEBSOCKET_PORT
          value: "4402"
        resources:
          requests:
            memory: "256Mi"
            cpu: "100m"
          limits:
            memory: "1Gi"
            cpu: "500m"
---
apiVersion: v1
kind: Service
metadata:
  name: penpot-mcp
  namespace: penpot-mcp
spec:
  selector:
    app: penpot-mcp
  ports:
  - name: plugin
    port: 4400
    targetPort: 4400
  - name: mcp-http
    port: 4401
    targetPort: 4401
  - name: websocket
    port: 4402
targetPort: 4402Apply the manifest and wait for the rollout to complete:
kubectl apply -f all-in-one.yaml
kubectl rollout status deployment/penpot-mcp -n penpot-mcp3.3. Wire Claude Code
Add the following entry to your project’s .mcp.json:
"penpot-mcp": {
  "type": "http",
  "url": "https://mcp.penpot.local/mcp"
}3.4. Connect the browser plugin
- Open
https://penpot.localand open any design file - Click the puzzle piece icon in the top toolbar
- Choose Add plugin and enter:
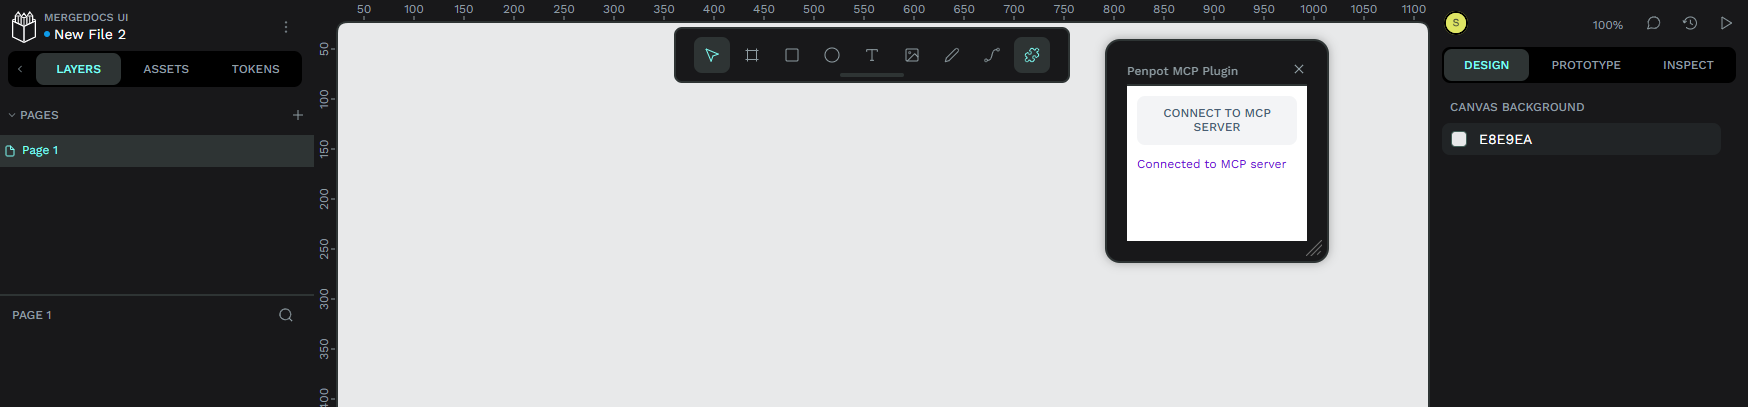
https://plugin.penpot.local/manifest.json - Open the plugin panel and click “Connect to MCP server”
The plugin must remain open and connected while Claude Code is issuing design commands.
3.5. Verify with MCP Inspector
To confirm that the MCP endpoint is reachable and the tools are registered:
npx @modelcontextprotocol/inspectorIn the Inspector UI, use:
- Transport: Streamable HTTP
- URL:
https://mcp.penpot.local/mcp - Mode: Via Proxy
You should see five registered tools: execute_code, high_level_overview, penpot_api_info, export_shape, import_image.
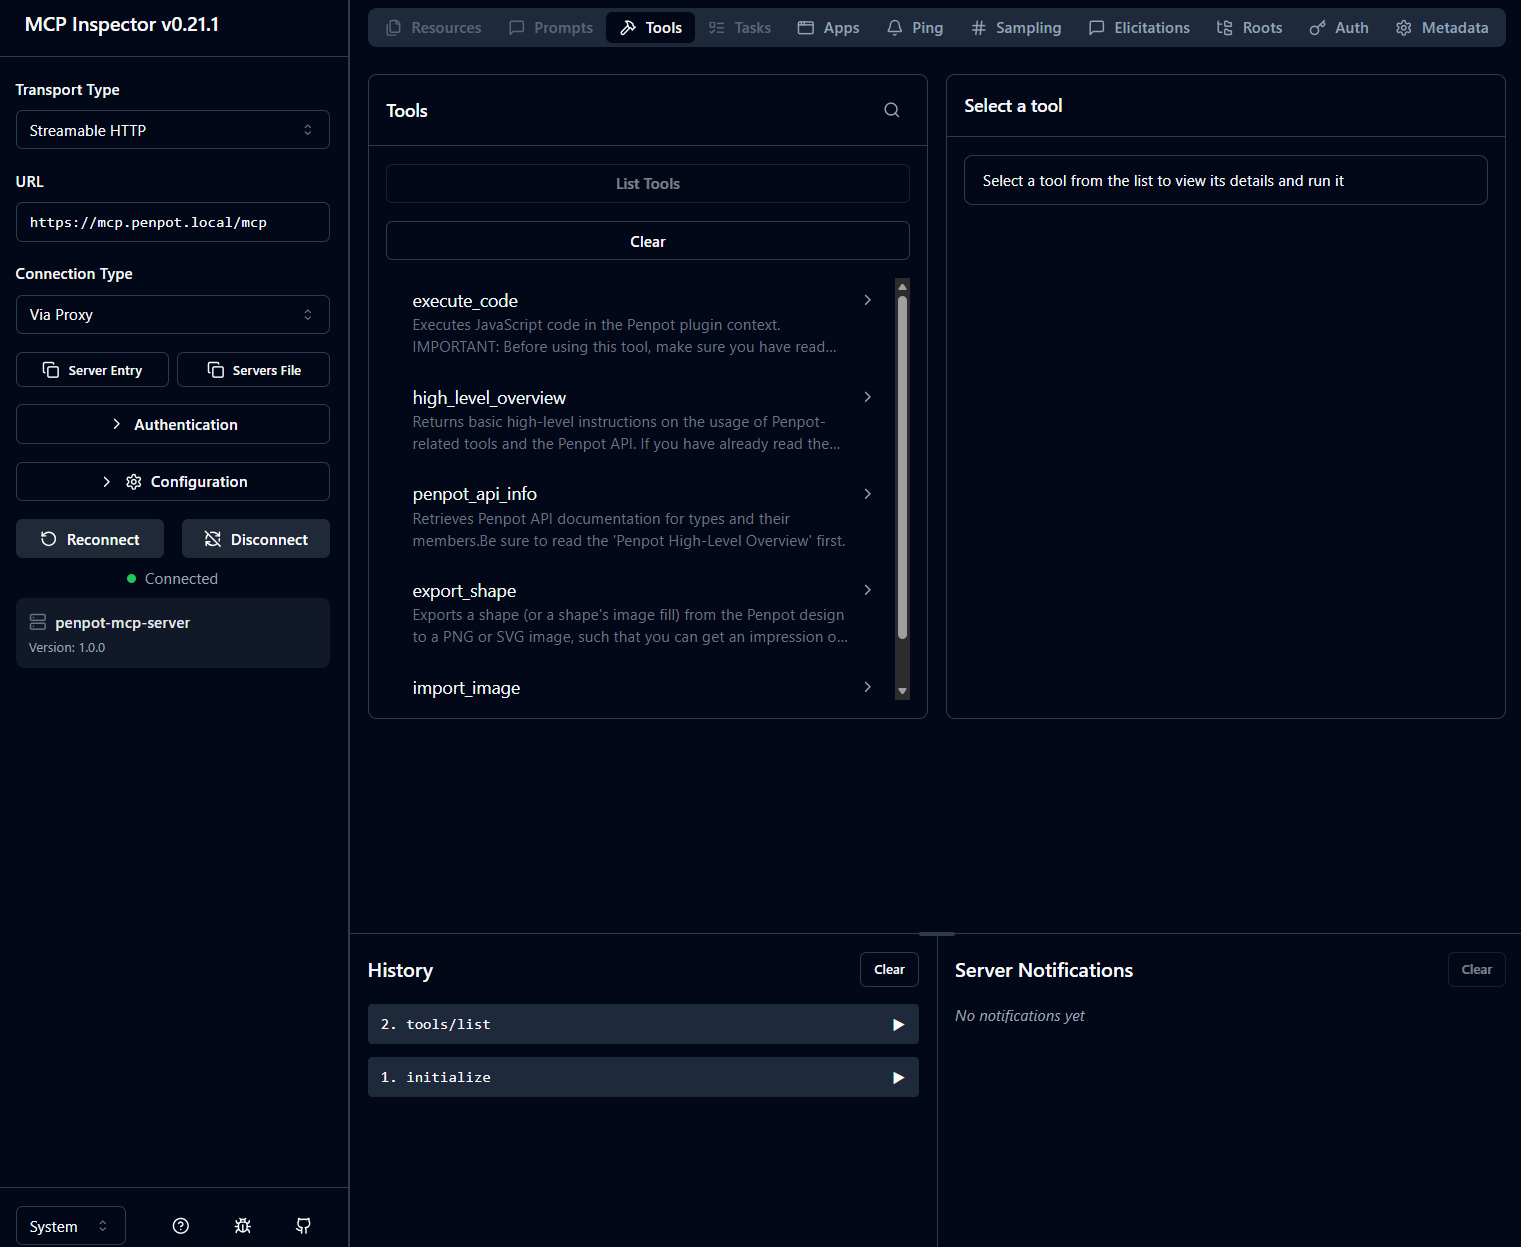
If the browser plugin is not connected first, tool calls will typically return a timeout error.
First Design test
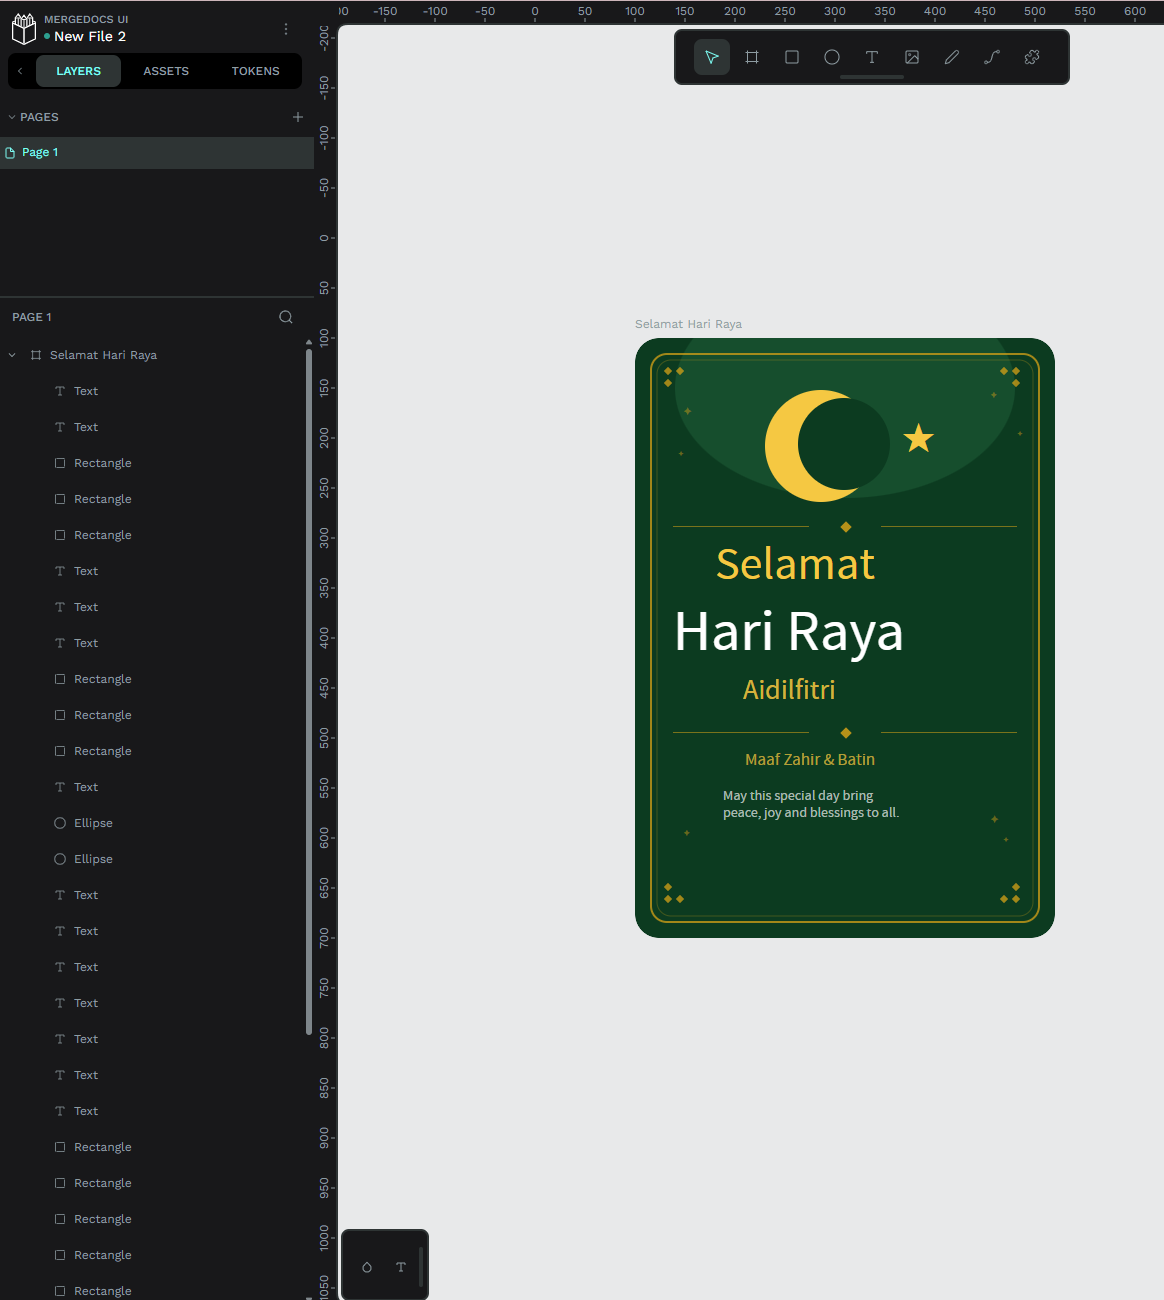
This post is written during Hari Raya Aidilfitri, so instead of a plain Hello World, I used the setup to create a festive greeting card first. Selamat Hari Raya to all Muslims celebrating!
With the plugin connected, I gave Claude the following prompt:
“Create a Selamat Hari Raya greeting card in Penpot — warm festive colours, a crescent and star motif, the greeting in large text, and a short blessing beneath it.”
Claude called execute_code through penpot-mcp, and the greeting card appeared directly on the canvas — confirming that the full pipeline was working end to end.
MergeDocs Redesign
MergeDocs is a fully client-side PDF merging utility: no server, no uploads, and all processing happens in the browser.
Current design
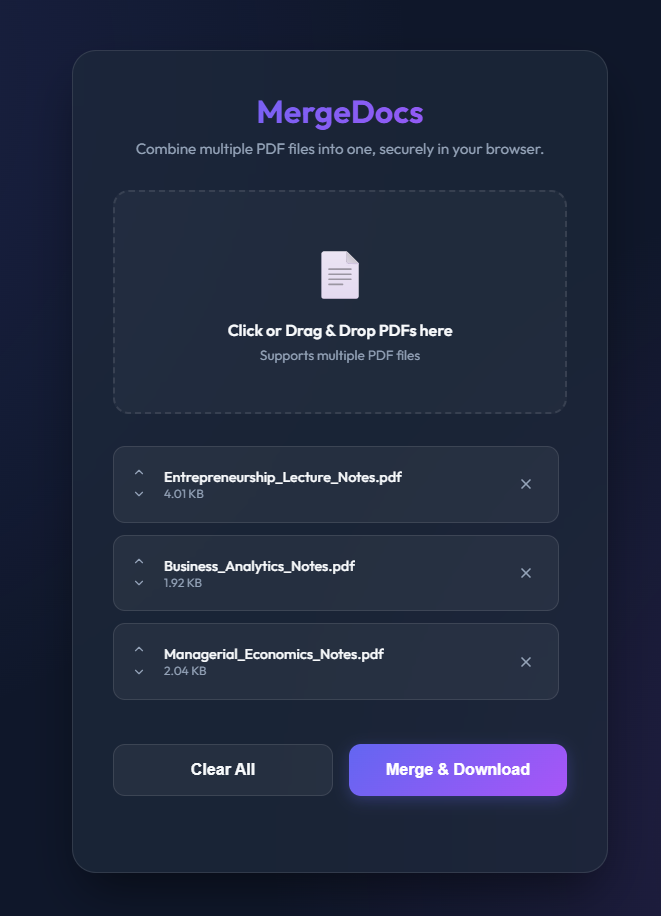
The existing UI is functional, but visually minimal. Using penpot-mcp, I asked Claude Code to produce an updated wireframe with a more modern, card-based layout and clearer action hierarchy.
Updated design via Claude Code

Claude generated the wireframe by calling execute_code through the Penpot Plugin API — creating boards, text layers, rectangles, and styles entirely from the terminal, without using the Penpot UI directly.
Conclusion
Self-hosting Penpot in Kubernetes turns your homelab into a private, persistent design environment. Adding Claude Code through penpot-mcp makes it even more useful: AI can move from suggesting design ideas to applying them directly on the canvas.
That makes the workflow especially compelling for internal tools, sensitive projects, and fast UI prototyping. Once the bridge is in place, the pattern is simple: export the current design, describe the changes, and let Claude generate the Penpot Plugin API code to update the canvas for you.