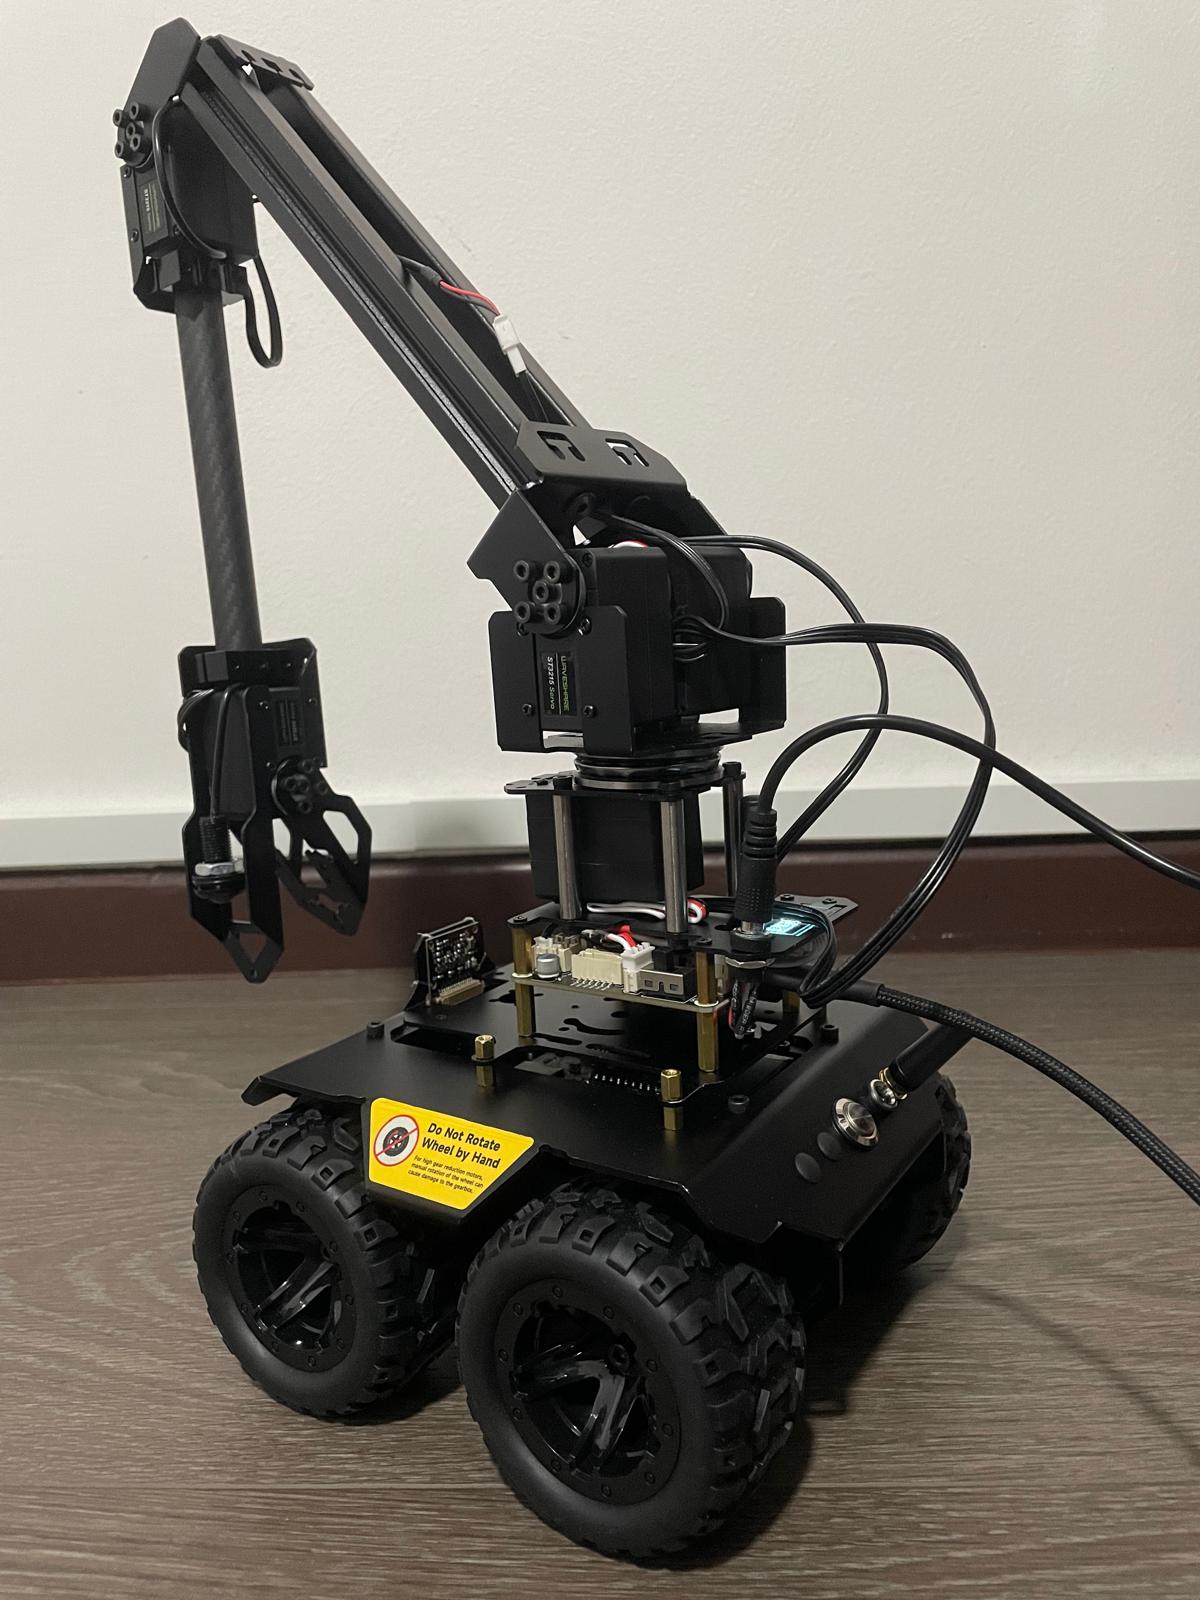
In this post, I explore the RoArm-M2-S with the Wave Rover . Due to the small base, there’s a tendency for instability, so I plan to upgrade to a UGV Rover . Meanwhile, let’s focus on setting up the RoArm.
Setup
Following the official Getting Started Tutorial , we begin by installing Oracle VirtualBox.
Installing Oracle VirtualBox
Download the VirtualBox Platform Packages and its Extension Pack. Install both, then proceed to create a new Virtual Machine (VM) named RoArm.
Creating the RoArm VM
-
Download Ubuntu 22.04.5 LTS and complete the unattended installation.
-
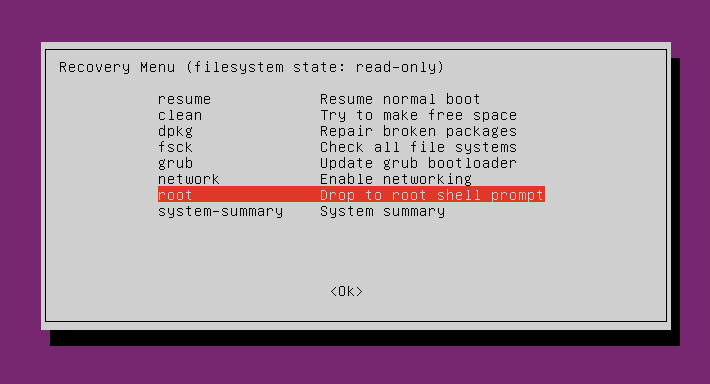
If you encounter the user not in sudoers or blank screen issues, access the GRUB menu by pressing Esc during boot and select recovery mode.
- To add your user to the sudoers file:
usermod -aG sudo pi
id pi- Enable auto-login:
sudo nano /etc/gdm3/custom.conf

# Uncomment the following lines
AutomaticLoginEnable = true
AutomaticLogin = pi- Set the VM Display Graphics Controller to VMSVGA, and configure options like Drag and Drop to Bidirectional.
Installing ROS2
ROS2 is essential for building robot applications. I attempted using the prebuilt ROS2 image, but encountered issues with mouse control, so I continued with a custom VM setup.
ROS2 + Moveit2 Installation
Clone the RoArm-M2-S repository and install necessary packages:
sudo apt update && sudo apt upgrade
sudo apt install git
git clone https://github.com/DUDULRX/roarm_ws_em0.gitAdd ROS2 sources and install dependencies:
sudo apt install software-properties-common
sudo add-apt-repository universe

sudo apt update && sudo apt install curl -y
sudo curl -sSL https://raw.githubusercontent.com/ros/rosdistro/master/ros.key -o /usr/share/keyrings/ros-archive-keyring.gpg

echo "deb [arch=$(dpkg --print-architecture) signed-by=/usr/share/keyrings/ros-archive-keyring.gpg] http://packages.ros.org/ros2/ubuntu $(. /etc/os-release && echo $UBUNTU_CODENAME) main" | sudo tee /etc/apt/sources.list.d/ros2.list > /dev/null

sudo apt update
sudo apt upgrade

sudo apt install ros-humble-desktop

sudo apt install ros-dev-tools

sudo apt install net-tools
sudo apt install ros-humble-moveit-*
sudo apt install ros-humble-foxglove-bridge
sudo apt autoremove ros-humble-moveit-servo-*Source the environment:
echo "source /opt/ros/humble/setup.bash" >> ~/.bashrc
source ~/.bashrcFinally, build the RoArm repository:
sudo apt install python3-pip
cd ~/roarm_ws_em0
python3 -m pip install -r requirements.txt

cd ~/roarm_ws_em0
sudo chmod +x build_first.sh
. build_first.sh

cd ~/roarm_ws_em0
colcon build
echo "source ~/roarm_ws_em0/install/setup.bash" >> ~/.bashrc
source ~/.bashrc Controlling a Physical RoArm
Connect the RoArm-M2-S to your PC via a USB-C cable, then verify the connection:
ls /dev/tty*
sudo chmod 666 /dev/ttyUSB0 # Adjust based on your setupLaunch the driver node:
ros2 run roarm_driver roarm_driverRViz Visualization
Visualize joint movements with RViz :
ros2 launch roarm_description display.launch.py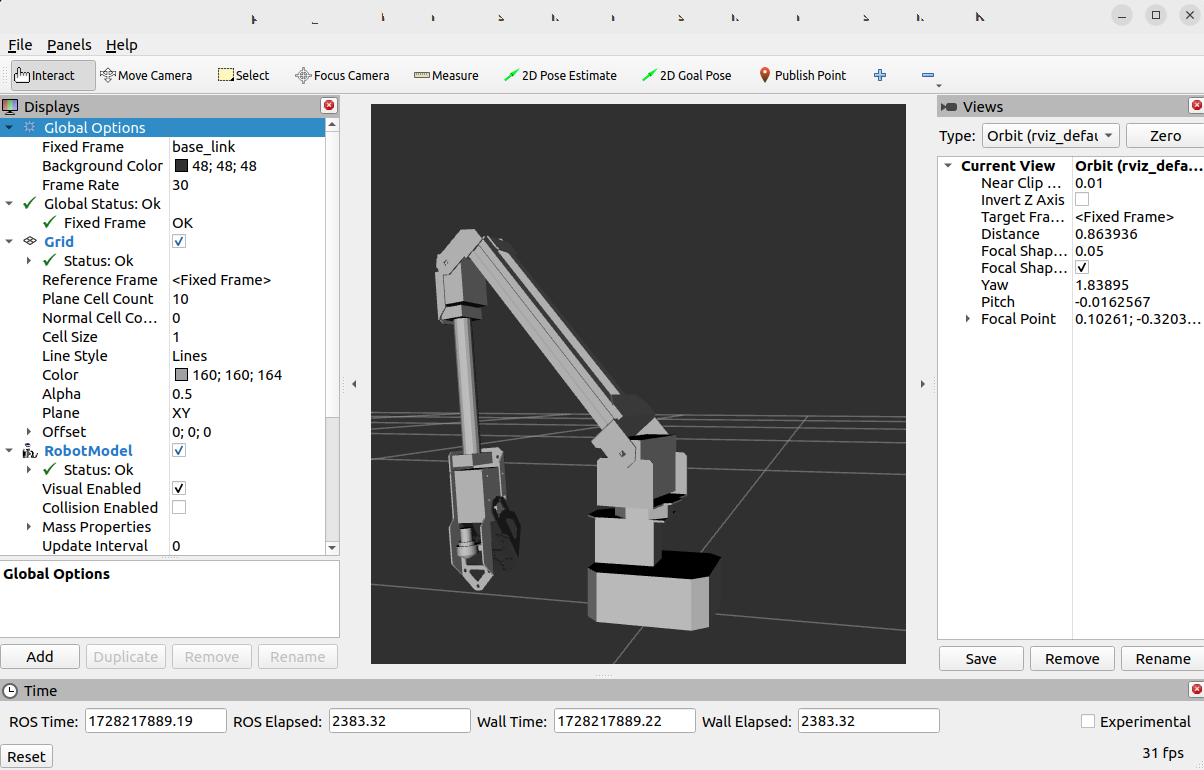
MoveIt Integration
Run the MoveIt demo (press Ctrl + C to close the Rviz session):
ros2 launch roarm_moveit interact.launch.py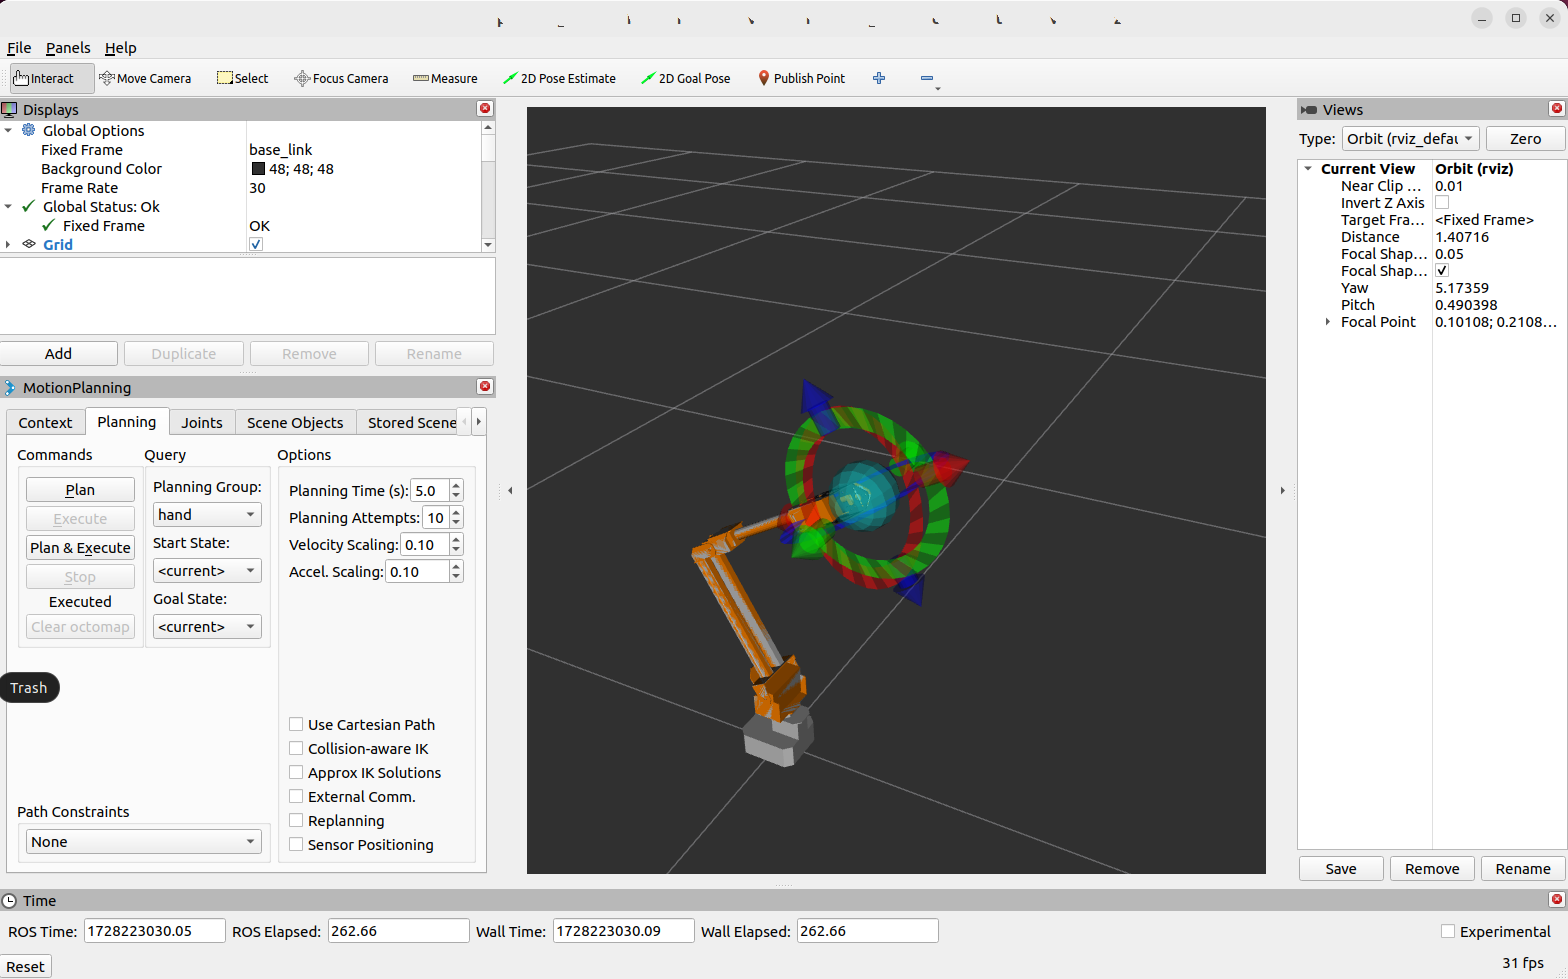
Keyboard Control
Control the arm via keyboard (press Ctrl + C to close the MoveIt session):
ros2 launch moveit_servo demo.launch.py
ros2 run roarm_moveit_cmd setgrippercmd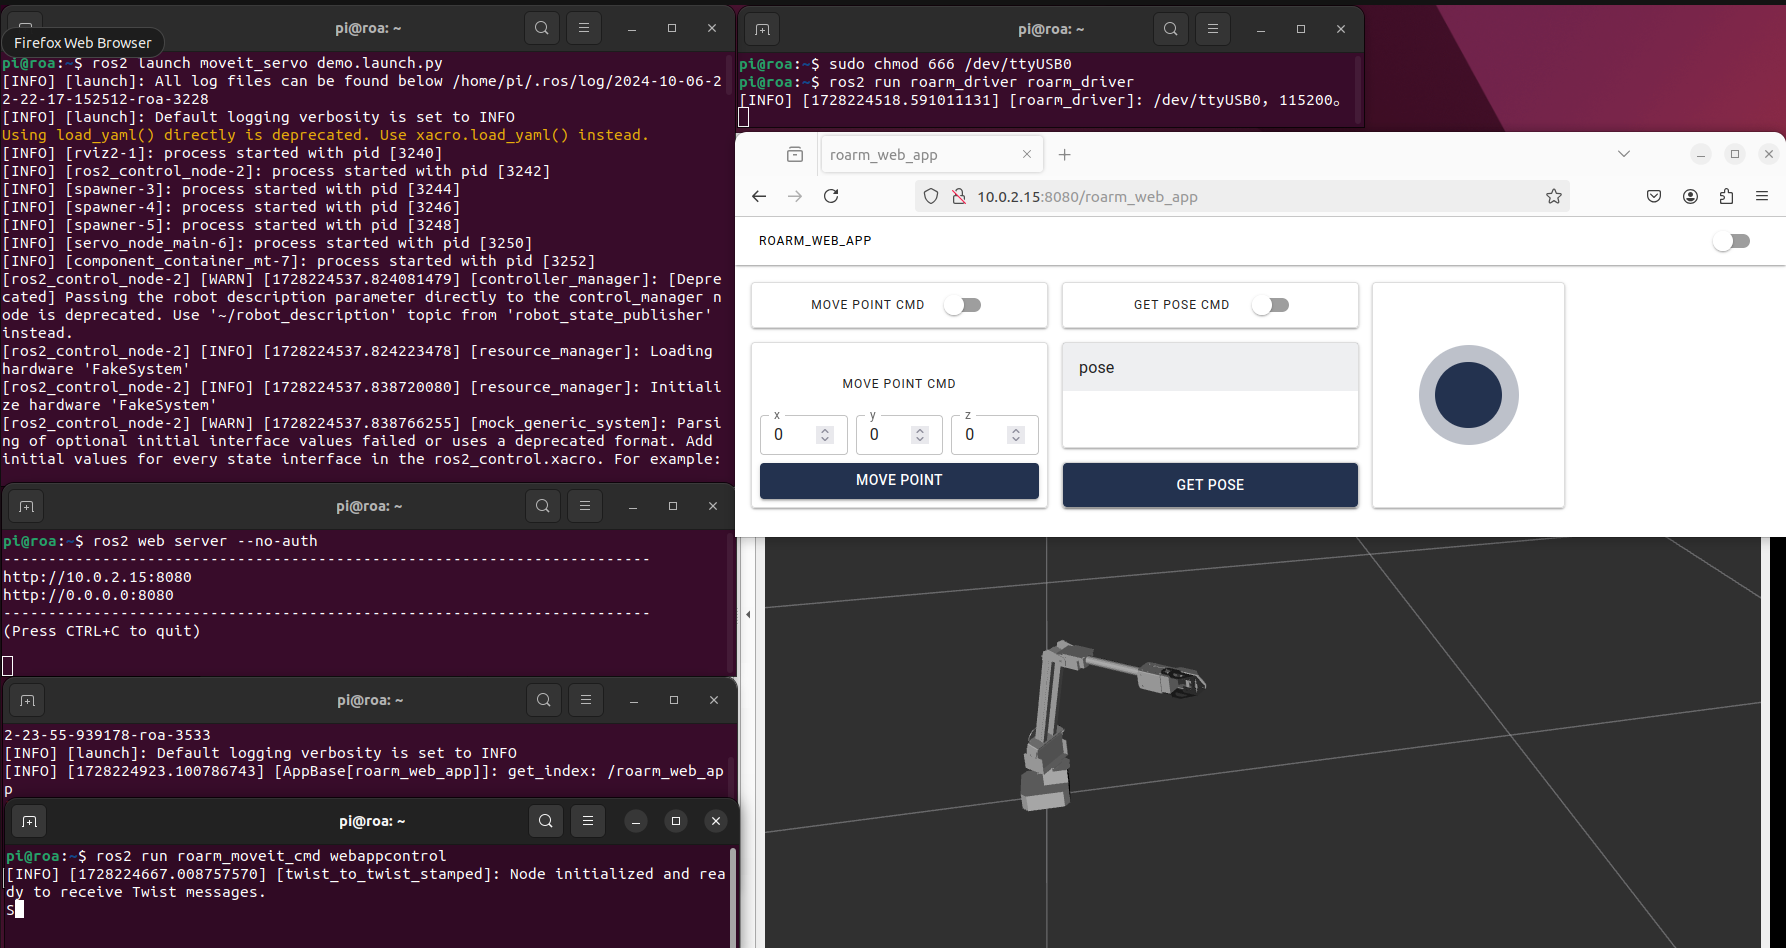
ros2 run roarm_moveit_cmd keyboardcontrolROS2Web_app for Web Control
ROS2Web_app provides a web interface to control the RoArm. Follow these steps (ensure that the roarm_driver is still running):
- Launch the MoveIt2 servo node:
ros2 launch moveit_servo demo.launch.py- Start the web server:
ros2 web server --no-auth- Run the web app:
ros2 run roarm_web_app roarm_web_app- Run the web app control node
ros2 run roarm_moveit_cmd webappcontrol- Access the app via your browser at http://10.0.2.15:8080/roarm_web_app (adjust based on your VM setup):
Optional - Installing VSCode
If you prefer using VScode for development, install it with the following commands:
wget -O code_amd64.deb https://go.microsoft.com/fwlink/?LinkID=760868
sudo apt install ./code_amd64.deb