Setting up K3s
K3S is a lightweight and easy-to-install Kubernetes distribution, making it an ideal choice for running a Kubernetes cluster in your home lab. In this blog post, we will walk you through the step-by-step process of setting up K3s on an Ubuntu Server 22.04.2 LTS.
1 Setting up K3S
1.1 Installing Ubuntu Server 22.04.2 LTS
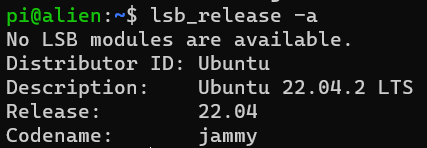
To start, we’ll install Ubuntu server 22.04.2 LTS on our laptop. You can verify the Linux distribution using the following command:
lsb_release -a
1.2 Installing K3S
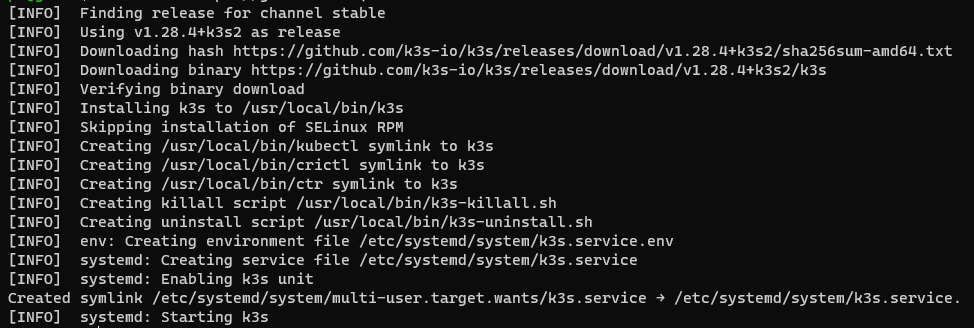
The next step is to install K3s. K3s can be easily installed with a single command:
curl -sfL https://get.k3s.io | sh -
If you see these info, you may install with these commands:
# [INFO]  Host iptables-save/iptables-restore tools not found
# [INFO]  Host ip6tables-save/ip6tables-restore tools not found

sudo apt-get install iptables
sudo apt-get install iptables-persistent
Install worker nodes
After the k3s setup is completed, you may obtain token with:
mynodetoken=$(sudo cat /var/lib/rancher/k3s/server/node-token)

# Sample format: K10e848701b18977c63d7abfce920cf66c0f19bdd18a40862b2e7a14b89c4eb2742::server:ac92f2b7ccebbb46bf241bdaea3c99bf
echo $mynodetoken
From the client node, execute this command (with k3s server IP and mynodetoken):
curl -sfL https://get.k3s.io | K3S_URL=https://192.168.68.132:6443 K3S_TOKEN=K10e848701b18977c63d7abfce920cf66c0f19bdd18a40862b2e7a14b89c4eb2742::server:ac92f2b7ccebbb46bf241bdaea3c99bf sh -
1.3 Creating Useful Aliases
To simplify interactions with K3s, we’ll set up some convenient aliases. Open the bash configuration file:
vi ~/.bashrc
Add the following aliases to the file:
alias kc='sudo kubectl'
alias kca='kc apply -f'
Save and apply the changes:
source ~/.bashrc
1.4 Verifying the Installation
Congratulations! Your K3s cluster is up and running. You can verify its status with kc get nodes:

2 Setting up Portainer
In addition to K3s, we will use Portainer, an efficient and user-friendly Docker and Kubernetes management system, to streamline the management of our home lab. Portainer is a lightweight, free, and open-source tool that will help us keep our containerized applications in check.
2.1 Create the Portainer Folder
First, let’s create a directory named portainer and navigate into it:
mkdir portainer
cd portainer
2.2 Download and Deploy Portainer to K3s Cluster
Next, we’ll download the latest YAML file for Portainer and save it as deploy.yaml:
wget https://raw.githubusercontent.com/portainer/k8s/master/deploy/manifests/portainer/portainer.yaml -O deploy.yaml
Now, let’s deploy Portainer to our K3s cluster:
kca deploy.yaml
You can check the status of the deployment using the following command:
kc get svc portainer -n portainer

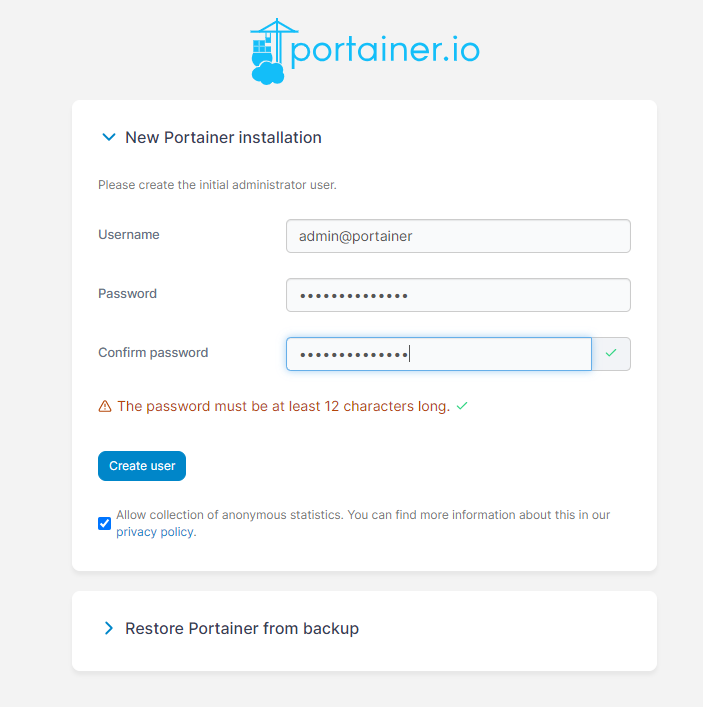
The above output shows that Portainer is running on an arbitrary port, in this case, 30777 at hostname alien. Access the Portainer UI using the following URL:
http://alien:30777
Please access it before the instance timed out; otherwise, you will need to restart the service:
# Get the portainer node
kc get po -A

# Delete the pod in portainer namespace by its specific name
kc delete po -n portainer portainer-696988fd4-fzh24
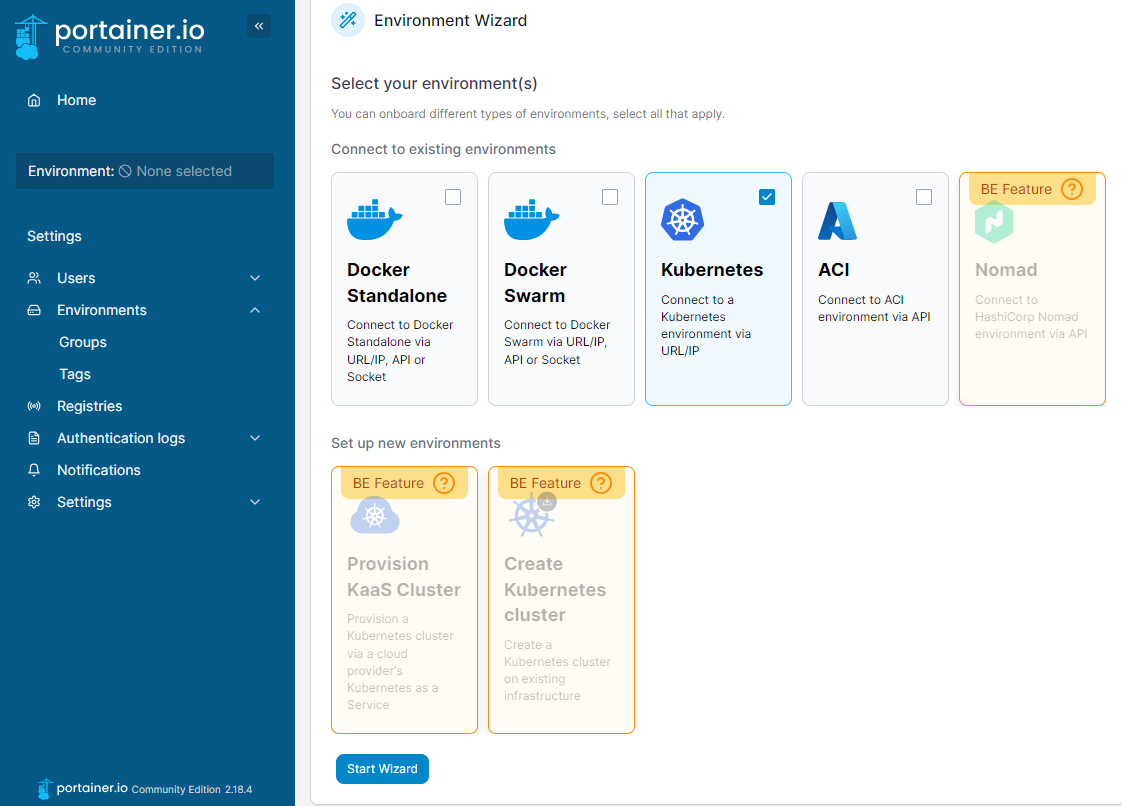
2.3 Add Kubernetes Environment to Portainer
Proceed to the Quick Setup Page on the Portainer UI and click on “Add Environment.”
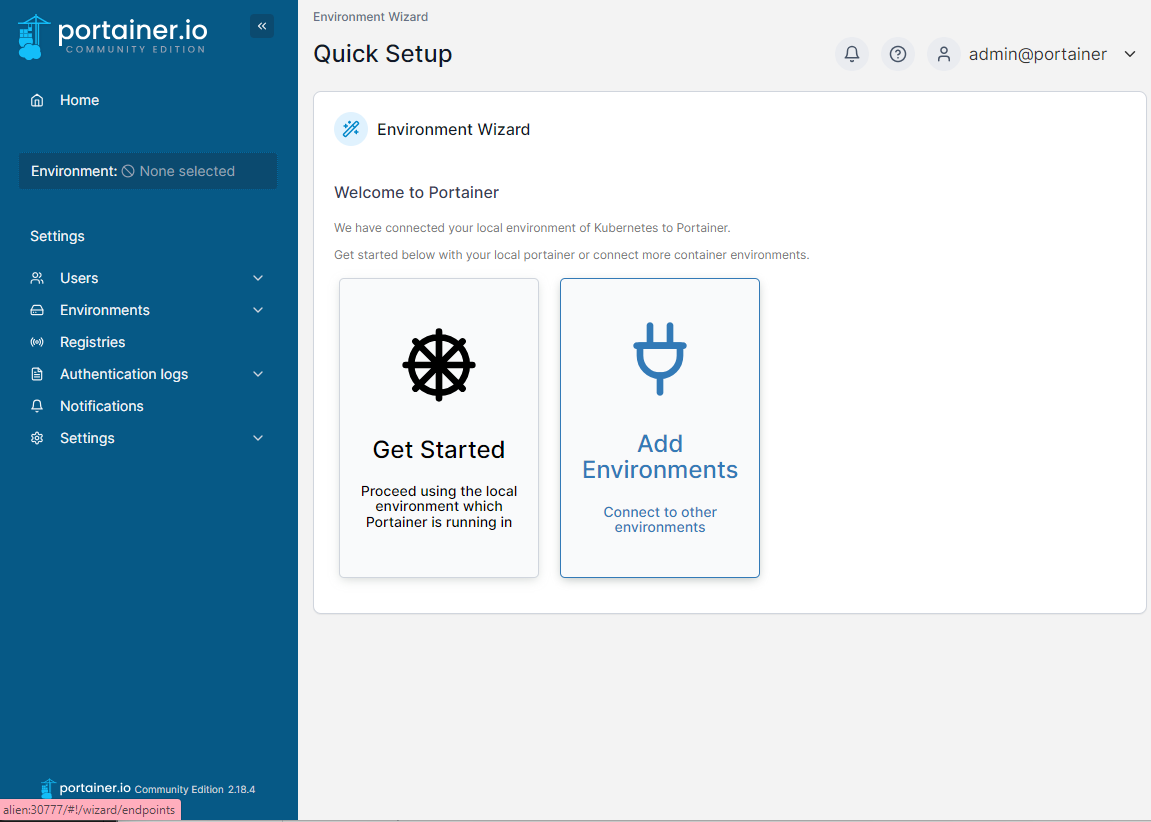
Next, select the Kubernetes option:
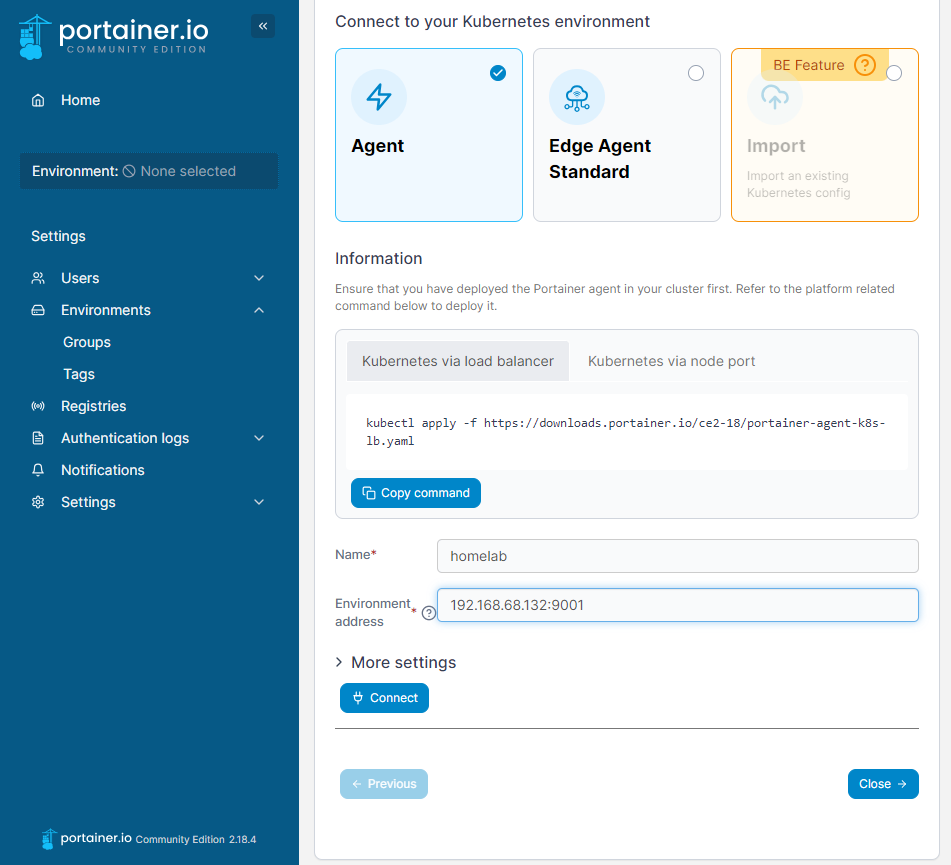
Execute the following command to configure the agent:
wget https://downloads.portainer.io/ce2-18/portainer-agent-k8s-lb.yaml -O agent-lb.yaml
kca agent-lb.yaml
To ensure the agent is running correctly, you can use the following command:
kc get po -n portainer
And to get the node port:
kc get svc -n portainer

2.4 Connect Portainer to K3s Cluster
Enter the name and environment address in Portainer and click on “Connect”:
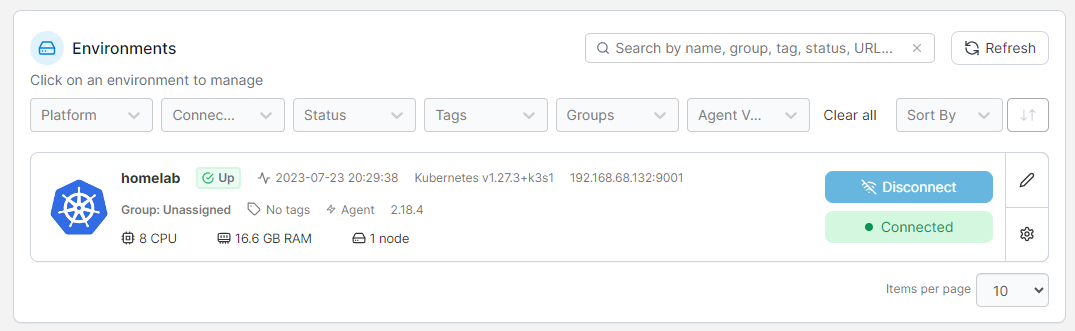
Congratulations! You have successfully connected Portainer to your K3s cluster:
3 Setting up Local Registry
We will now set up a local Docker registry on our K3s cluster. A local registry allows us to efficiently manage container images and streamline the deployment process within our home lab environment.
3.1 Install Docker on the K3s Cluster
First, we need to install Docker on the K3s cluster. Run the following commands to install Docker and add the user pi to the docker group for easy management:
sudo apt install docker.io
sudo usermod -aG docker pi
3.2 Configure Docker for the Local Registry
Next, we will configure Docker to use our local registry. Open the Docker daemon configuration file:
sudo vi /etc/docker/daemon.json
Copy and paste the following content into daemon.json:
{
  "insecure-registries": [
    "192.168.68.132:30500"
  ]
}
Save and close the file. Now, edit the Docker default configuration file:
sudo vi /etc/default/docker
Add the following line to set the Docker options:
DOCKER_OPTS="--config-file=/etc/docker/daemon.json"
Afterward, restart Docker to apply the changes:
sudo systemctl restart docker
3.3 Create the Registry Namespace and Deployment
Now, let’s create the necessary resources for the local registry on the K3s cluster. First, create the registry namespace:
kc create namespace registry
Next, create the deployment manifest for the registry:
mkdir ~/registry
cd ~/registry
vi deploy.yaml
In the deploy.yaml file, add the following content to deploy the registry:
apiVersion: apps/v1
kind: Deployment
metadata:
  name: registry
  namespace: registry
spec:
  replicas: 1
  selector:
    matchLabels:
      app: registry
  template:
    metadata:
      labels:
        app: registry
        name: registry
    spec:
      containers:
      - name: registry
        image: registry:2
        ports:
        - containerPort: 5000
        volumeMounts:
        - name: registry-store
          mountPath: /var/lib/registry
          subPath: registry
      volumes:
        - name: registry-store
          hostPath:
            path: /var/lib/registry-store
To deploy the registry, simply run the following command:
kca deploy.yaml
3.4 Create the Service to Expose Port 5000
Now, let’s create the service to expose port 5000 for the local registry:
vi svc.yaml
Add the following content to the svc.yaml file:
apiVersion: v1
kind: Service
metadata:
  name: registry-svc
  namespace: registry
spec:
  selector:
    app: registry
  type: NodePort
  ports:
    - name: docker-port
      protocol: TCP
      port: 5000
      targetPort: 5000
      nodePort: 30500
To deploy the service, run the following command:
kca svc.yaml
3.5 Create Docker Registry Credentials
To allow the K3s cluster to pull images from the local registry, we need to create Docker registry credentials with the llm namespace defined:
kc create ns llm
kc create secret docker-registry regcred \
  --docker-server=192.168.68.132:30500 \
  --docker-username=[YOUR DOCKER USERNAME] \
  --docker-password=[YOUR DOCKER PASSWORD] \
  --docker-email=[YOUR EMAIL] \
  -n llm
Verify the secret:
kc get secret regcred --output=yaml -n llm
3.6 Configure K3s to Use the Local Registry
Create the registries.yaml file to configure K3s to use the local registry:
sudo mkdir -p /etc/rancher/k3s
sudo vi /etc/rancher/k3s/registries.yaml
Add the following content to the file:
mirrors:
  "192.168.68.132:30500":
    endpoint:
      - "http://192.168.68.132:30500"
Finally, restart K3s and K3s agent to apply the changes:
# Creates the specified hostPath
sudo mkdir /var/lib/registry-store

systemctl restart k3s

# Restarts if you have any agents installed
systemctl restart k3s-agent
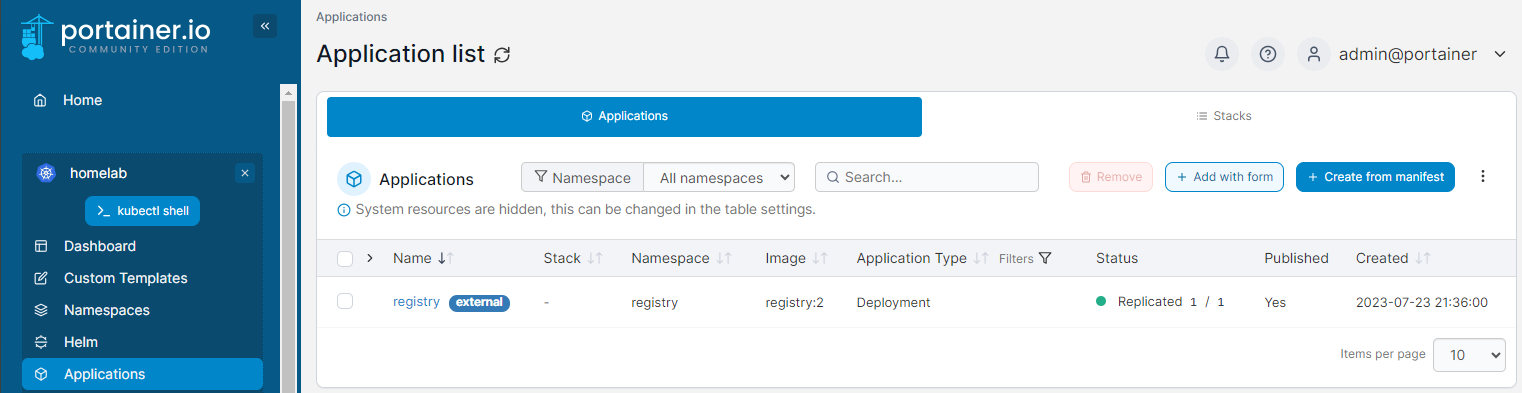
Congratulations! You have now successfully set up a local registry for your K3s home lab!
If you skip this step either for the master or work node, you might see similar errors:
Failed to pull image "192.168.68.135:30500/[YOUR_IMAGE]": failed to pull and unpack image "192.168.68.135:30500/[YOUR-IMAGE]": failed to resolve reference >"192.168.68.135:30500/[YOUR-IMAGE]": failed to do request: Head "https://192.168.68.135:30500/xxxxxx": http: server gave HTTP response to HTTPS client
Optional - Pushing an Image to the K3s cluster
In this optional section, we will learn how to push a Docker image from our local machine to the K3s cluster’s local registry, allowing us to deploy the image in the Kubernetes environment.
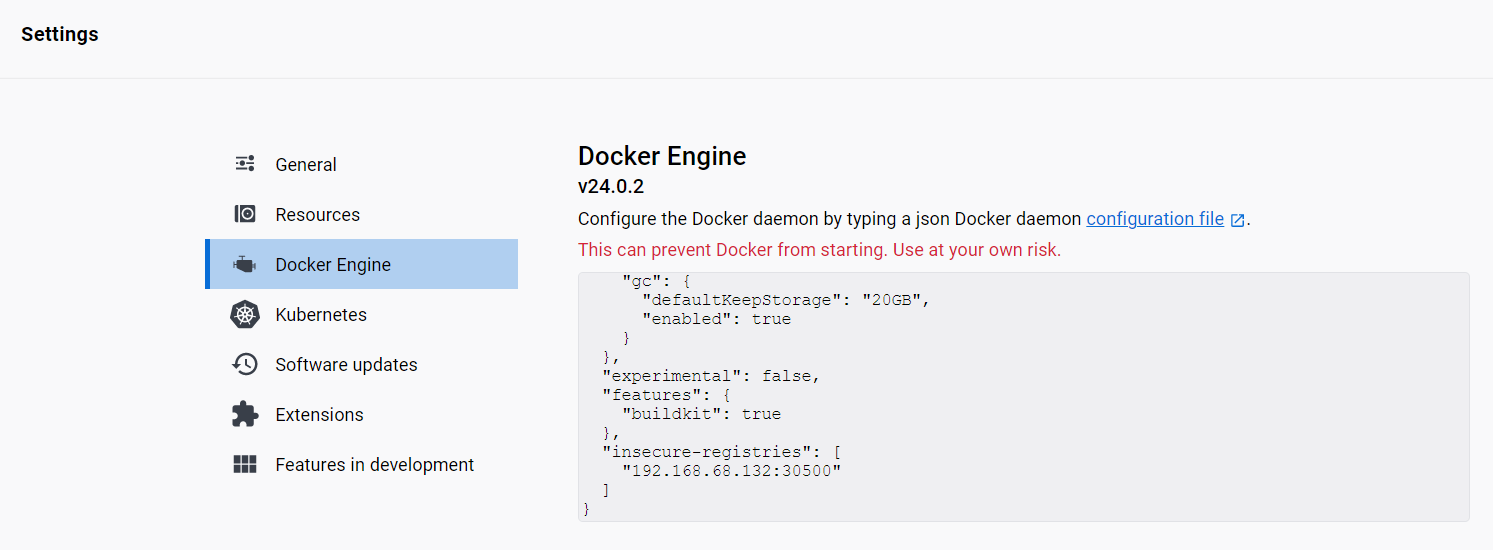
Step 1: Configure Docker Engine for the K3s Cluster
Before pushing the image to the K3s cluster, ensure that our Docker Desktop for Windows is configured to allow insecure registry access to our local registry. To do this, open the Docker Desktop settings on your local machine and add the IP address of your K3s cluster and the port (30500) to the list of insecure registries:
  "insecure-registries": [
    "192.168.68.132:30500"
  ]
Step 2: Tag and Push the Docker Image
From our [previous post](%< ref “/archives/2023/unleashing-the-power-of-llama-server-in-docker-container” %}}), verify that the available Docker image exists on your local machine:
docker image ls
Next, tag the Docker image with the address of your K3s cluster’s local registry:
docker tag fastapi:latest 192.168.68.132:30500/fastapi
Now, push the tagged image to the local registry:
docker push 192.168.68.132:30500/fastapi
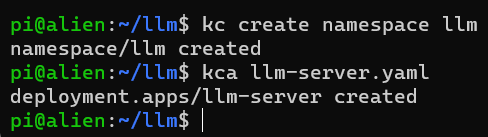
Step 3: Deploy the Image in K3s
With the image successfully pushed to the local registry, you can now deploy it in your K3s cluster. Create a Kubernetes deployment manifest, for example, llm-server.yaml:
apiVersion: apps/v1
kind: Deployment
metadata:
  name: llm-server
  namespace: llm
spec:
  replicas: 1
  selector:
    matchLabels:
      app: llm-server
  template:
    metadata:
      labels:
        app: llm-server
        name: llm-server
    spec:
      containers:
      - name: llm-server
        image: 192.168.68.132:30500/fastapi:latest
        ports:
        - containerPort: 8088
      imagePullSecrets:
      - name: regcred
Ensure the imagePullSecrets section specifies the secret previously created, in this example, regcred.
Next, deploy the application to the K3s cluster using kubectl aliases:
kca llm-server.yaml
Step 4: Expose the llm-server Service in K3s
To make the llm-server accessible from outside the cluster, you need to expose the service. Below is a sample YAML for a NodePort service:
apiVersion: v1
kind: Service
metadata:
  name: llm-server-svc
  namespace: llm
spec:
  selector:
    app: llm-server
  type: NodePort
  ports:
    - name: http
      protocol: TCP
      port: 80
      targetPort: 8088
      nodePort: 30080
Save the YAML file and apply it to the K3s cluster:
kca llm-server-svc.yaml
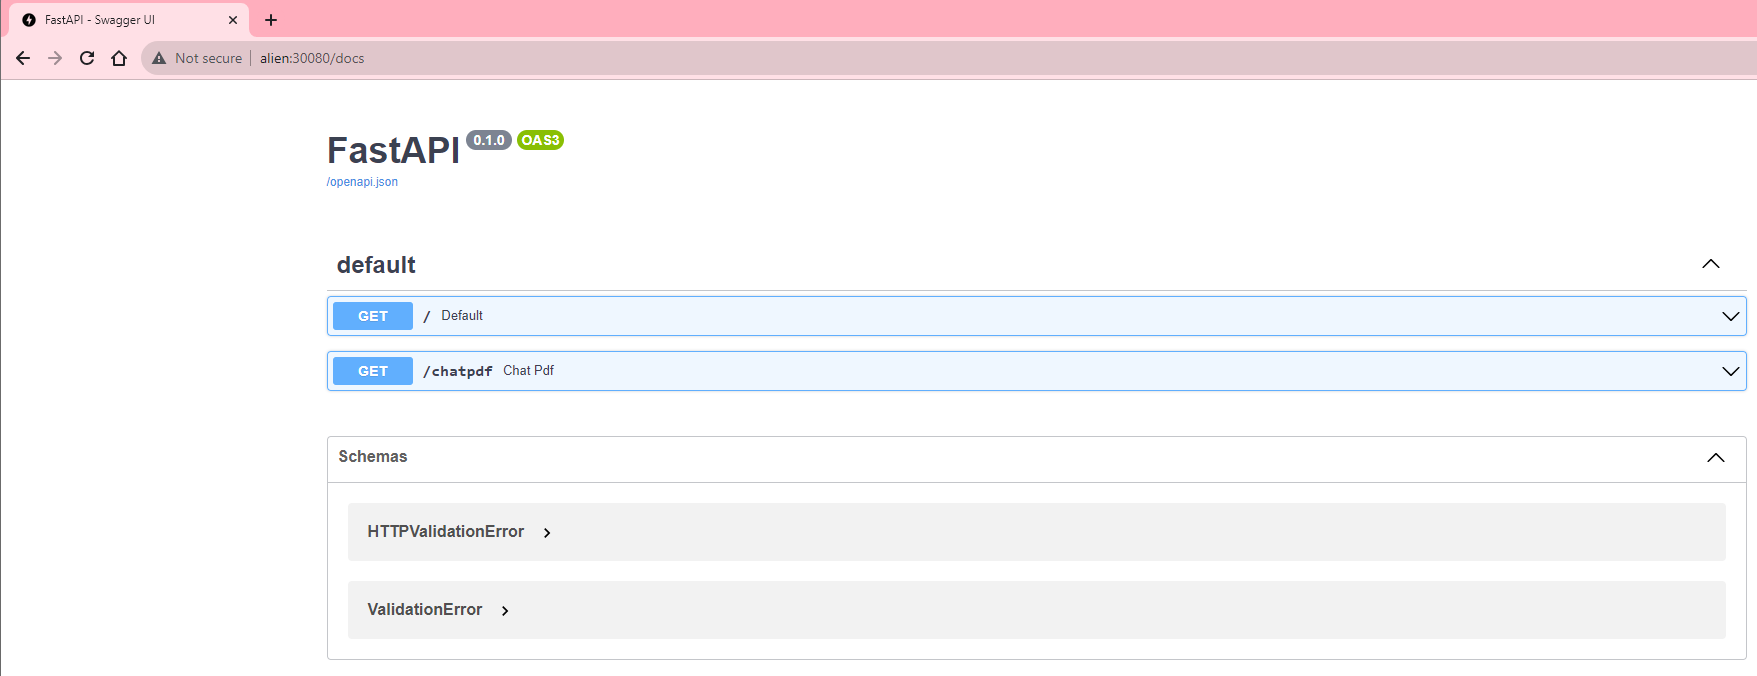
The llm-server is now accessible on port 30080 of any Node IP in your K3s cluster. You can access it from your browser using the IP of one of the K3s nodes and the specified port:
http://alien:30080/docs
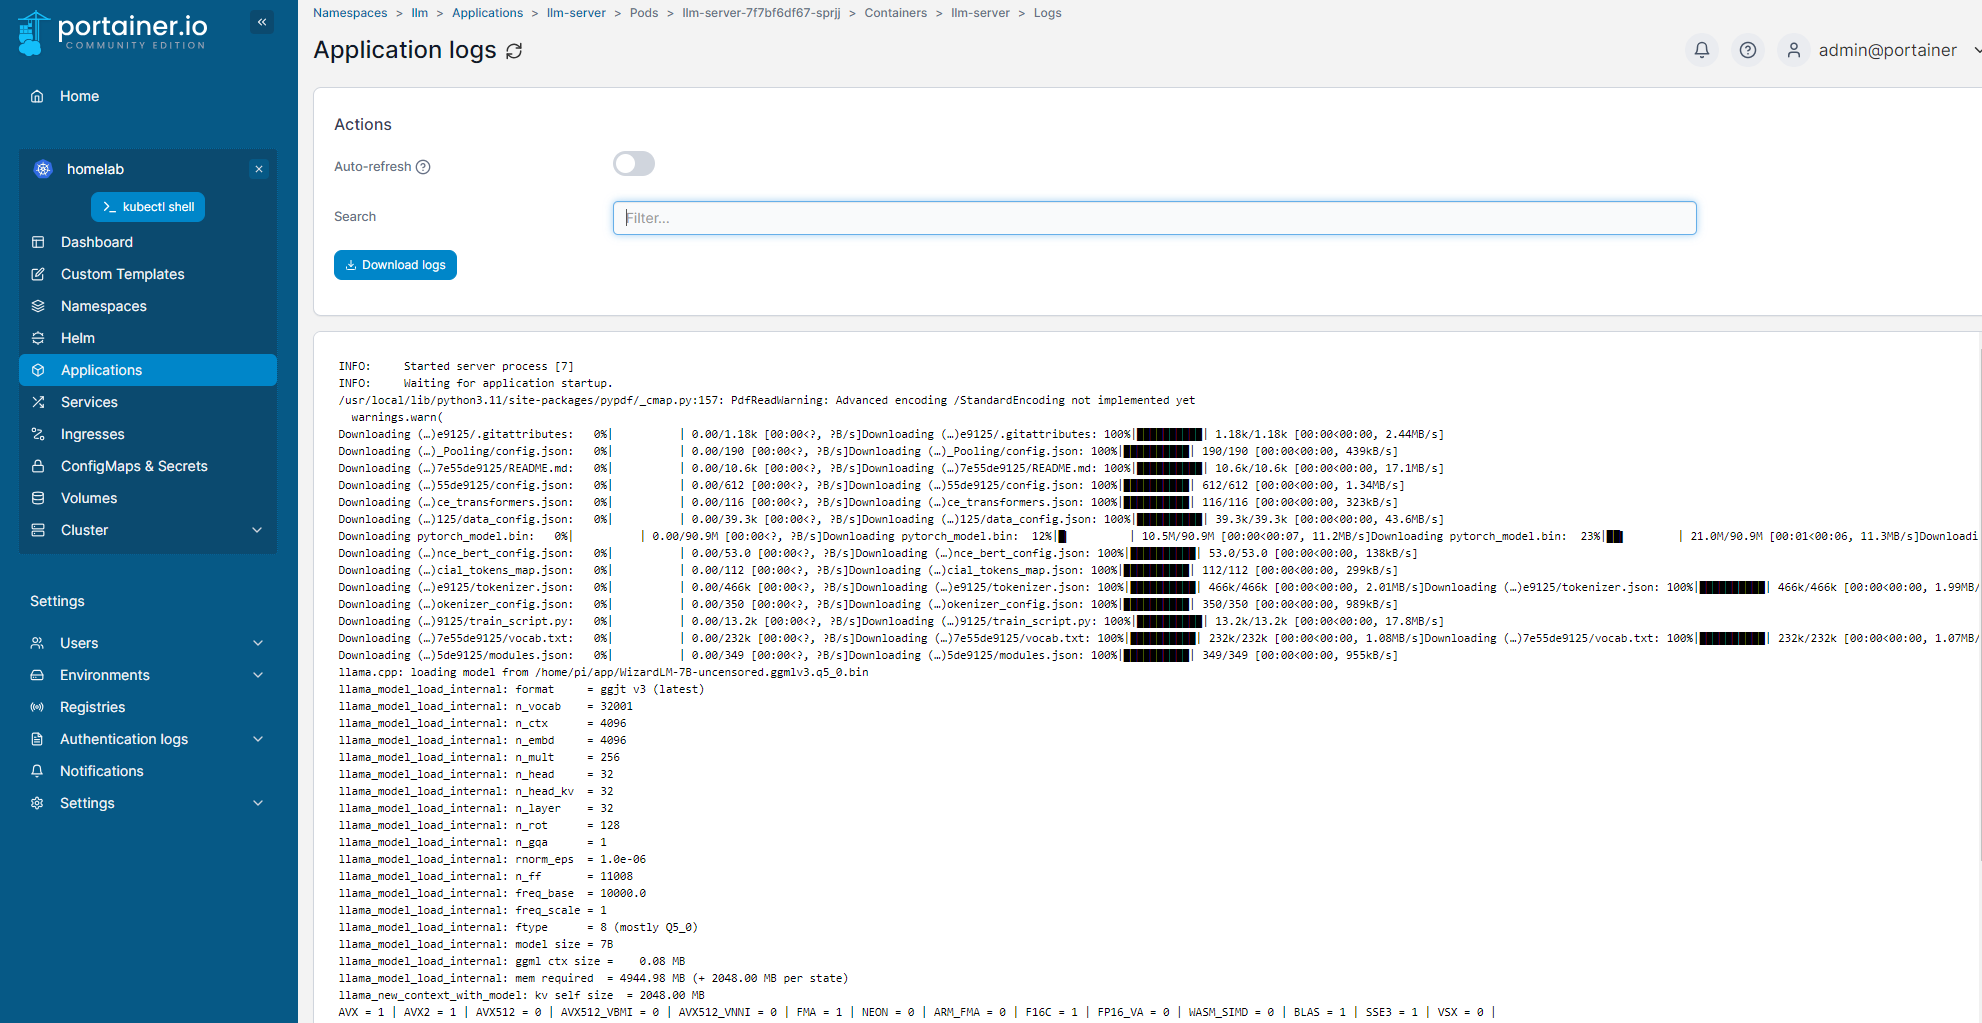
And this is the application logs from portainer:
If you realise that you are not utilising the entire HDD, you may wish to extend it by:
sudo lvresize -l 100%FREE /dev/ubuntu-vg/ubuntu-lv
sudo resize2fs /dev/ubuntu-vg/ubuntu-lv
With the optional step of pushing the Docker image to the K3s cluster’s local registry and deploying it in Kubernetes, you have a complete end-to-end workflow of containerizing, pushing, and deploying applications in your home lab’s K3s cluster.
This advanced technique allows for smooth and efficient management of your containerized applications, providing a robust platform for development and experimentation. Start your containerized journey in your K3s home lab today!