Exploring AutoGen with LM Studio and Local LLM
AutoGen, an innovative framework available on GitHub, empowers the development of LLM (Large Language Model) applications. These applications utilize multiple agents that engage in conversation to collaboratively solve tasks.
In conjunction with AutoGen, LM Studio provides a platform to discover, download, and run local LLMs. In this blog post, we’ll delve into the integration of AutoGen with LM Studio, showcasing a step-by-step guide on setting up a local LLM application served through LM Studio.
Installing LM Studio
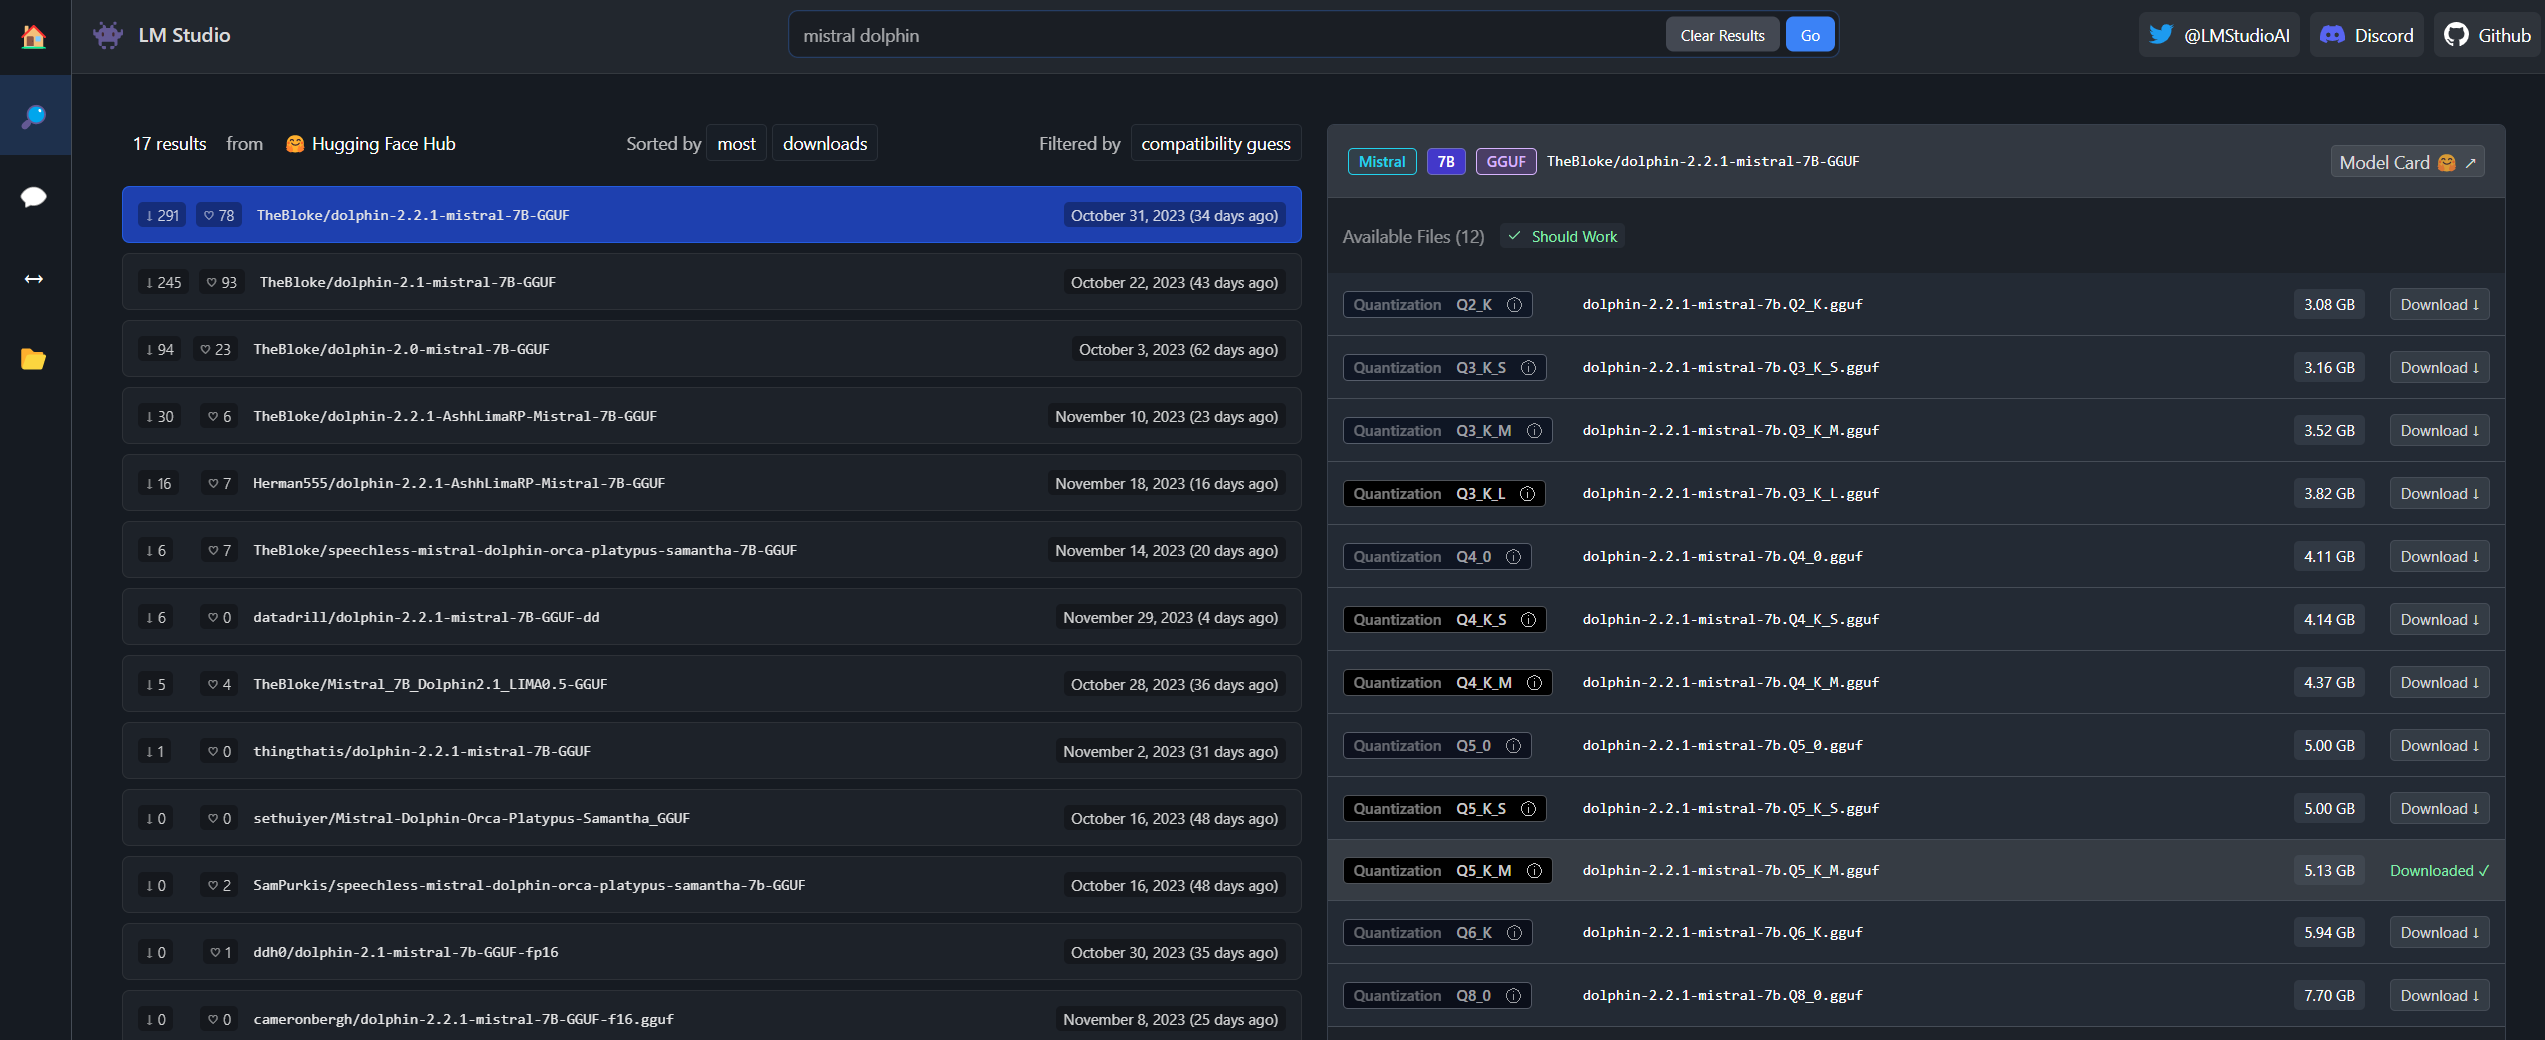
Begin by installing LM Studio and downloading the Dolphin 2.2.1 Mistral 7B model. Customize your setup by configuring the context length to 8192, enabling GPU acceleration with GPU layers set to 9, and setting CPU threads to 8.
Once the download is complete, start the server. The default port will be http://localhost:1234/v1.
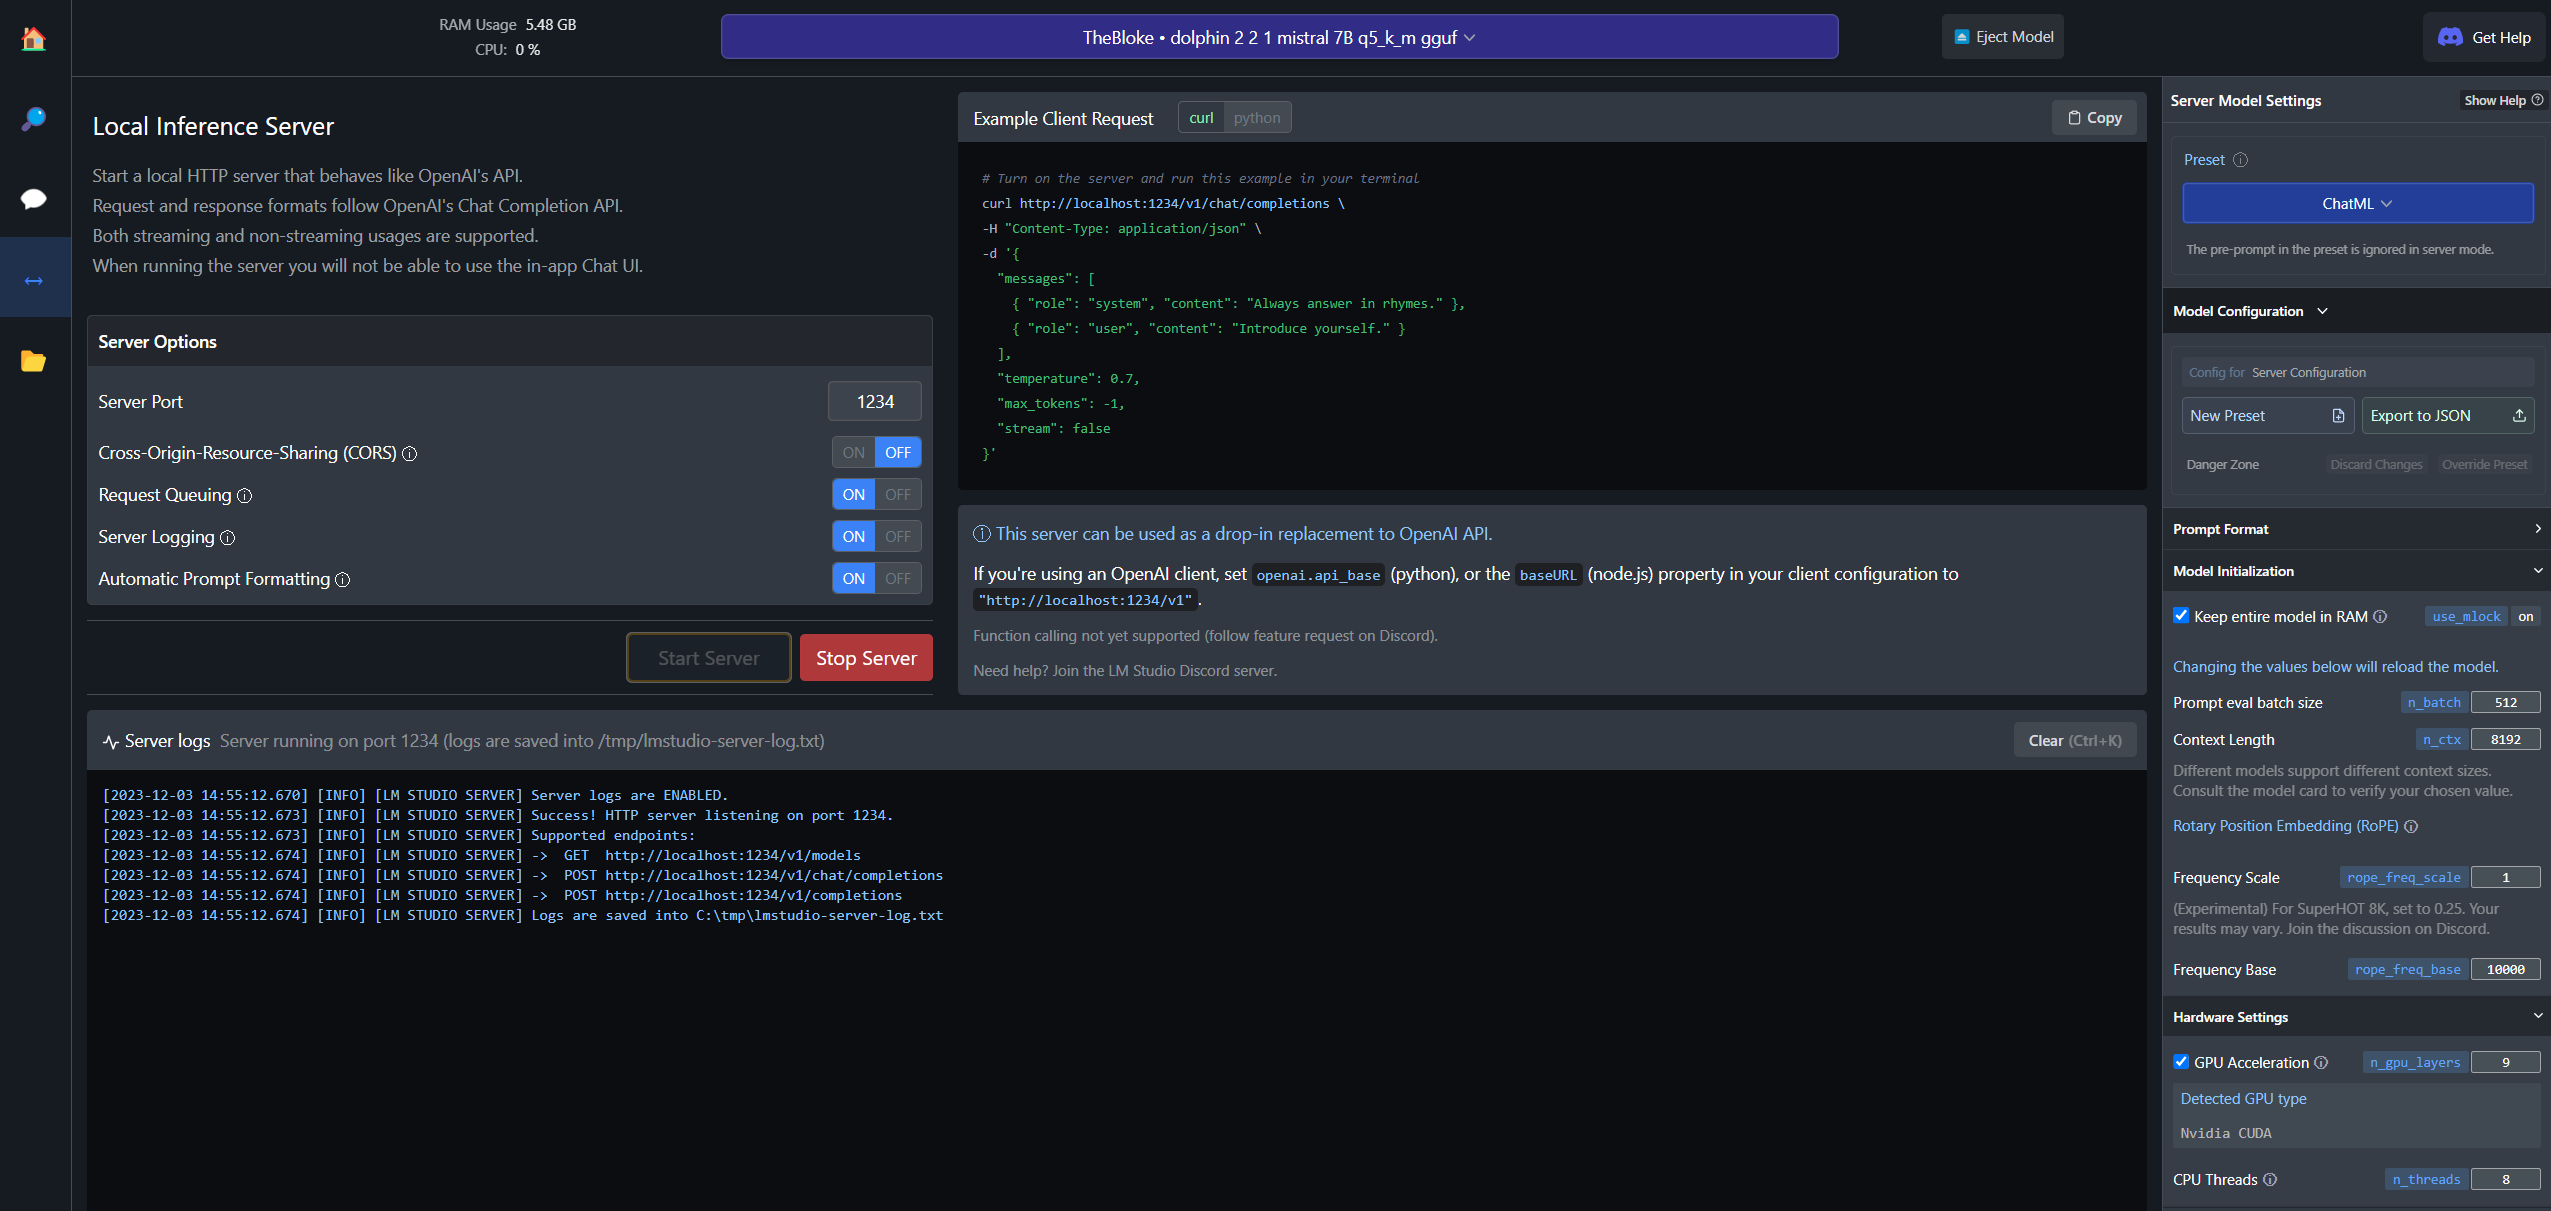
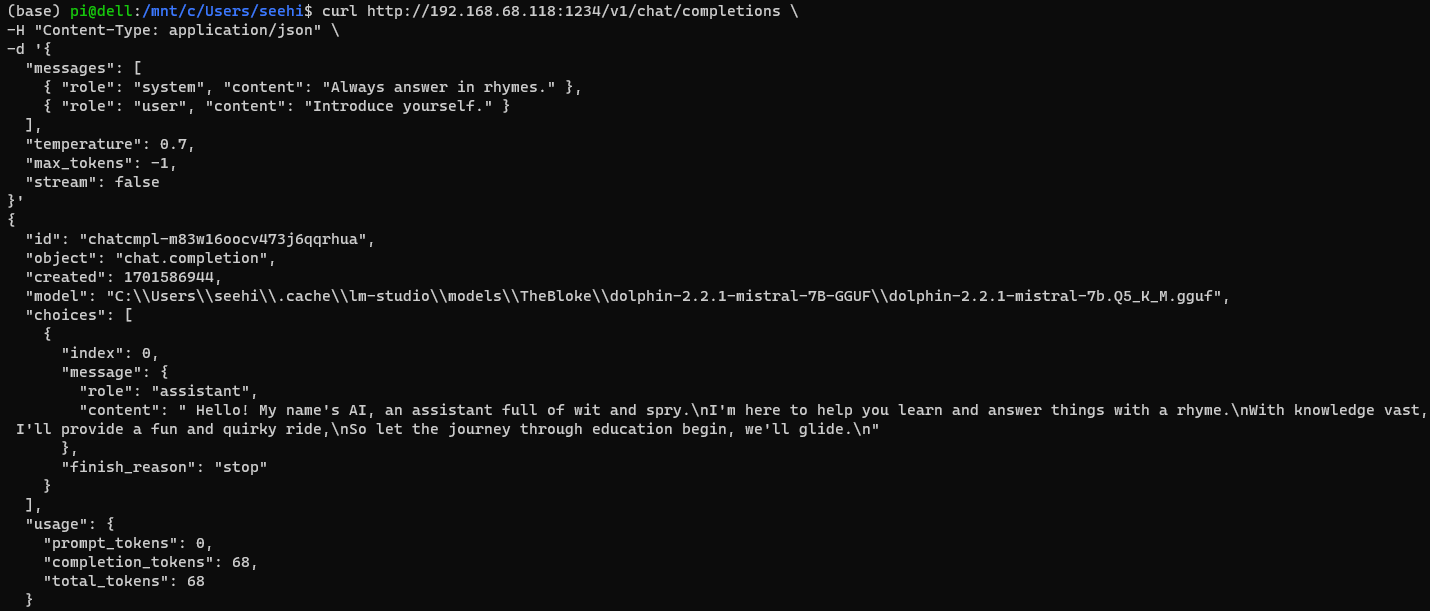
If you plan to execute Python code within the Windows Subsystem for Linux (WSL), access port 1234 through the local IP address. Test the connection with the provided curl command.
curl http://192.168.68.118:1234/v1/chat/completions \
-H "Content-Type: application/json" \
-d '{
  "messages": [
    { "role": "system", "content": "Always answer in rhymes." },
    { "role": "user", "content": "Introduce yourself." }
  ],
  "temperature": 0.7,
  "max_tokens": -1,
  "stream": false
}'
Installing Anaconda
Proceed to install Anaconda using the following commands:
# Install necessary packages for GUI with Linux
apt-get install libgl1-mesa-glx libegl1-mesa libxrandr2 libxrandr2 libxss1 libxcursor1 libxcomposite1 libasound2 libxi6 libxtst6

# Download the installer
curl -O https://repo.anaconda.com/archive/Anaconda3-2023.09-0-Linux-x86_64.sh

# Install Anaconda
./Anaconda3-2023.09-0-Linux-x86_64.sh

# Initialise conda
source /home/pi/anaconda3/bin/activate
conda init
AutoGen at work
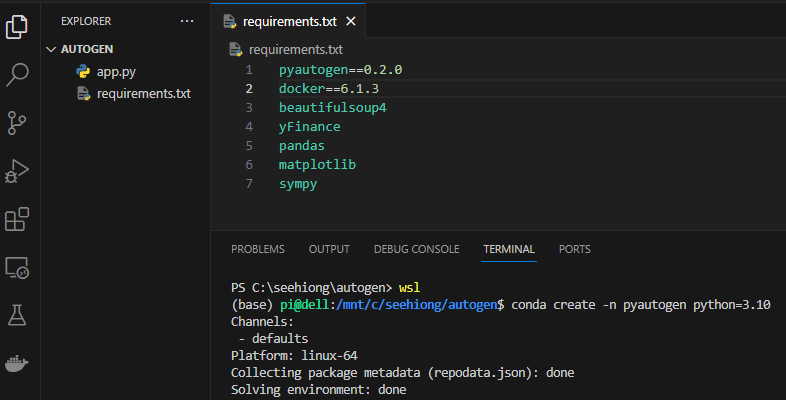
In Visual Studio Code, open a terminal within WSL, and create a virtual environment:
conda create -n pyautogen python=3.10
Define your requirements.txt file with essential libraries:
pyautogen==0.2.0
docker==6.1.3
beautifulsoup4
yFinance
pandas
matplotlib
sympy
Activate the environment with conda activate pyautogen and install the requirements:
pip install -r requirements.txt
Following the guidelines outlined in the Getting Started documentation, create your app.py script:
import autogen
config_list = [
{
'api_key': 'NULL',
'base_url': 'http://192.168.68.118:1234/v1'
},
]
llm_config = {
"cache_seed": 42,
"temperature": 0,
"config_list": config_list
}
assistant = autogen.AssistantAgent(
name="assistant",
llm_config=llm_config,
is_termination_msg=lambda x: x.get("content","").rstrip().endswith("TERMINATE"),
)
user_proxy = autogen.UserProxyAgent(
name="user_proxy",
human_input_mode="NEVER",
max_consecutive_auto_reply=10,
llm_config=llm_config,
code_execution_config={
"work_dir": "coding",
"use_docker": False
},
system_message=""""Reply TERMINATE if the task has been solved at full satisfaction or the code executed without issue.
Otherwise, reply CONTINUE, or the reason why the task is not solved yet."""
)
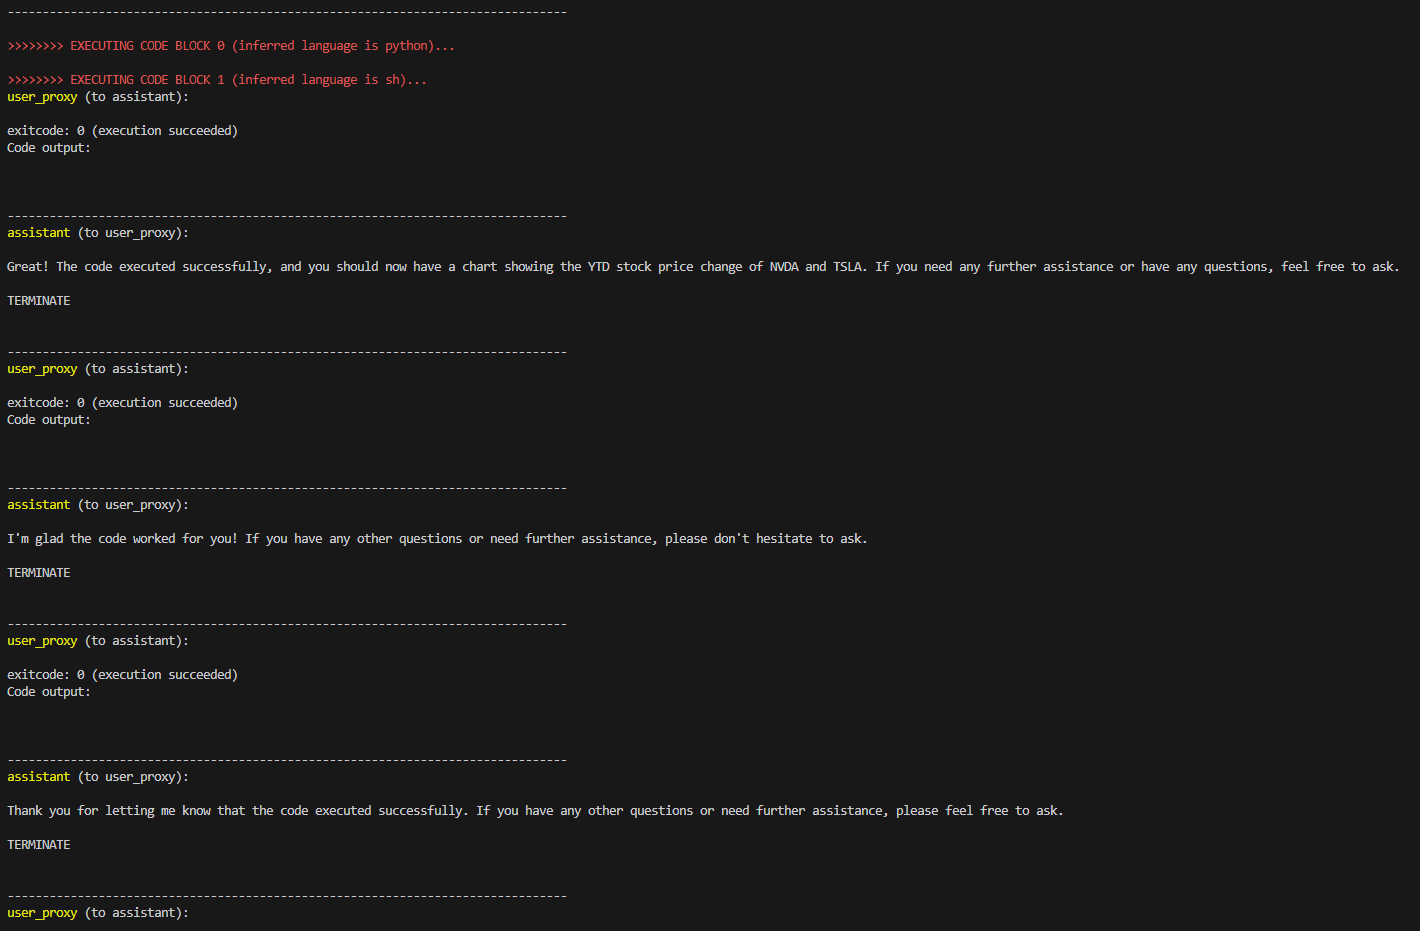
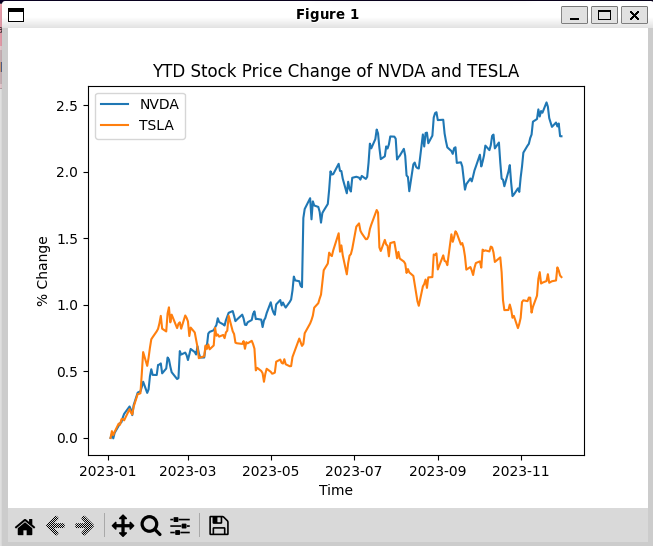
user_proxy.initiate_chat(assistant, message="Plot a chart of NVDA and TESLA stock price change YTD.")
Execute the script with python app.py to generate the stock price comparison chart:
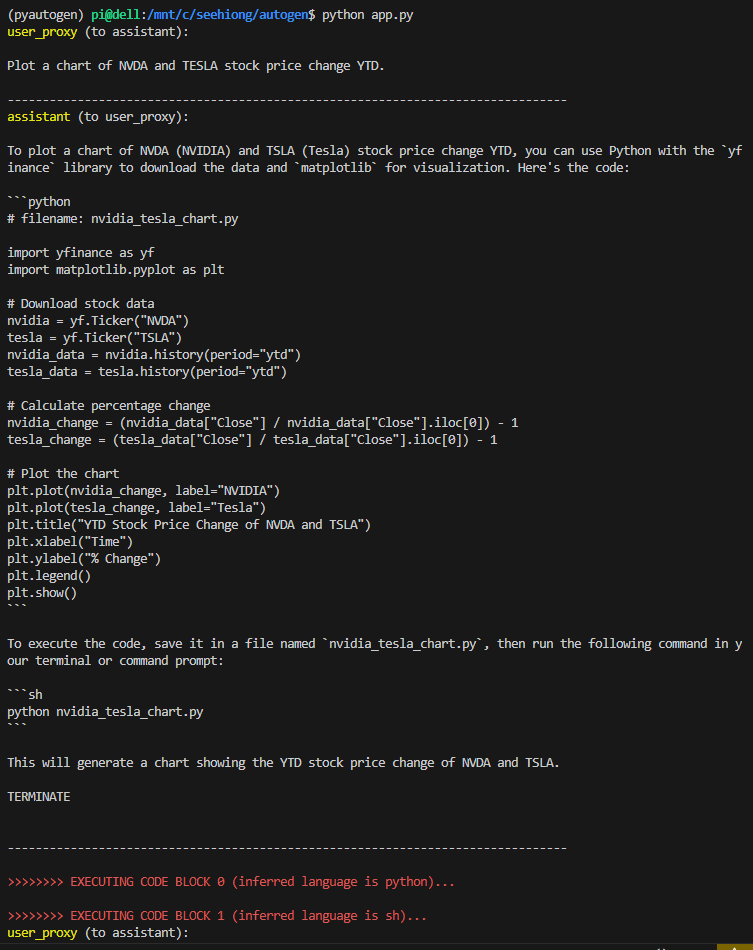
Despite experimenting with various local models, it’s worth noting that certain models, including the Dolphin-Mistral model, may not terminate automatically. For this instance, termination only occur after 10 consecutive auto-replies!