Building a CI/CD pipeline part 2 on a Raspberry PI Cluster, with JFrog Artifactory as the repository manager
Building a CI/CD pipeline on a Raspberry PI Cluster (Part II)
(Total Setup Time: 40 mins)
Continuing from part I of this guide, I will add JFrog Artifactory to my CI/CD pipeline.
Preparation
(1 min)
Referencing from my previous post on maven agent, let’s configure maven-agent to mount Longhorn volume. Navigate to Manage Jenkins > Manage Nodes and Clouds > Configure Clouds. Expand on Pod Template details and add a volume:
Claim Name: maven-agent-pvc
Mount Path: /home/jenkins/.m2

Installing Artifactory
(13 mins)
First, download the JFrog Artifactory OSS edition. Due to some yq issues on Raspberry PI, I download the older version instead:
mkdir ~/artifactory
cd ~/artifactory

curl https://releases.jfrog.io/artifactory/bintray-artifactory/org/artifactory/oss/jfrog-artifactory-oss/6.23.21/jfrog-artifactory-oss-6.23.21.zip -o jfrog-artifactory-oss-6.23.21.zip
Second, prepare the Dockerfile for Raspberry PI:
# Copy and paste below into Dockerfile
vi Dockerfile
FROM balenalib/raspberrypi4-64-debian-openjdk:11-bullseye

EXPOSE 8081

RUN apt-get update \
   && apt-get install wget unzip -y

WORKDIR /opt

COPY jfrog-artifactory-oss-6.23.21.zip /opt
RUN mkdir jfrog \
    && mv jfrog-artifactory-oss-6.23.21.zip jfrog

WORKDIR /opt/jfrog
RUN export JFROG_HOME=/opt/jfrog

RUN unzip jfrog-artifactory-oss-6.23.21.zip \
    && mv artifactory-oss-6.23.21 artifactory \
    && cd artifactory/bin

WORKDIR /opt/jfrog/artifactory/bin
CMD ./artifactoryctl
Third, build and tag the docker image:
docker build -t seehiong/artifactory:1.0 .
Last, create the required Longhorn volumes and prepare the Kubernetes deployment file. NOTE: I add delay in the init-container in order for Longhorn to stabilize. Also note that this directory structure is different from the latest Artifactory versions.
# Copy and paste below into artifactory-deployment.yaml
vi artifactory-deployment.yaml
apiVersion: v1
kind: Service
metadata:
  name: artifactory
  namespace: seehiong
  annotations:
    metallb.universe.tf/allow-shared-ip: home-net
spec:
  ports:
  - port: 8081
    targetPort: 8081
    nodePort: 30081
    name: artifact-http
  selector:
    app: artifactory
  type: LoadBalancer
  loadBalancerIP: 192.168.100.250
---
apiVersion: apps/v1
kind: Deployment
metadata:
  name: artifactory
  namespace: seehiong
spec:
  selector:
    matchLabels:
      app: artifactory
  template:
    metadata:
      labels:
        app: artifactory
    spec:
      containers:
      - name: artifactory
        image: seehiong/artifactory:1.0
        imagePullPolicy: Never
        ports:
        - containerPort: 8081
          name: artifact-http
        volumeMounts:
        - name: artifactory-data-persistent-storage
          mountPath: /opt/jfrog/artifactory/data
        - name: artifactory-etc-persistent-storage
          mountPath: /opt/jfrog/artifactory/etc
      initContainers:
      - name: init-volume
        image: arm64v8/busybox
        command: ['sh', '-c', "sleep 30"]
      volumes:
      - name: artifactory-data-persistent-storage
        persistentVolumeClaim:
          claimName: artifactory-data-pvc
      - name: artifactory-etc-persistent-storage
        persistentVolumeClaim:
          claimName: artifactory-etc-pvc
Configuring Artifactory
(10 mins)
It takes a while for Artifactory to setup. In my case, I add maven during startup. You may peek at the progress by:
kubectl get po -n seehiong

# Get logs (remember to replace with your pod name)
kubectl logs -n seehiong artifactory-99b667d47-jqxkv -f

# Get inside the container
kubectl exec -n seehiong -it artifactory-99b667d47-jqxkv -- bash
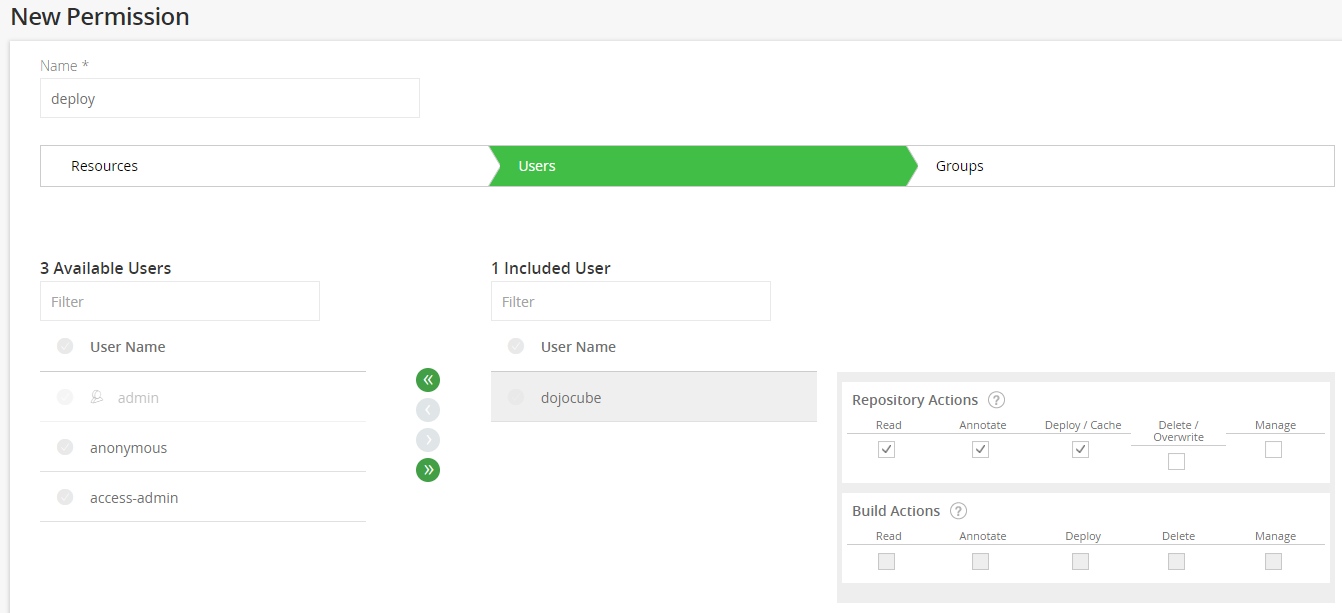
First, log into Artifactory using the default admin user and password. Creates your own account. From Admin > Security > Permission menu, adds a permission:
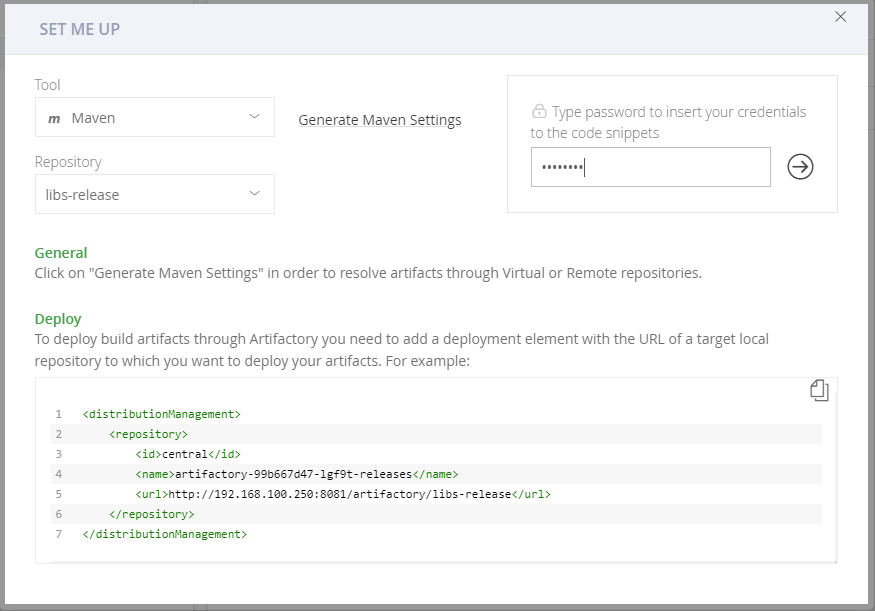
Second, from Artifacts menu, click on Set Me Up button. Select the maven, enter password and click on Generate Maven Settings button.
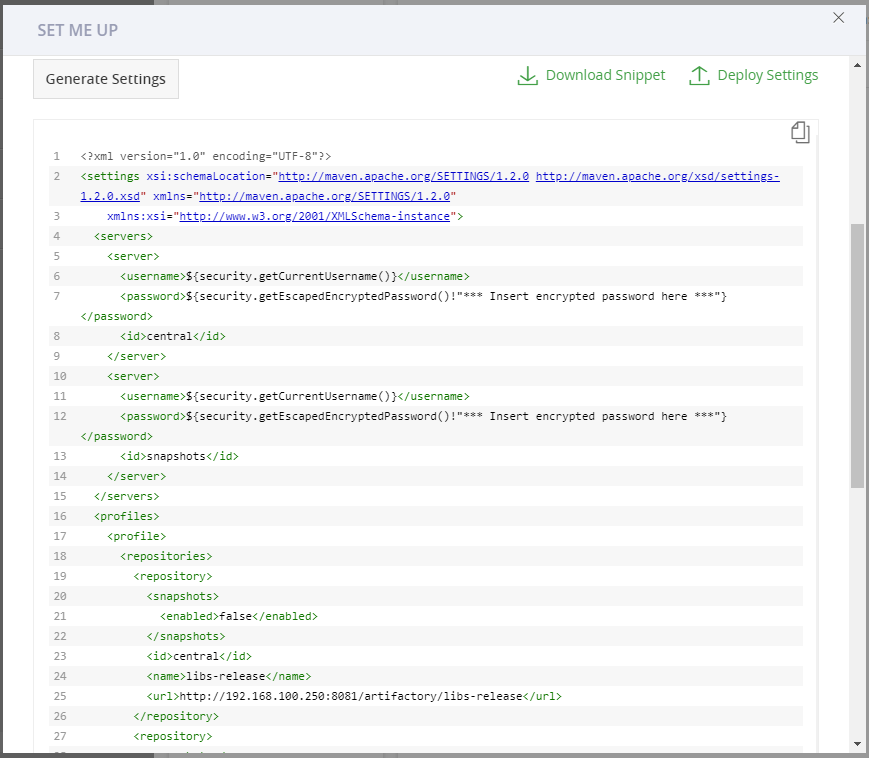
Third, click on Generate Settings button and scroll down to the settings file. Click on Download Snippet link and copy this settings.xml file to the .m2 folder of the maven-agent-pvc volume. NOTE: Please remember to modify the user and password of your newly created account, which has deploy permission.
Lastly, copy the contents of the distribution management and paste into your project’s pom.xml file. NOTE: Depending on your setting, enter either libs-snapshot or libs-release, such as:
<distributionManagement>
  <repository>
    <id>central</id>
    <name>artifactory-99b667d47-gzcwk-releases</name>
    <url>http://192.168.100.250:8081/artifactory/libs-snapshot</url>
  </repository>
</distributionManagement>
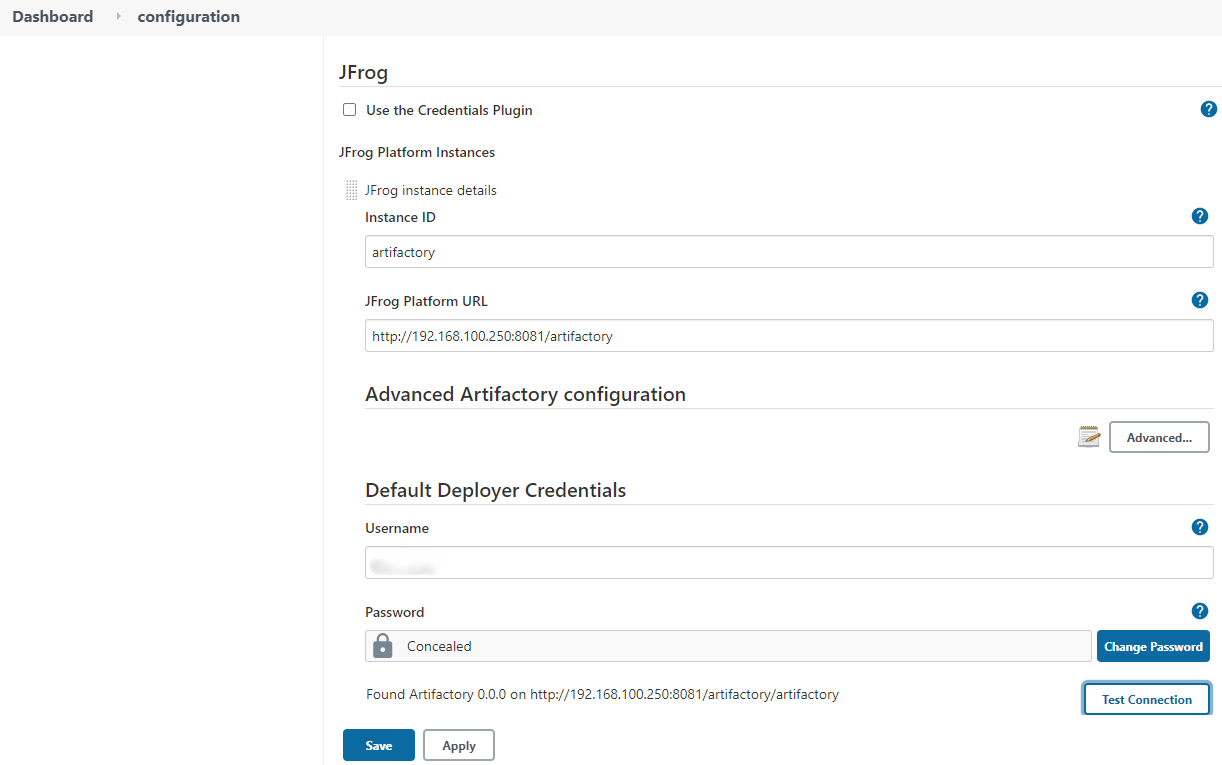
Configuring Jenkins
(1 min)
First, from Manage Jenkins > Manage Plugins, click on Available tab and search for Artifactory. Installs Artifactory plugin.

Second, from Manage Jenkins > Configure System, scroll to JFrog section. Enters Artifactory URL and the deployer credential.
Deploy JAR to Artifactory
(5 mins)
First, configure your project’s Jenkinsfile to include a deploy command. This is my sample file:
pipeline {
  agent none

  stages {
    stage('Build & Deploy') {
      agent {
        label 'maven'
      }
      steps {
        checkout scm
        sh './mvnw -DskipTests clean package deploy'
      }
    }
  }
}
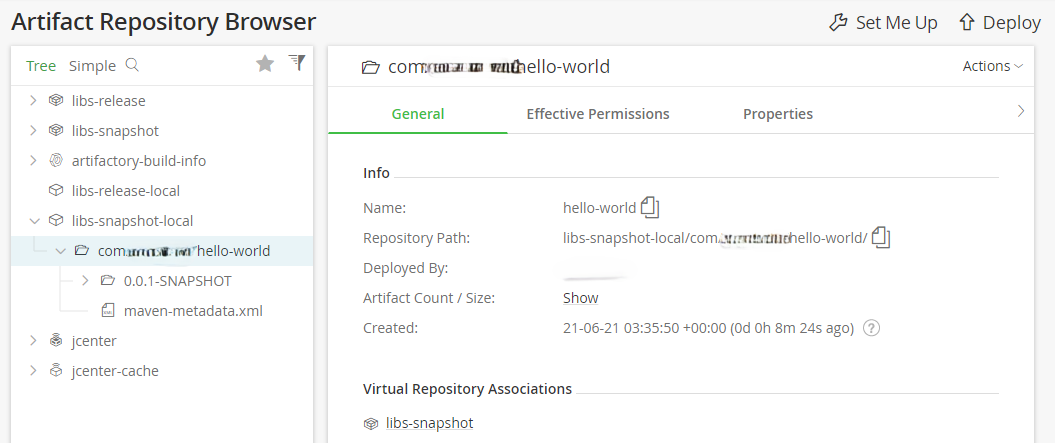
Second, when you commit the changes, Jenkins triggers a pipeline. It builds the code and pushes the package to the Artifactory.
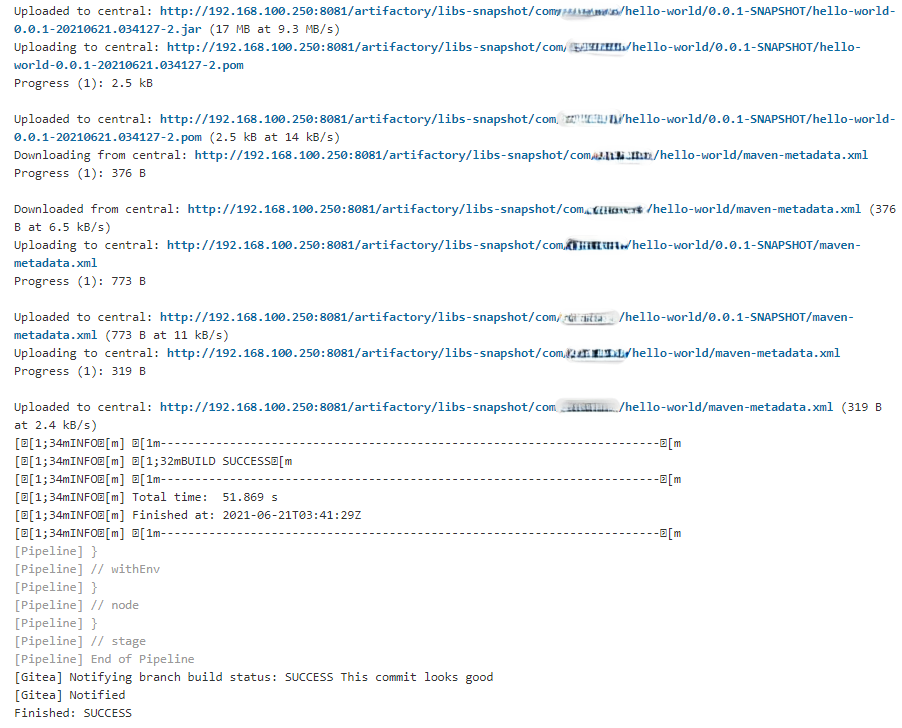
Finally! With this setup, you build a CI/CD pipeline on a Raspberry PI Cluster (Part 2), integrating Jenkins and Artifactory.
Troubleshooting
Unstable Longhorn Volumes
Perhaps due to my setup, my cluster node reboots by itself and the entire cluster becomes unstable. To resolve this issue, I create few scripts to delete existing Kubernetes deployments. When Longhorn is finally up and running without issues, my deployments are then deployed, one at a time.
Jenkins wrong volume permissions
This happens when user in the container does not have the same userid:groupid as the user on the host, which has access to the volume. To fix this, under the template/spec of deployment.yaml, I create an init container to change the ownership of the volume.
...
initContainers:
- name: init
  image: arm64v8/busybox:latest
  command: ["sh", "-c", "chown -R 1000:1000 /.m2"]
  volumeMounts:
  - name: maven-agent-pvc
    mountPath: /.m2
...