
Building a CI/CD pipeline on a Raspberry PI Cluster, with 3 master and 1 worker nodes, enclosed in a custom-made LEGO structure
Building a CI/CD pipeline on a Raspberry PI Cluster (Part I)
(Total Setup Time: 40 mins)
In this series, I will build my own CI/CD pipeline, with tools that are configured to run on Raspberry PI Cluster and Longhorn, a HA Raspberry PI Cluster. By end of this guide, you will have a self-hosted Git service, working hand-in-hand with Jenkins.
Preparation
(5 mins)
Metallb is a load-balancer implementation for bare metal Kubernetes clusters. You may refer to the previous guide on Metallb. Let’s install it by with these commands:
mkdir ~/metallb
cd ~/metallb

wget https://raw.githubusercontent.com/metallb/metallb/v0.9.3/manifests/namespace.yaml -O metallb-namespace.yaml
kubectl apply -f metallb-namespace.yaml

wget https://raw.githubusercontent.com/metallb/metallb/v0.9.3/manifests/metallb.yaml -O metallb.yaml
kubectl apply -f metallb.yaml

kubectl create secret generic -n metallb-system memberlist --from-literal=secretkey="$(openssl rand -base64 128)"
This is my layer2 configuration, in metallb-config.yaml:
apiVersion: v1
kind: ConfigMap
metadata:
  namespace: metallb-system
  name: config
data:
  config: |
    address-pools:
    - name: default
      protocol: layer2
      addresses:
      - 192.168.100.200-192.168.100.250

kubectl apply -f metallb-config.yaml
I create 4 volumes, namely mysql, gitea, jenkins and maven-agent, specific to each of the tools.

Installing Mysql
(5 mins)
Referencing Gitea for Kubernetes Cluster, these are the steps for installing Mysql.
kubectl create namespace seehiong
docker pull mysql/mysql-server:latest

mkdir ~/mysql
cd ~/mysql

vi mysql-deployment.yaml
# Insert below into mysql-deployment.yaml
apiVersion: v1
kind: Service
metadata:
  name: mysql
  namespace:seehiong
spec:
  ports:
  - port: 3306
  selector:
    app: mysql
  clusterIP: None
---
apiVersion: apps/v1
kind: Deployment
metadata:
  name: mysql
  namespace:seehiong
spec:
  selector:
    matchLabels:
      app: mysql
  strategy:
    type: Recreate
  template:
    metadata:
      labels:
        app: mysql
    spec:
      hostname: mysql
      containers:
      - image: mysql/mysql-server:latest
        imagePullPolicy: IfNotPresent
        name: mysql
        env:
          # Use secret in real usage
        - name: MYSQL_ROOT_PASSWORD
          value: password
        ports:
        - containerPort: 3306
          name: mysql
        volumeMounts:
        - name: mysql-persistent-storage
          mountPath: /var/lib/mysql
      volumes:
      - name: mysql-persistent-storage
        persistentVolumeClaim:
          claimName: mysql-pvc
kubectl apply -f mysql-deployment.yaml
You may check on the pod ID and run the following scripts:
kubectl get pods -n seehiong
kubectl exec --namespace=seehiong -it mysql-6587f996b5-qrcr6 -- /bin/bash
mysql -u root -p
# Execute these within the docker prompt, with username=gitea, password=gitea, database=gitedb
CREATE USER 'gitea'@'%' IDENTIFIED BY 'gitea';
CREATE DATABASE giteadb;
GRANT ALL PRIVILEGES ON giteadb.* TO 'gitea';
FLUSH PRIVILEGES;
Installing Gitea
(5 mins)
First, installs Gitea by running thse commands:
apt install docker-compose

mkdir ~/gitea
cd ~/gitea

vi docker-compose.yml
# Insert below into docker-compose.yml
version: "2"

networks:
  gitea:
    external: false

services:
  server:
    image: gitea/gitea:latest
    environment:
      - USER_UID=1000
      - USER_GID=1000
      - DB_TYPE=mysql
      - DB_HOST=mysql:3306
      - DB_NAME=giteadb
      - DB_USER=gitea
      - DB_PASSWD=gitea
    restart: always
    networks:
      - gitea
    volumes:
      - ./gitea:/data
      - /etc/timezone:/etc/timezone:ro
      - /etc/localtime:/etc/localtime:ro
    ports:
      - "3000:3000"
      - "222:22"
# Builds, starts and stops container
docker-compose up -d
docker-compose down
Second, creates the deployment file for Gitea:
vi gitea-deployment.yaml
# Insert below into gitea-deployment.yaml
apiVersion: v1
kind: Service
metadata:
  name: gitea
  namespace: seehiong
  annotations:
    metallb.universe.tf/allow-shared-ip: home-net
spec:
  ports:
  - port: 3000
    targetPort: 3000
    nodePort: 30000
    name: gitea-http
  - port: 2222
    targetPort: 2222
    nodePort: 32222
    name: gitea-ssh
  selector:
    app: gitea
  type: LoadBalancer
  loadBalancerIP: 192.168.100.250
---
apiVersion: apps/v1
kind: Deployment
metadata:
  name: gitea
  namespace: seehiong
spec:
  replicas: 1
  selector:
    matchLabels:
      app: gitea
  strategy:
    type: Recreate
  template:
    metadata:
      labels:
        app: gitea
    spec:
      hostname: gitea
      containers:
      - image: gitea/gitea:latest
        imagePullPolicy: IfNotPresent
        name: gitea
        ports:
        - containerPort: 3000
          name: gitea-http
        - containerPort: 22
          name: gitea-ssh
        volumeMounts:
        - name: gitea-persistent-storage
          mountPath: /data
      volumes:
      - name: gitea-persistent-storage
        persistentVolumeClaim:
          claimName: gitea-pvc
kubectl apply -f gitea-deployment.yaml
kubectl get svc -n seehiong
Third, access to the configured url, i.e. 192.168.100.250:3000 and follows the gitea installation. For my case, the parameters are:
username: gitea
password: gitea
database: giteadb
Installing Jenkins
(5 mins)
By referencing Jenkins for Kuberenetes Cluster, the installation steps are:
mkdir ~/jenkins
cd ~/jenkins

vi Dockerfile
# Insert below into Dockerfile

FROM balenalib/raspberrypi4-64-debian-openjdk:11-bullseye

ENV JENKINS_HOME /var/jenkins_home
ENV JENKINS_SLAVE_AGENT_PORT 50000

RUN apt-get update \
  && apt-get install -y --no-install-recommends curl git

RUN curl -fL -o /opt/jenkins.war http://updates.jenkins-ci.org/download/war/2.295/jenkins.war

VOLUME ${JENKINS_HOME}
WORKDIR ${JENKINS_HOME}

EXPOSE 8080 ${JENKINS_SLAVE_AGENT_PORT}

CMD ["/bin/bash","-c","java -jar /opt/jenkins.war"]
# Builds, tags the image
docker build -t seehiong/jenkins:1.0 .
Next, creates the Jenkins deployment file and deploys it to the cluster.
vi jenkins-deployment.yaml
# Insert below into jenkins-deployment.yaml
apiVersion: v1
kind: Service
metadata:
  name: jenkins
  namespace: seehiong
  annotations:
    metallb.universe.tf/allow-shared-ip: home-net
spec:
  ports:
    - port: 8080
      name: jenkins-http
      targetPort: 8080
      nodePort: 30080
    - port: 50000
      name: jenkins-slave
      targetPort: 50000
  selector:
    app: jenkins
  type: LoadBalancer
  loadBalancerIP: 192.168.100.250
---
apiVersion: apps/v1
kind: Deployment
metadata:
  name: jenkins
  namespace: seehiong
spec:
  selector:
    matchLabels:
      app: jenkins
  strategy:
    type: Recreate
  template:
    metadata:
      labels:
        app: jenkins
    spec:
      hostname: jenkins
      containers:
      - name: jenkins
        image: seehiong/jenkins:1.0
        ports:
        - containerPort: 8080
        volumeMounts:
          - name: jenkins-persistent-storage
            mountPath: /var/jenkins_home
      volumes:
        - name: jenkins-persistent-storage
          persistentVolumeClaim:
            claimName: jenkins-pvc
kubectl apply -f jenkins-deployment.yaml
kubectl get po -n seehiong

# Gets the pod ID, replace the following accordingly and retrieves the password
kubectl logs -n seehiong jenkins-6c6cb7d48c-pnnr5
Installing Maven-agent
(5 mins)
By referencing Jenkins Agent on Kubernetes Cluster, the steps to create a maven-agent are:
# Source
# https://hub.docker.com/r/jenkins/slave/dockerfile
FROM balenalib/raspberrypi4-64-debian-openjdk:11-bullseye

ARG VERSION=4.7
ARG user=jenkins
ARG group=jenkins
ARG uid=1000
ARG gid=1000

# Modified for debian-bullseye
RUN groupadd -g ${gid} ${group}
RUN useradd -d /home/${user} -u ${uid} -g ${group} -m ${user}
LABEL Description="This is a base image, which provides the Jenkins agent executable (slave.jar)" Vendor="Jenkins project" Version="${VERSION}"

ARG AGENT_WORKDIR=/home/${user}/agent

# Modified for debian-bullseye
RUN apt-get update && apt-get install -y curl bash git git-lfs openssh-client openssl procps \
  && curl --create-dirs -fsSLo /usr/share/jenkins/agent.jar https://repo.jenkins-ci.org/public/org/jenkins-ci/main/remoting/${VERSION}/remoting-${VERSION}.jar \
  && chmod 755 /usr/share/jenkins \
  && chmod 644 /usr/share/jenkins/agent.jar \
  && ln -sf /usr/share/jenkins/agent.jar /usr/share/jenkins/slave.jar \
  && apt-get remove -y curl

USER ${user}
ENV AGENT_WORKDIR=${AGENT_WORKDIR}
RUN mkdir /home/${user}/.jenkins && mkdir -p ${AGENT_WORKDIR}

VOLUME /home/${user}/.jenkins
VOLUME ${AGENT_WORKDIR}
WORKDIR /home/${user}

# Source
# https://hub.docker.com/r/jenkins/inbound-agent/dockerfile
USER ${user}
COPY jenkins-agent /usr/share/jenkins/jenkins-agent

USER root
COPY jenkins-agent /usr/local/bin/jenkins-agent
RUN chmod +x /usr/local/bin/jenkins-agent \
  && ln -s /usr/local/bin/jenkins-agent /usr/local/bin/jenkins-slave

USER ${user}

ENTRYPOINT ["jenkins-agent"]
Next, copies the content of jenkins-agent and pastes it into a file (COPY command will copy this file into the docker image).
docker build -t seehiong/jenkins-agent:1.0 .

# Checks Java version
docker run -it seehiong/jenkins-agent:1.0 /bin/bash
java -version
Configuring Jenkins - Kubernetes
(5 mins)
First, navigates to the configured url, i.e. 192.168.100.250:8080. Installs the recommended commonly used plugins.
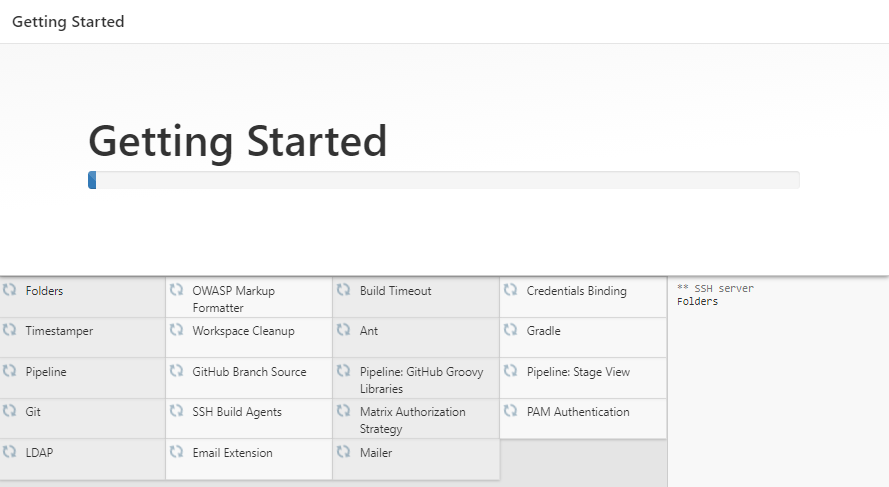
Second, installs Kuberenetes and Gitea plugin:

Third, navigates to Manage Jenkins > Manage Nodes and Cloud > Configure Clouds. Selects Kuberenetes, clicks on the Kuberenetes Cloud Details and tests the connection. Enters Jenkins url:
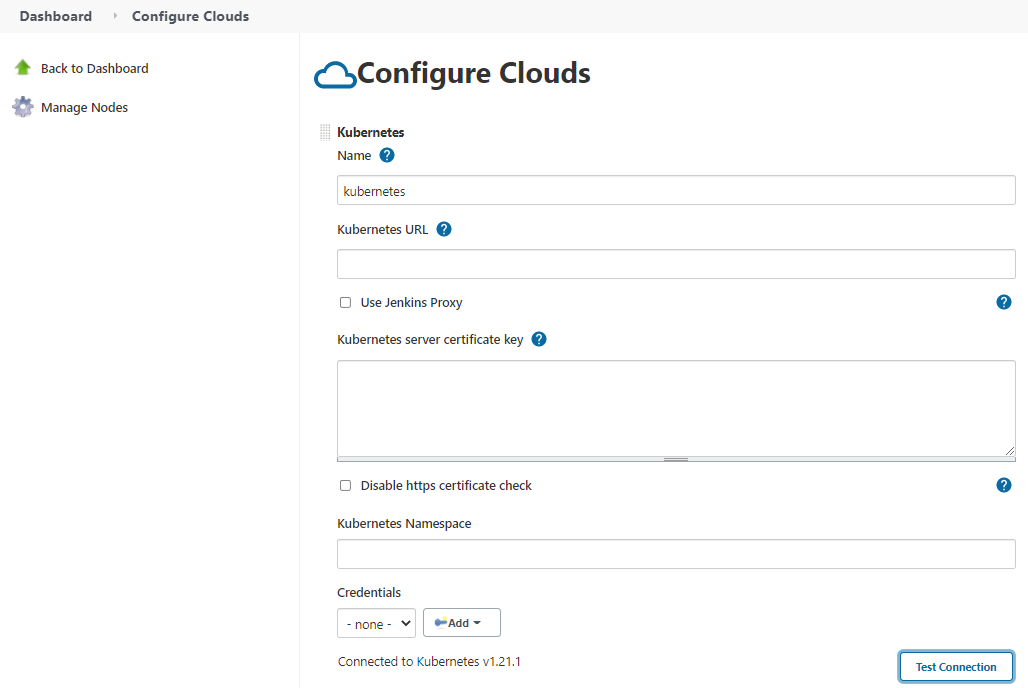
You may setup the Jenkins URL with:
Jenkins URL: http://jenkins:8080
jenkins tunnel: jenkins:50000

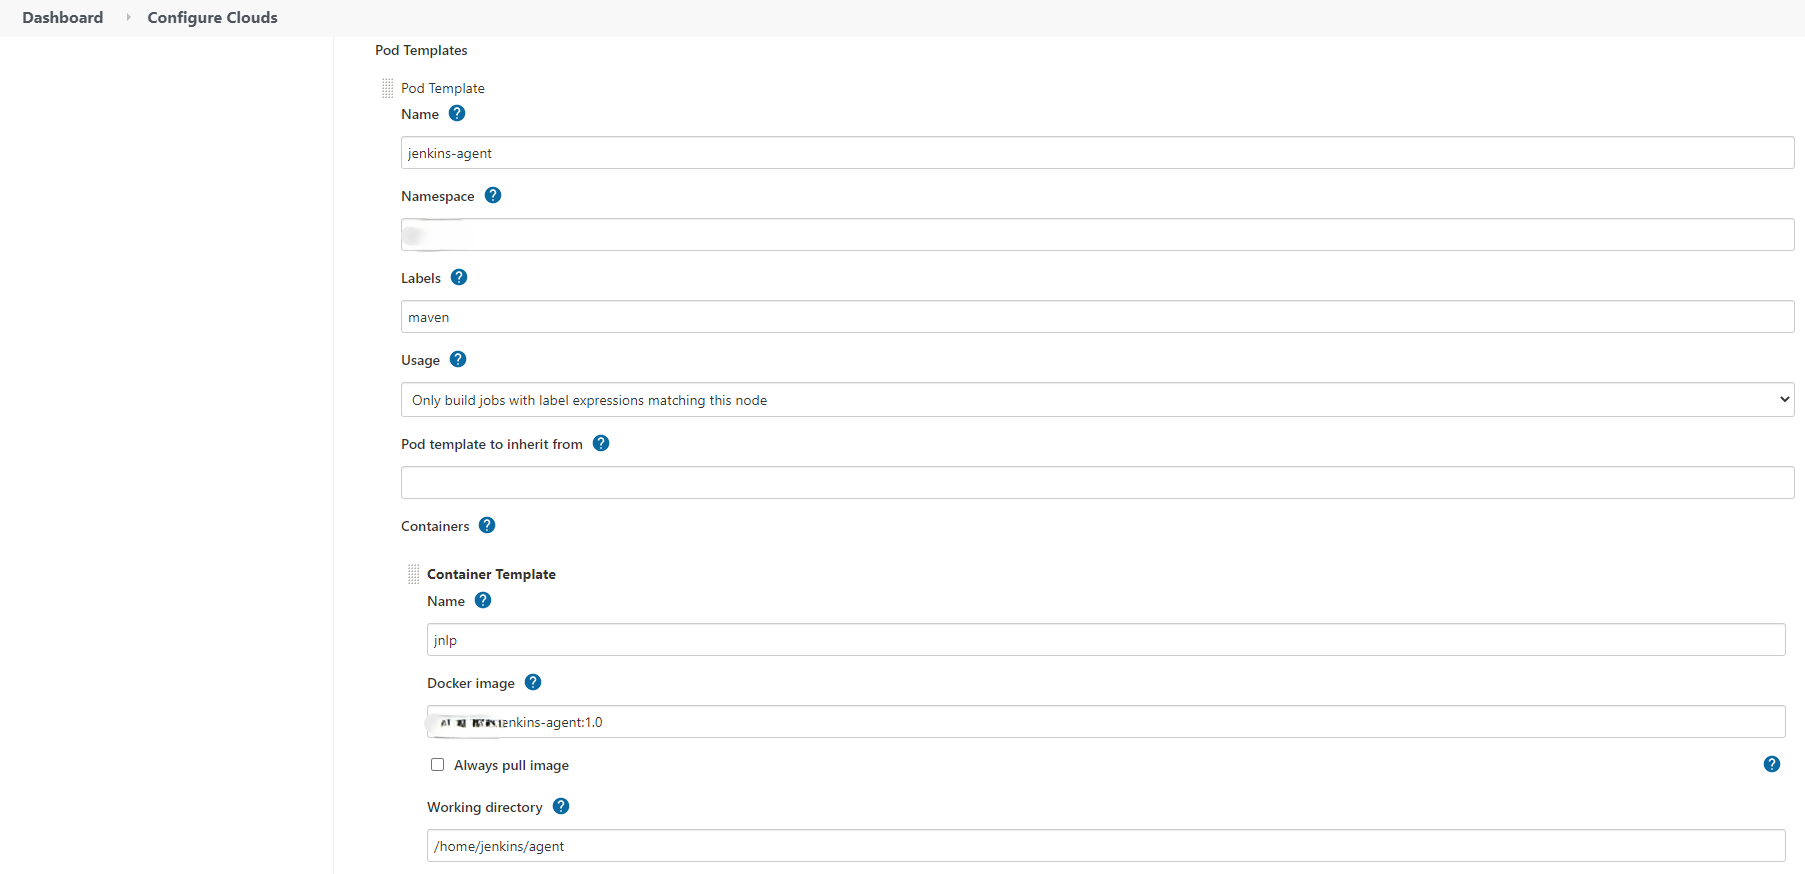
Fourth, configures the pod template:
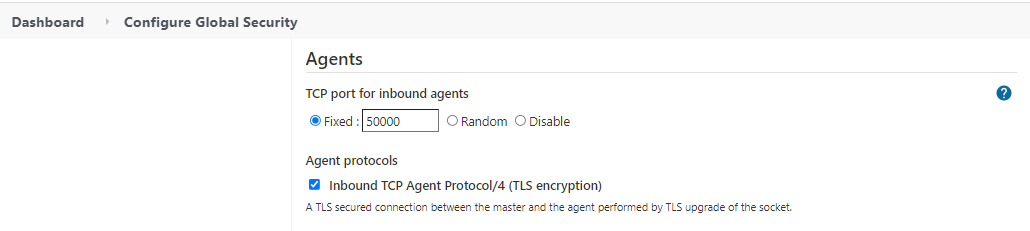
Lastly, navigates to Manage Jenkins -> Configure Global Security. Enters the Agent values:
Configuring Jenkins - Gitea
(5 mins)
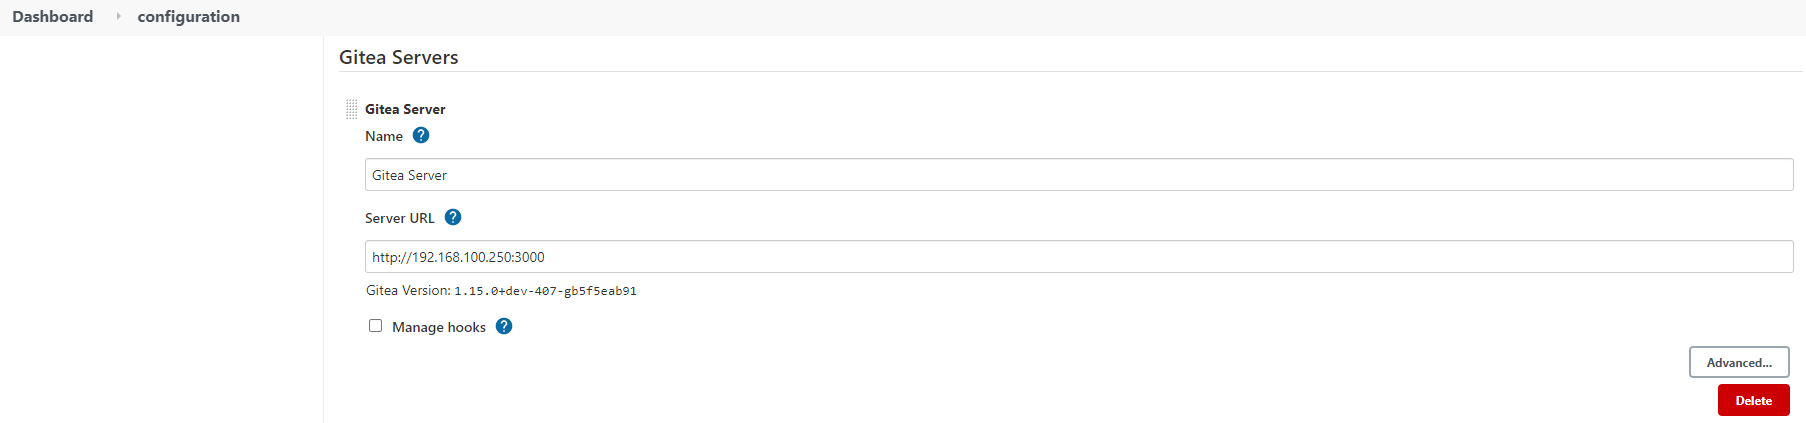
First, navigates to Manage Jenkins > Configure System. Adds Gitea erver:
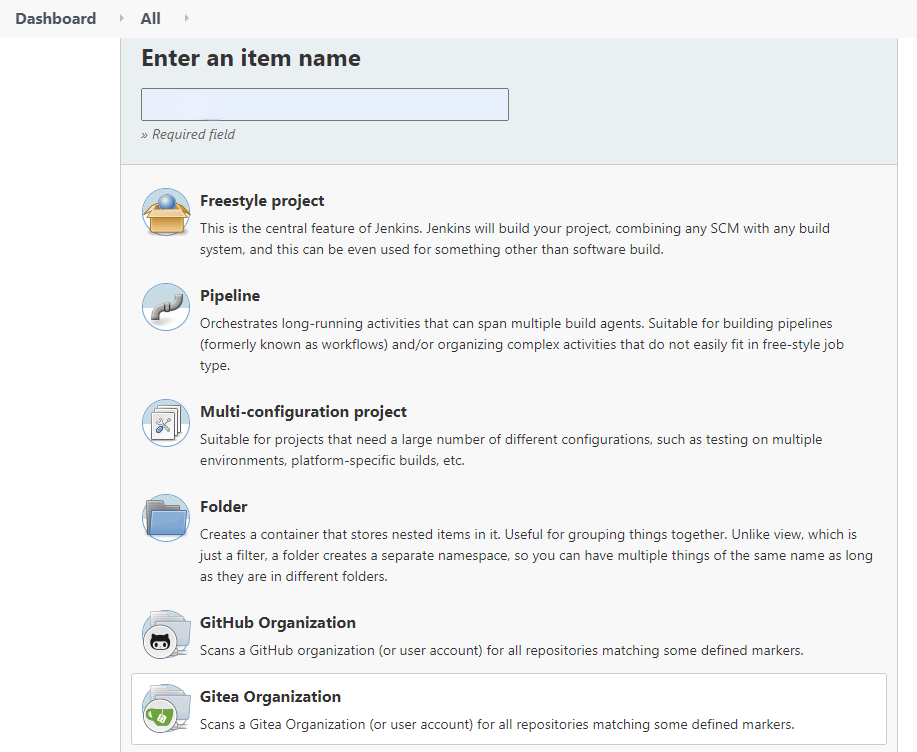
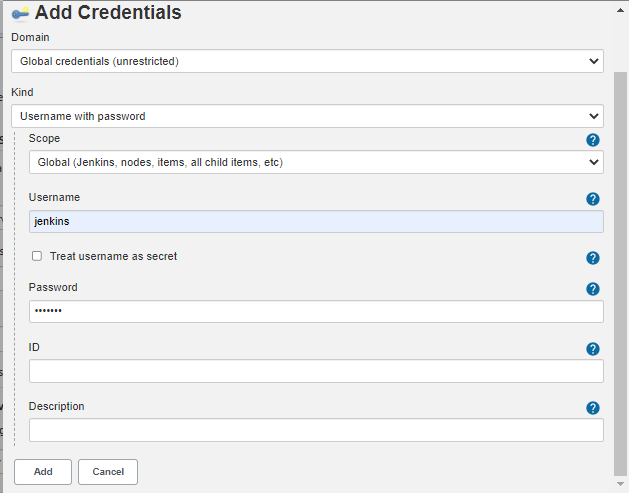
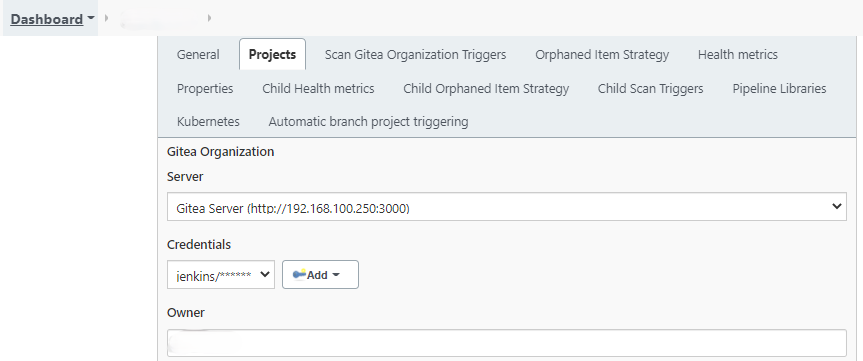
Second, creates a new seehiong Gitea Organization. Configures the Jenkins Credentials and Projects under the General tab.
Integrating Jenkins and Gitea
(5 mins)
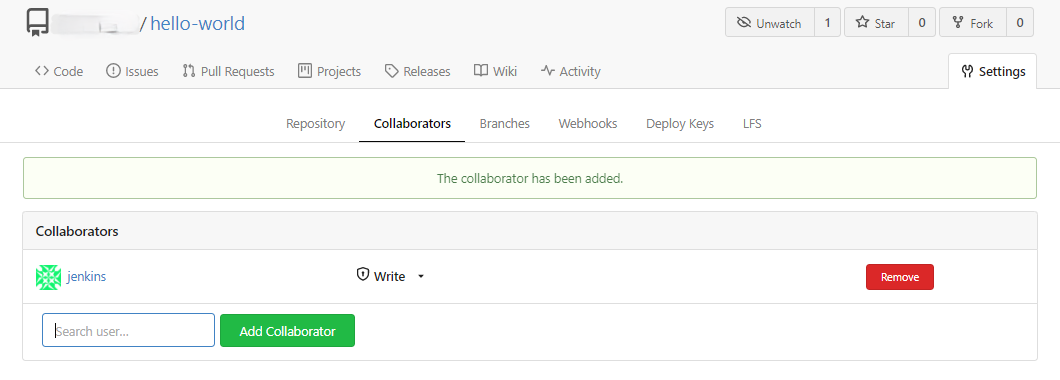
By referencing Integration between Jenkins and Gitea, adds a new seehiong organization. Then, creates a Jenkins user in Gitea and adds as collaborators.
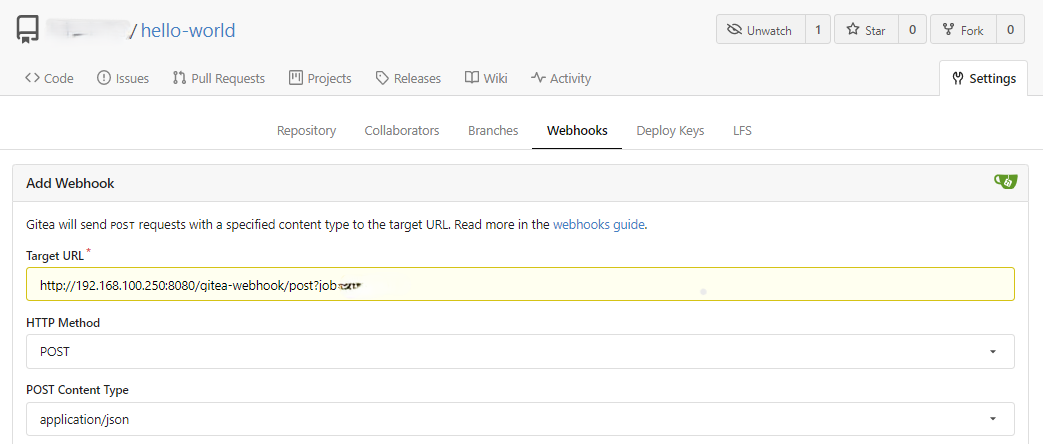
Next, adds Gitea webhooks to Jenkins and tests the delivery.

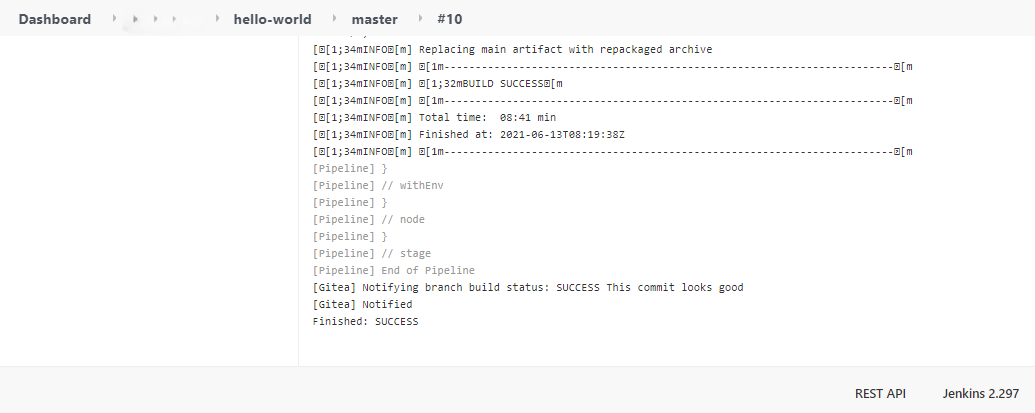
In Action
Finally, if you followed through the steps diligently, building a CI/CD pipeline on a Raspberry PI Cluster is completed. When you commit any code, it triggers the CI pipeline. Maven-agent will build and compile your code.
Troubleshooting
Error testing connection : Failure executing: GET at: https://10.96.0.1/api/v1/namespaces/default/pods. Message: Forbidden!Configured service account doesn’t have access. Service account may have been revoked.
When testing connection at Kuberenetes Cloud setting, the above error appears. You may fix by:
cd ~/jenkins
vi jenkins-rbac.yaml
# Insert below into jenkins-rbac.yaml
apiVersion: rbac.authorization.k8s.io/v1
kind: ClusterRoleBinding
metadata:
  name: jenkins-rbac
  namespace: seehiong
subjects:
  - kind: ServiceAccount
    name: default
    namespace: seehiong
roleRef:
  kind: ClusterRole
  name: cluster-admin
  apiGroup: rbac.authorization.k8s.io
kubectl apply -f jenkins-rbac.yaml
Cannot find Jenkins password in /var/jenkins/home/secrets/initialAdminPassword
Depending on your configuration, you may find the initialAdminPassword
docker ps
docker logs 90494de7c46d #Container ID

kubectl get po -n seehiong
kubectl logs -n seehiong jenkins-57fd4d8dd4-mwbpr #Pod Name
Upgrading Jenkins version
For upgrading Jenkins version, the permanent fix is to modify jenkins/Dockerfile
# Find the jenkins.war file and modify the version to the latest
RUN curl -fL -o /opt/jenkins.war http://updates.jenkins-ci.org/download/war/2.297/jenkins.war
docker build -t seehiong/jenkins:1.0 .
/home/jenkins/agent/workspace/seehiong_hello-world_master@tmp/durable-5d2c75ea/script.sh: 1: ./mvnw: Permission denied
You may check the mvnw file in your project and changes the file permission accordingly.
chmod +x mvnw

# Adds and pushes change to gitea
git update-index --chmod=+x mvnw