With Jenkins Agent for Kubernetes Cluster, you can orchestrate your build, test and scale deployment pipelines automatically
Jenkins on Kubernetes Cluster (Part II)
(Total Setup Time: 25 mins)
In this guide, I will setup Jenkins agents for previous post. With these agents, you can expand your Kubernetes cluster capabilities to handle additional loads.
Preparation
(15 mins)
First, you need to create the jenkins agent docker image for raspberry Pi cluster. You may start by creating a new Dockerfile and insert the following:
# Source
# https://hub.docker.com/r/jenkins/slave/dockerfile
FROM balenalib/raspberrypi4-64-debian-openjdk:11-bullseye

ARG VERSION=4.7
ARG user=jenkins
ARG group=jenkins
ARG uid=1000
ARG gid=1000

# Modified for debian-bullseye
RUN groupadd -g ${gid} ${group}
RUN useradd -d /home/${user} -u ${uid} -g ${group} -m ${user}
LABEL Description="This is a base image, which provides the Jenkins agent executable (slave.jar)" Vendor="Jenkins project" Version="${VERSION}"

ARG AGENT_WORKDIR=/home/${user}/agent

# Modified for debian-bullseye
RUN apt-get update && apt-get install -y curl bash git git-lfs openssh-client openssl procps \
  && curl --create-dirs -fsSLo /usr/share/jenkins/agent.jar https://repo.jenkins-ci.org/public/org/jenkins-ci/main/remoting/${VERSION}/remoting-${VERSION}.jar \
  && chmod 755 /usr/share/jenkins \
  && chmod 644 /usr/share/jenkins/agent.jar \
  && ln -sf /usr/share/jenkins/agent.jar /usr/share/jenkins/slave.jar \
  && apt-get remove -y curl

USER ${user}
ENV AGENT_WORKDIR=${AGENT_WORKDIR}
RUN mkdir /home/${user}/.jenkins && mkdir -p ${AGENT_WORKDIR}

VOLUME /home/${user}/.jenkins
VOLUME ${AGENT_WORKDIR}
WORKDIR /home/${user}

# Source
# https://hub.docker.com/r/jenkins/inbound-agent/dockerfile
USER ${user}
COPY jenkins-agent /usr/share/jenkins/jenkins-agent

USER root
COPY jenkins-agent /usr/local/bin/jenkins-agent
RUN chmod +x /usr/local/bin/jenkins-agent \
  && ln -s /usr/local/bin/jenkins-agent /usr/local/bin/jenkins-slave

USER ${user}

ENTRYPOINT ["jenkins-agent"]
Second, create a local copy of jenkins-agent file. The above COPY command will copy it into the docker image.
Third, build the jenkins-agent image and tag it:
docker build -t seehiong/jenkins-agent:1.0 .
Verify the built status by running docker images:
REPOSITORY                           TAG                 IMAGE ID            CREATED             SIZE
seehiong/jenkins-agent               1.0                 3e31e8033460        2 minutes ago       432MB
To check the java version, use docker run:
docker run -it seehiong/jenkins-agent:1.0 /bin/bash
java -version
Lastly, we are ready to configure Jenkins for Kubernetes Cluster for scalability, with this Jenkins agent image!
Configuring Jenkins Agent for Kubernetes Cluster
(5 mins)
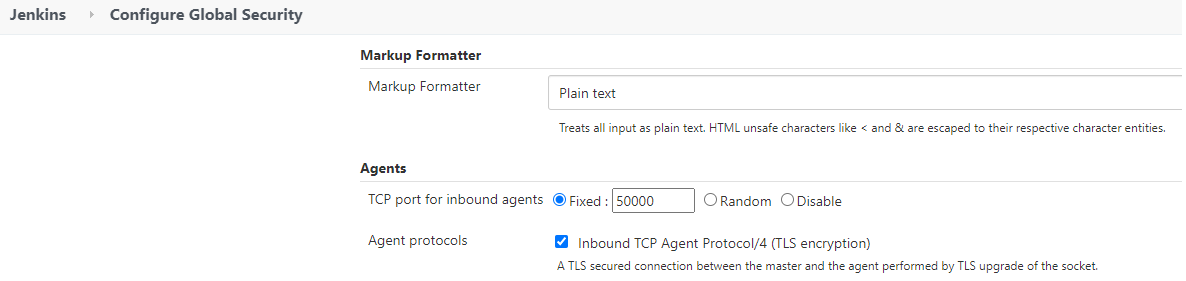
First, log into Jenkins and navigate to Jenkins > Configure Global Security. Set TCP port for inbound agents to the defualt port 50000. Since remoting 3.0 is using JNLP4-connect, verify that the Inbound TCP Agent Protocol/4 option is marked.
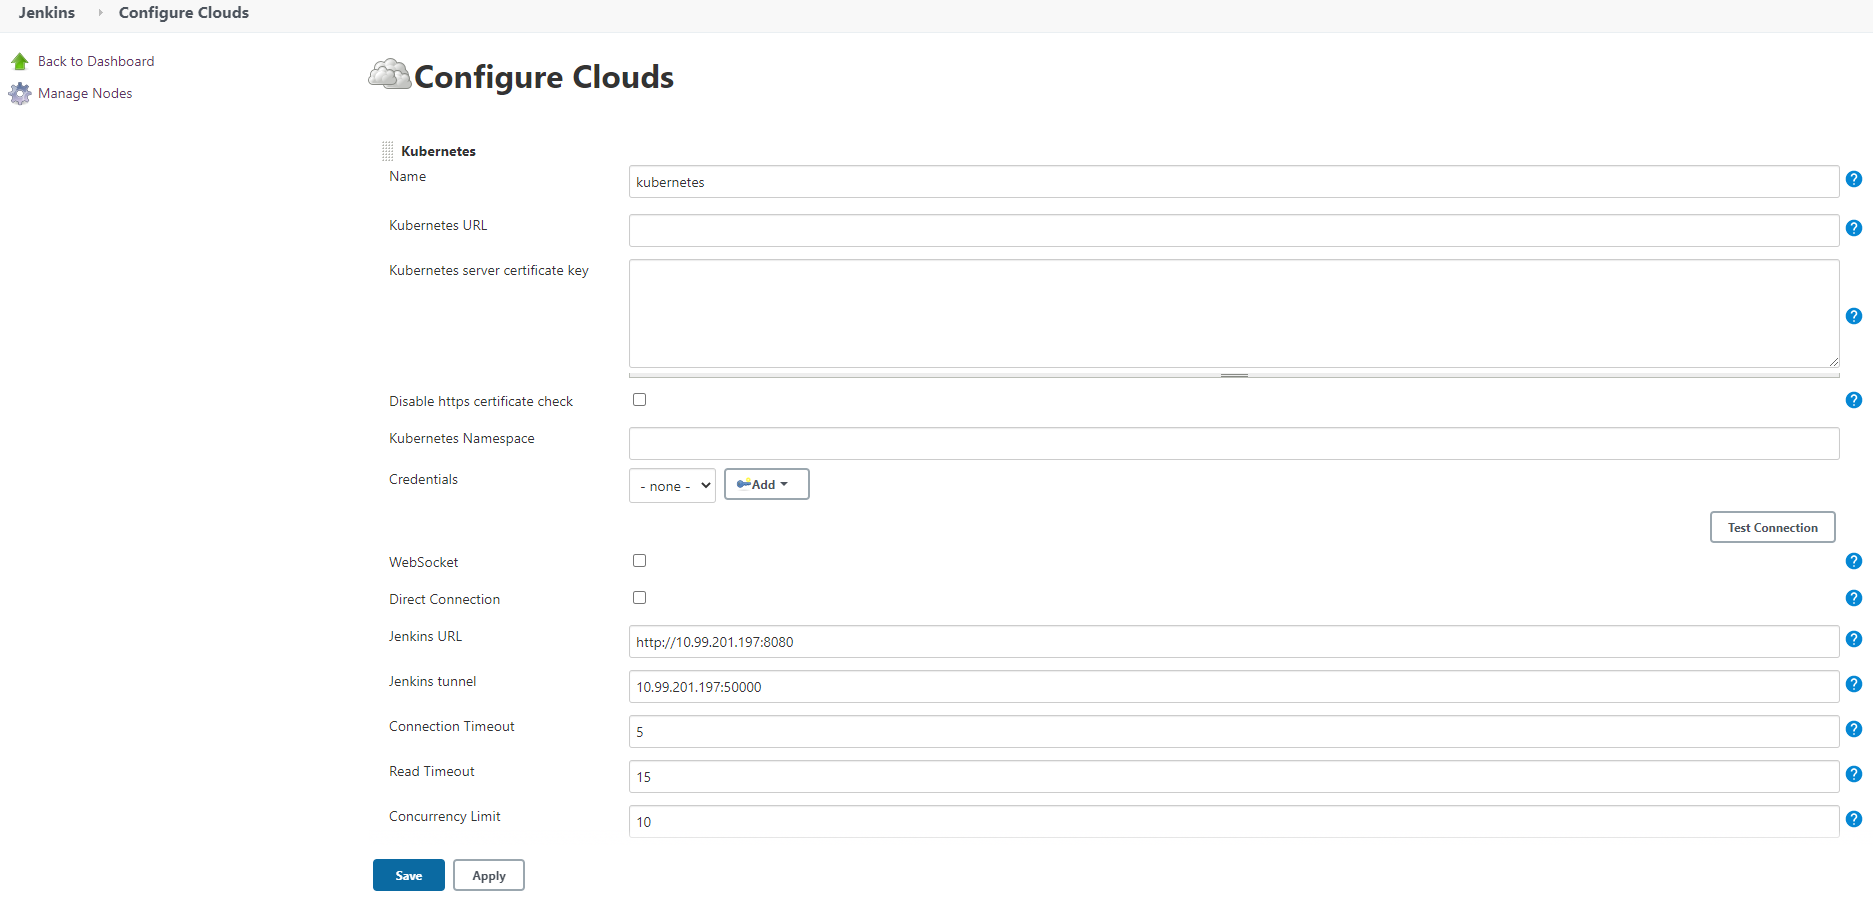
Second, navigate to Jenkins > Configure Clouds, add a new cloud and select Kubernetes. You may test the connection by clicking on the Test Connection button.
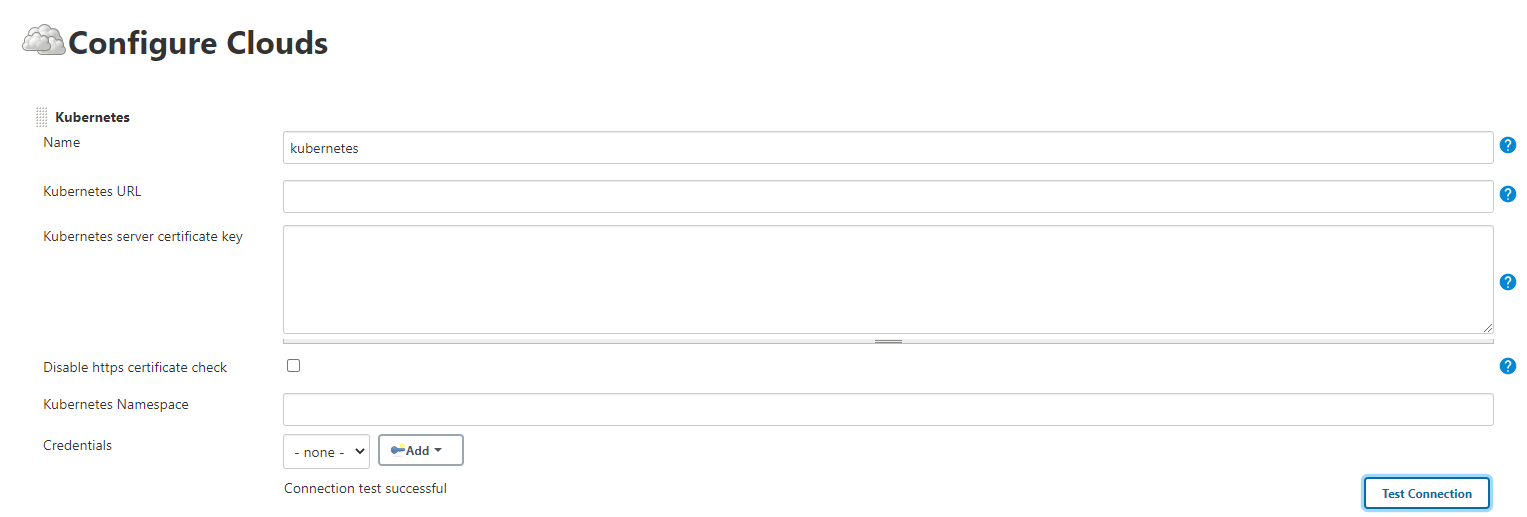
Next, check that the Jenkins URL and tunnel is set correctly. You can find the IP address by running this:
kubectl get svc

# Sample output
NAME         TYPE        CLUSTER-IP      EXTERNAL-IP   PORT(S)                          AGE
jenkins      NodePort    10.99.201.197   <none>        8080:30080/TCP,50000:32502/TCP   8d
This is the my cloud configuration:
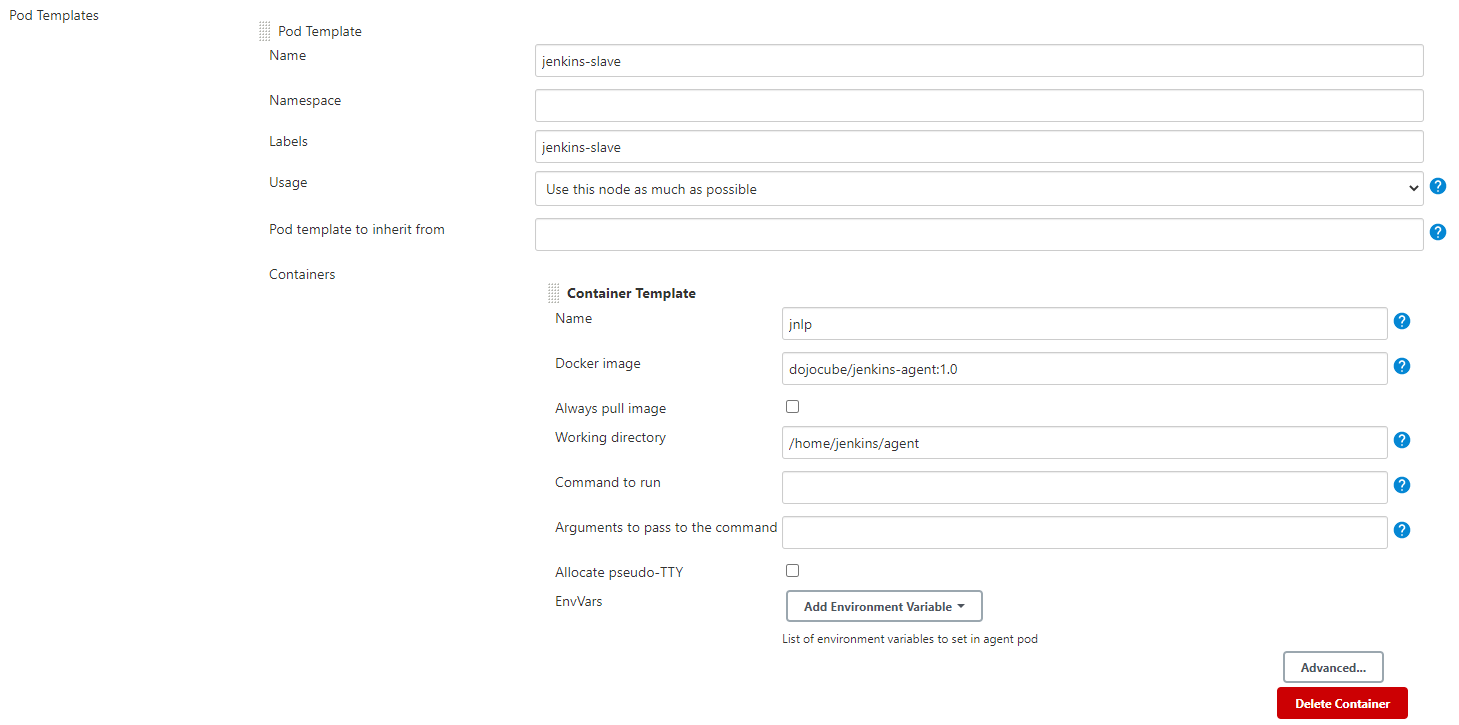
Third, click on the pod templates to add a pod template. Next, click on the add container to add a new jnlp container. This is my pod template setting:
Creating the First Jenkins Job
(5 mins)
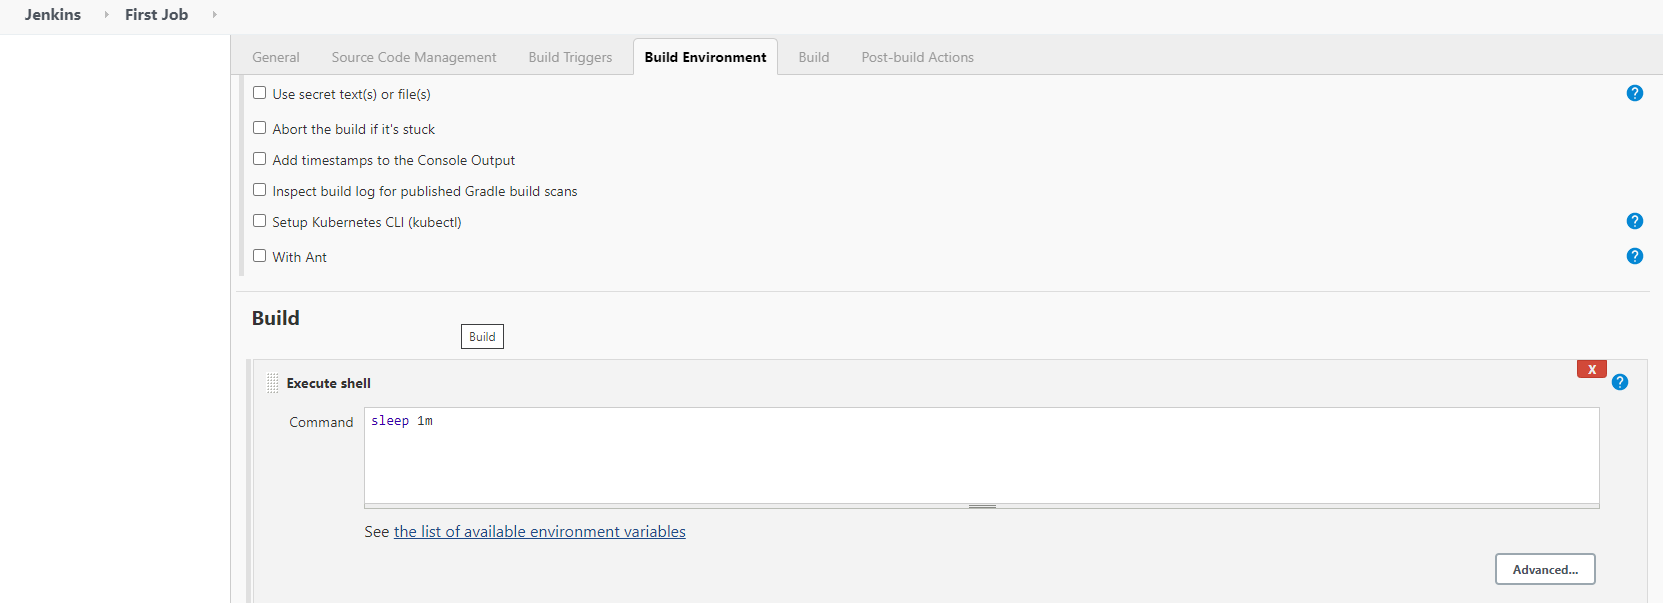
First, click on the New Item, enter item name as First Job and select Freestyle project. From the Build tab, enter any abitrary command. I use sleep 1m to execute in shell. Click on the save button.
Second, following the above steps, I created 3 jobs, to sleep for 1 minute, 45 seconds and 30 seconds respectively.
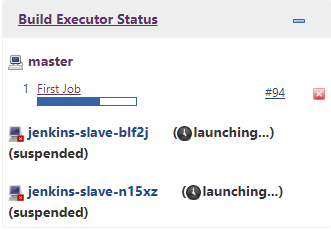
Lastlty, from the main page, you can click on the schedule a build for each job. You will notice that the jenkins-agents are initially suspended:
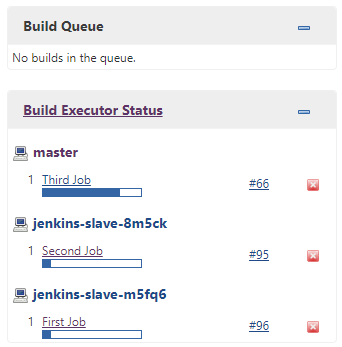
After some pod initialization processes, it will execute the jobs, similar to this:
You may check the logs from jenkins master by running:
# Get pod name
kubectl get pods
kubectl logs jenkins-7c5ffc6f55-c8fmj

That’s all folks! You have configured a working Jenkins on Kubernetes Cluster with scalability capabilities. Stay tuned to our subsequent posts on configuring Jenkins pipeline for our builds.
Troubleshooting
Nodes stay suspended
The important point to note is that, as opposed to many site on the internet, the container name must be named as jnlp. Even though it is stated correctly here, the screen shot on the page itself states otherwise.