In this post, I will walk you through the process of setting up a Kubernetes cluster using Talos Linux, an operating system specifically designed for Kubernetes that is secure, immutable, and minimal by design. Talos Linux is distinguished by its unique architecture: it is hardened by default, has no shell (bash), no SSH access, and no systemd. Instead, all management is conducted through an API.
Preparation
After downloading the ISO image, I used balenaEtcher to create a bootable USB installation media. My setup consists of one control plane node and two worker nodes. The following IP addresses were assigned:
192.168.68.115 - control-1
192.168.68.117 - worker-1
192.168.68.118 - worker-2
Installation
Installing Talos Linux CLI
To install the Talos Linux CLI on my Windows machine, I used the following command:
choco install talosctl
Some commands need to be executed from within WSL, so I installed it there with:
curl -sL https://talos.dev/install | sh
Setting Up the Talos Linux Control Node
To create a cluster named talosk8s, run the following command:
talosctl gen config talosk8s https://192.168.68.115:6443

# Sample output
generating PKI and tokens
created C:\Users\sh\controlplane.yaml
created C:\Users\sh\worker.yaml
created C:\Users\sh\talosconfig
To identify the installation disk, use:
talosctl disks --insecure -n 192.168.68.115
Here is my control-1.patch file:
# control-1.patch
machine:
  network:
    hostname: control-1
  install:
      disk: /dev/nvme0n1 # The disk used for installations.
      image: ghcr.io/siderolabs/installer:v1.7.6 # Allows for supplying the image used to perform the installation.
      wipe: true # Indicates if the installation disk should be wiped at installation time.
From within WSL, I executed the following commands:
# The CLI tool patches the original controlplane.yaml and outputs a specific control file for the node
talosctl machineconfig patch controlplane.yaml --patch @control-1.patch --output control-1.yaml

# Apply the configuration to the control node
talosctl apply-config --insecure -n 192.168.68.115 --file control-1.yaml
Once etcd is up and waiting to join the cluster, issue the bootstrap command:
talosctl bootstrap --nodes 192.168.68.115 --endpoints 192.168.68.115 --talosconfig talosconfig
Manually copy the contents of talosconfig to ~/.talos/config or %USERPROFILE%/.talos/config and update the IP address from 127.0.0.1 to 192.168.68.115:
context: talosk8s
contexts:
    talosk8s:
        endpoints:
            - 192.168.68.115
        ca: LS0tLS1xxx==
        crt: LS0tLS1xxx
        key: LS0tLS1xxx
To use kubectl or k9s, merge the configuration into the default ~/.kube/config or %USERPROFILE%/.kube/config file with:
talosctl kubeconfig -n 192.168.68.115
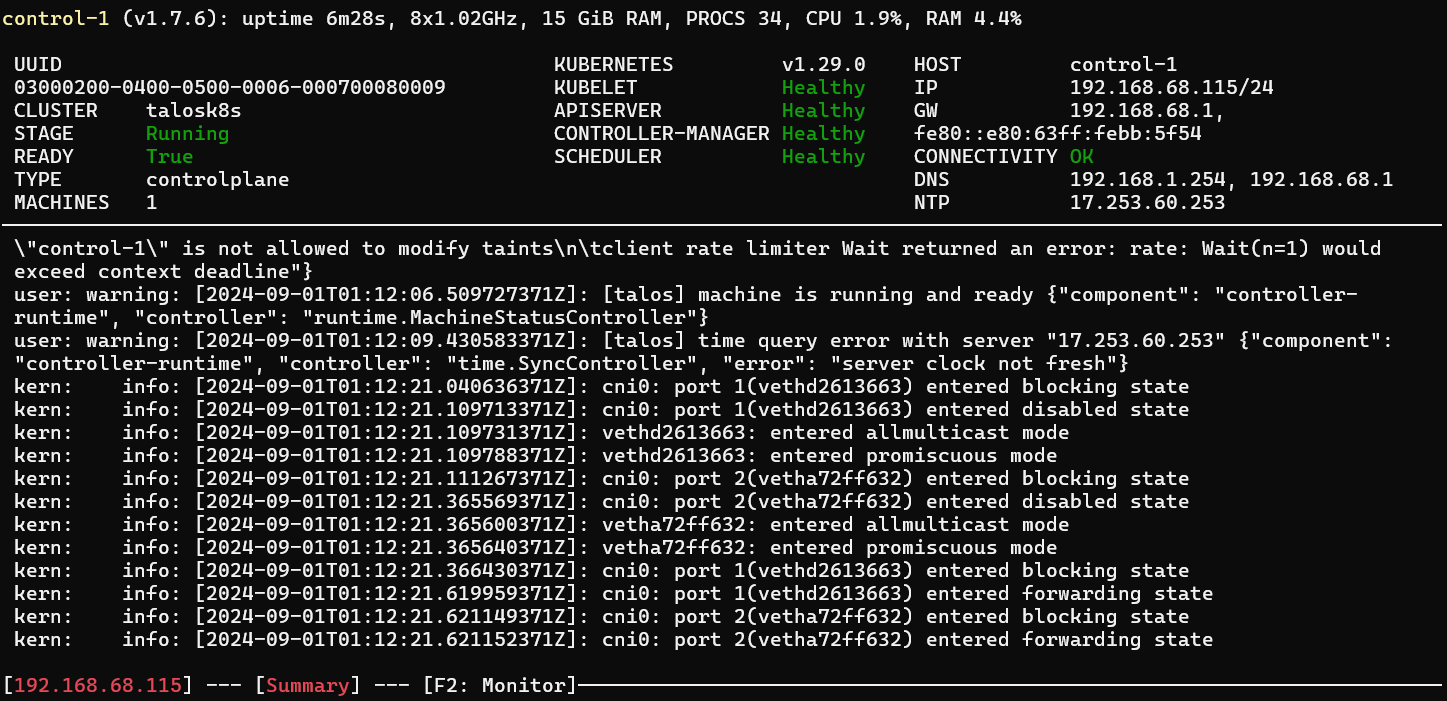
You can access the dashboard at any time with:
talosctl dashboard -n 192.168.68.115
Adding Talos Linux Worker Nodes
Next, let’s add the worker nodes. Below is the worker-1.patch file:
# worker-1.patch
machine:
  network:
    hostname: worker-1
  install:
      disk: /dev/sdb # The disk used for installations.
      image: ghcr.io/siderolabs/installer:v1.7.6 # Allows for supplying the image used to perform the installation.
      wipe: true # Indicates if the installation disk should be wiped at installation time.
NOTE: The installation disk can be identified using talosctl disks –insecure -n 192.168.68.117. Repeat this for worker-2.patch by updating its IP address and installation disk.
Within WSL, I executed these commands:
# The CLI tool patches the original worker.yaml and outputs the specific worker file for each node
talosctl machineconfig patch worker.yaml --patch @worker-1.patch --output worker-1.yaml
talosctl machineconfig patch worker.yaml --patch @worker-2.patch --output worker-2.yaml

# Apply the configuration to the corresponding worker nodes
talosctl apply-config --insecure -n 192.168.68.117 --file worker-1.yaml
talosctl apply-config --insecure -n 192.168.68.118 --file worker-2.yaml
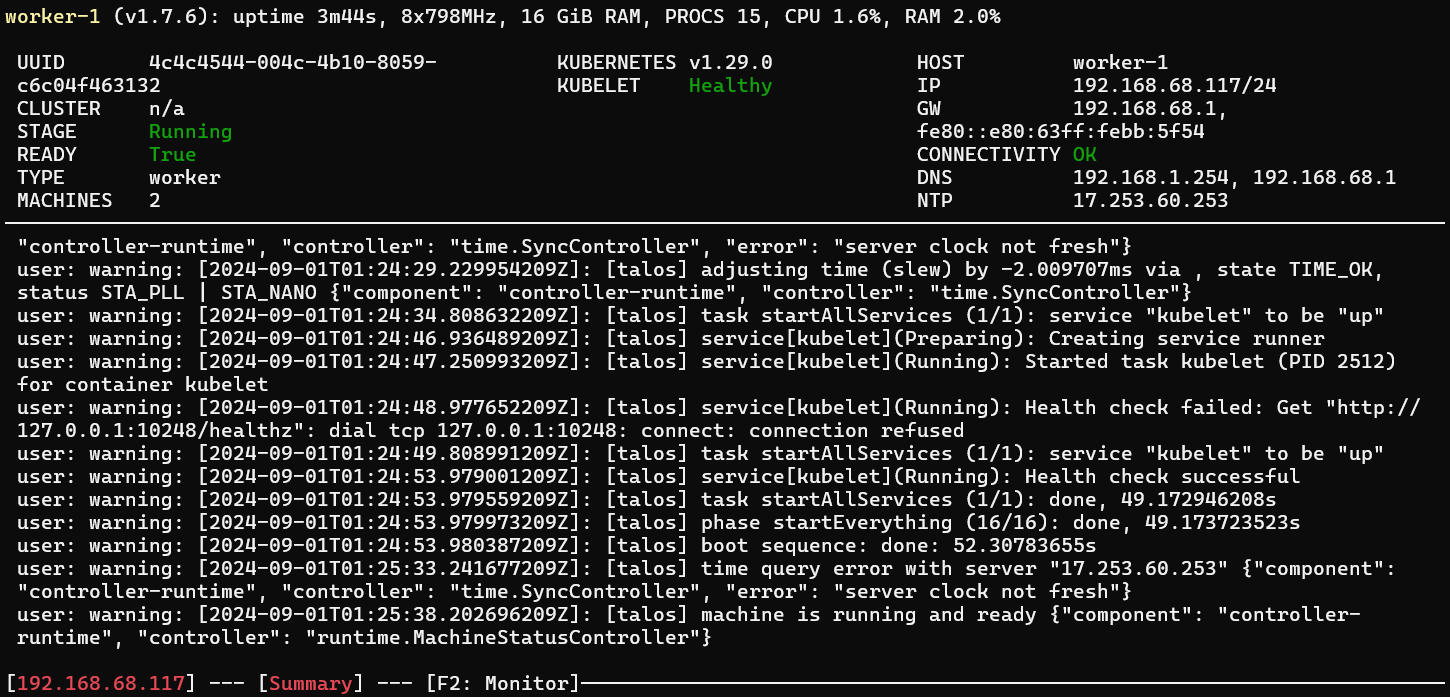
To access the dashboard for each worker node:
talosctl dashboard -n 192.168.68.117
talosctl dashboard -n 192.168.68.118
To check the version, use:
talosctl version -n 192.168.68.117 -e 192.168.68.117

# Sample output
Client:
        Tag:         v1.7.6
        SHA:         ae67123a
        Built:
        Go version:  go1.22.5
        OS/Arch:     linux/amd64
Server:
        NODE:        192.168.68.117
        Tag:         v1.7.6
        SHA:         ae67123a
        Built:
        Go version:  go1.22.5
        OS/Arch:     linux/amd64
        Enabled:     RBAC
Configuring Local Storage
Configuring hostPath Mounts
Following the official Local Storage Guide, here is my local-storage-patch.yaml file:
machine:
  kubelet:
    extraMounts:
      - destination: /var/mnt
        type: bind
        source: /var/mnt
        options:
          - bind
          - rshared
          - rw
Apply this machine configuration to all nodes:
# Control node
talosctl patch mc -p @local-storage-patch.yaml -e 192.168.68.115 -n 192.168.68.115

# All worker nodes
talosctl patch mc -p @local-storage-patch.yaml -e 192.168.68.117 -n 192.168.68.117
talosctl patch mc -p @local-storage-patch.yaml -e 192.168.68.118 -n 192.168.68.118
Local Path Provisioner
The Local Path Provisioner dynamically provisions persistent local storage for Kubernetes.
curl https://raw.githubusercontent.com/rancher/local-path-provisioner/v0.0.28/deploy/local-path-storage.yaml -O
Update the local-path-storage.yaml with the patched sections:
apiVersion: v1
kind: Namespace
metadata:
  name: local-path-storage
  labels:
    pod-security.kubernetes.io/enforce: privileged
---
apiVersion: storage.k8s.io/v1
kind: StorageClass
metadata:
  name: local-path
  annotations:
        storageclass.kubernetes.io/is-default-class: "true"
provisioner: rancher.io/local-path
volumeBindingMode: WaitForFirstConsumer
reclaimPolicy: Delete
---
kind: ConfigMap
apiVersion: v1
metadata:
  name: local-path-config
  namespace: local-path-storage
data:
  config.json: |-
    {
            "nodePathMap":[
            {
                    "node":"DEFAULT_PATH_FOR_NON_LISTED_NODES",
                    "paths":["/var/mnt"]
            }
            ]
    }
    ...
Apply the local path provisioner:
kubectl apply -f local-path-storage.yaml

kubectl get sc

# Sample output
NAME                   PROVISIONER             RECLAIMPOLICY   VOLUMEBINDINGMODE      ALLOWVOLUMEEXPANSION   AGE
local-path (default)   rancher.io/local-path   Delete          WaitForFirstConsumer   false                  38s
Setting Up the NFS External Provisioner
To install the NFS Subdir External Provisioner, use Helm:
# Install helm
sudo snap install helm --classic

helm repo add nfs-subdir-external-provisioner https://kubernetes-sigs.github.io/nfs-subdir-external-provisioner/

helm install nfs-subdir-external-provisioner nfs-subdir-external-provisioner/nfs-subdir-external-provisioner \
    --set nfs.server=192.168.68.111 \
    --set nfs.path=/mnt/public
Deploy a sample test-claim.yaml file:
kind: PersistentVolumeClaim
apiVersion: v1
metadata:
  name: test-claim
  annotations:
    nfs.io/storage-path: "test-path" # not required, depending on whether this annotation was shown in the storage class description
spec:
  storageClassName: nfs-client
  accessModes:
    - ReadWriteMany
  resources:
    requests:
      storage: 1Mi
Here is the test-pod.yaml file:
kind: Pod
apiVersion: v1
metadata:
  name: test-pod
spec:
  containers:
  - name: test-pod
    image: busybox:stable
    command:
      - "/bin/sh"
    args:
      - "-c"
      - "touch /mnt/SUCCESS && exit 0 || exit 1"
    volumeMounts:
      - name: nfs-pvc
        mountPath: "/mnt"
  restartPolicy: "Never"
  volumes:
    - name: nfs-pvc
      persistentVolumeClaim:
        claimName: test-claim
Apply these resources:
kubectl create -f test-claim.yaml -f test-pod.yaml
K8s Dashboard
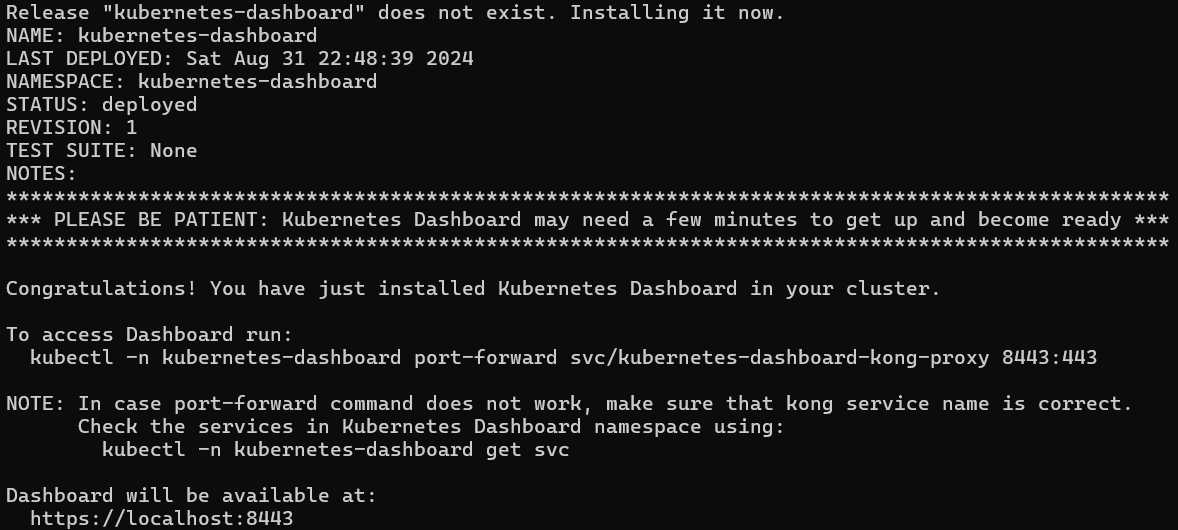
The Kubernetes Dashboard provides a web-based UI for managing Kubernetes clusters. Install it using the following commands:
# Add Kubernetes Dashboard repository
helm repo add kubernetes-dashboard https://kubernetes.github.io/dashboard/

# Deploy Kubernetes Dashboard
helm upgrade --install kubernetes-dashboard kubernetes-dashboard/kubernetes-dashboard --create-namespace --namespace kubernetes-dashboard
Following the Creating a Sample User guide, here is my dashboard-adminuser.yaml configuration:
apiVersion: v1
kind: ServiceAccount
metadata:
  name: admin-user
  namespace: kubernetes-dashboard
---
apiVersion: rbac.authorization.k8s.io/v1
kind: ClusterRoleBinding
metadata:
  name: admin-user
roleRef:
  apiGroup: rbac.authorization.k8s.io
  kind: ClusterRole
  name: cluster-admin
subjects:
- kind: ServiceAccount
  name: admin-user
  namespace: kubernetes-dashboard
---
apiVersion: v1
kind: Secret
metadata:
  name: admin-user
  namespace: kubernetes-dashboard
  annotations:
    kubernetes.io/service-account.name: "admin-user"
type: kubernetes.io/service-account-token
To create the admin user, apply the configuration:
kubectl apply -f dashboard-adminuser.yaml

# Gets the access token
kubectl get secret admin-user -n kubernetes-dashboard -o jsonpath={".data.token"} | base64 -d
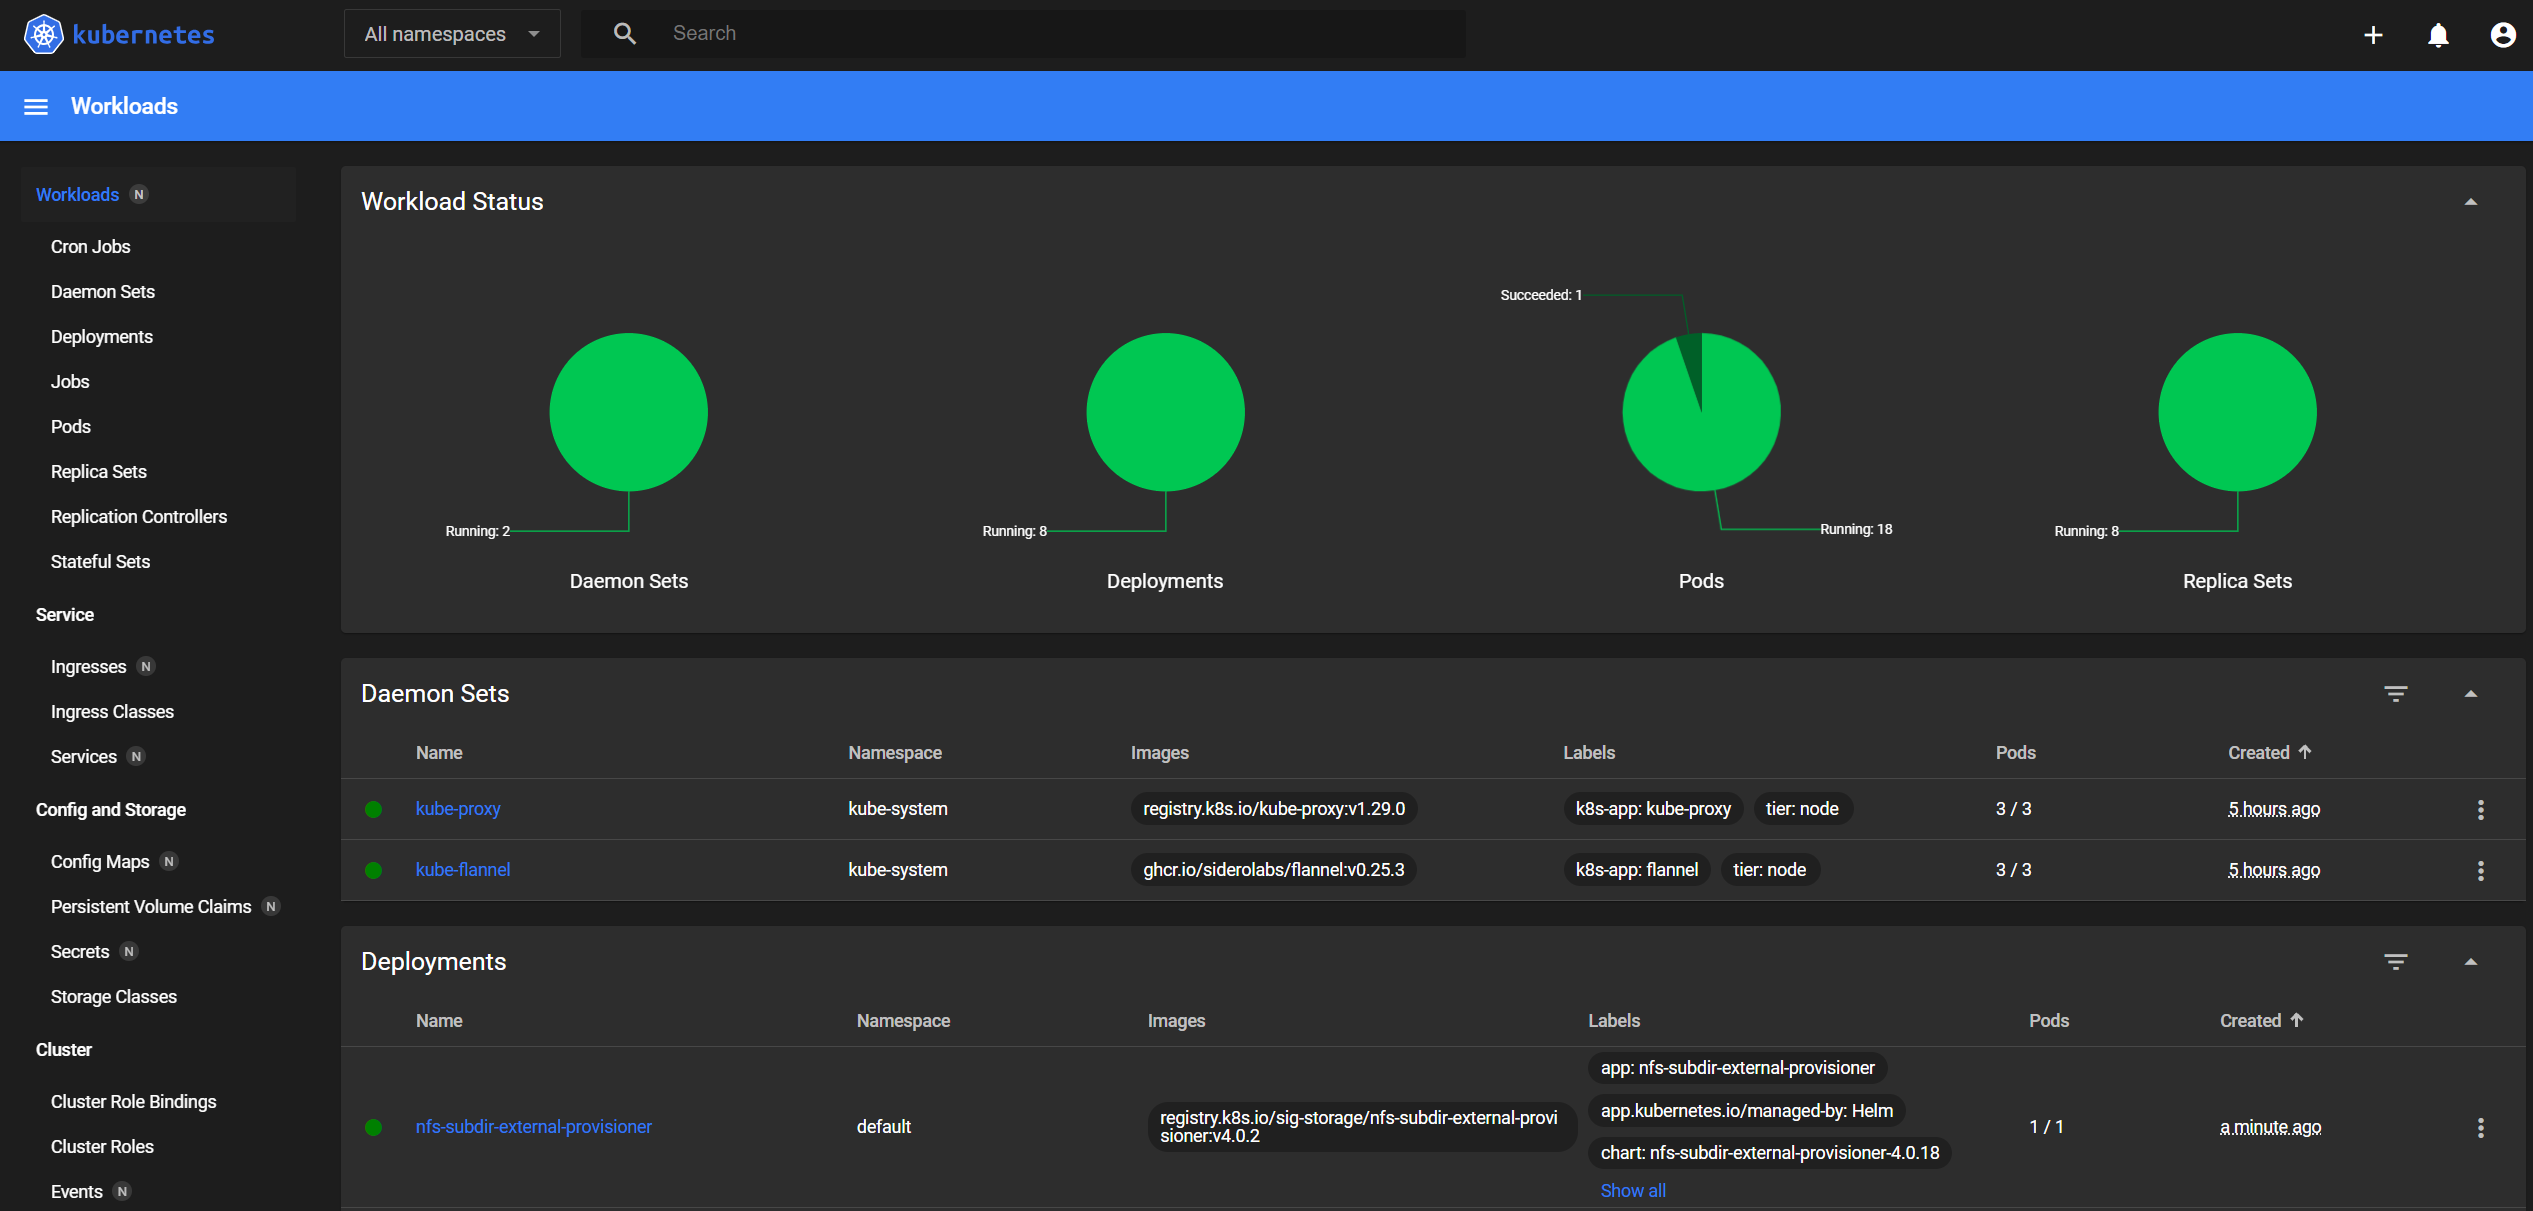
To access the dashboard, port forward from the Windows command prompt and navigate to https://localhost:8443/#/login. Use the token retrieved above to log in:
kubectl -n kubernetes-dashboard port-forward svc/kubernetes-dashboard-kong-proxy 8443:443
Conclusion
With this setup, you’ve got a highly secure, immutable Kubernetes cluster running on Talos Linux. This configuration enhances security and ensures system stability, making it a great fit for both development and production environments.