Setting Up Kafka with MicroK8s and Multipass
My homelab is a playground for experimenting with various tools and setups. However, for Proof of Concept (POC) environments, a lightweight and portable setup is often more suitable. In this post, I will guide you through setting up a MicroK8s environment in a virtual machine using Multipass. This POC demonstrates how Kafka can be set up in this environment. Multipass is a CLI tool for launching and managing VMs on Windows, Mac, and Linux, simulating a cloud environment with support for cloud-init.
Preparation
After downloading Multipass for Windows, run the installer. Since I am using Windows Professional, I opted for the recommended Microsoft Hyper-V hypervisor.
To launch a virtual machine, use the following command:
multipass launch --name mk8s-vm --memory 16G --disk 40G

# Open a shell to the VM
multipass shell mk8s-vm

# To delete the VM
multipass stop mk8s-vm
multipass delete mk8s-vm
multipass purge
Following the instructions in Installing MicroK8s with multipass, use these commands:
# Update VM instance
sudo apt update && sudo apt upgrade -y

# Install MicroK8s & configure the network
sudo snap install microk8s --classic --channel=1.30/stable
sudo iptables -P FORWARD ACCEPT

# Add the current user to the microk8s group & create a kubectl alias
sudo usermod -a -G microk8s ubuntu
sudo snap alias microk8s.kubectl kubectl

# Reopen the shell
exit
multipass shell mk8s-vm

# Start MicroK8s
microk8s start
Kafka Setup
To install Kafka, an open-source distributed event streaming platform, I will set up a single-node Apache Kafka Raft (KRaft) which uses a new quorum controller service.
- First, install Helm:
sudo snap install helm --classic

helm repo add bitnami https://charts.bitnami.com/bitnami
helm repo update
- Prepares MicroK8s for Kafka installation:
# Enable hostpath storage for kafka
microk8s enable hostpath-storage

# Setup kubeconfig for Helm installation
microk8s config > kubeconfig
cp kubeconfig .kube/config
chmod 700 .kube/config
- Referring to the Bitnami package for Apache Kafka and Kafka charts values, here is my values.yaml file under a newly created kafka folder. Adjust it according to your requirements:
replicaCount: 1

kafka:
  enabled: true
  replicaCount: 1
  configurationOverrides:
    server:
      - "process.roles=controller,broker"
      - "node.id=0"
      - "controller.quorum.voters=0@localhost:9093"
      - "listeners=PLAINTEXT://:9092,CONTROLLER://:9093"
      - "inter.broker.listener.name=PLAINTEXT"
      - "advertised.listeners=PLAINTEXT://localhost:9092"
      - "listener.security.protocol.map=PLAINTEXT:PLAINTEXT,CONTROLLER:PLAINTEXT,SASL_PLAINTEXT:SASL_PLAINTEXT"
      - "controller.listener.names=CONTROLLER"
      - "log.dirs=/bitnami/kafka/data"
      - "num.network.threads=3"
      - "num.io.threads=8"
      - "socket.send.buffer.bytes=102400"
      - "socket.receive.buffer.bytes=102400"
      - "socket.request.max.bytes=104857600"
      - "num.partitions=3"
      - "num.recovery.threads.per.data.dir=1"
      - "offsets.topic.replication.factor=1"
      - "transaction.state.log.replication.factor=1"
      - "transaction.state.log.min.isr=1"
      - "log.retention.hours=168"
      - "log.segment.bytes=1073741824"
      - "log.retention.check.interval.ms=300000"
      - "zookeeper.connect="
      - "group.initial.rebalance.delay.ms=0"

extraConfig: |
  offsets.topic.replication.factor=1
  transaction.state.log.replication.factor=1

sasl:
  enabledMechanisms: PLAIN
  client:
    users:
      - user1
    passwords: "password1"

controller:
  replicaCount: 1
Note: Kafka can only run in KRaft mode with SASL_PLAINTEXT. Additionally, the extraConfig is required to avoid errors (refer to the troubleshooting section for more details).
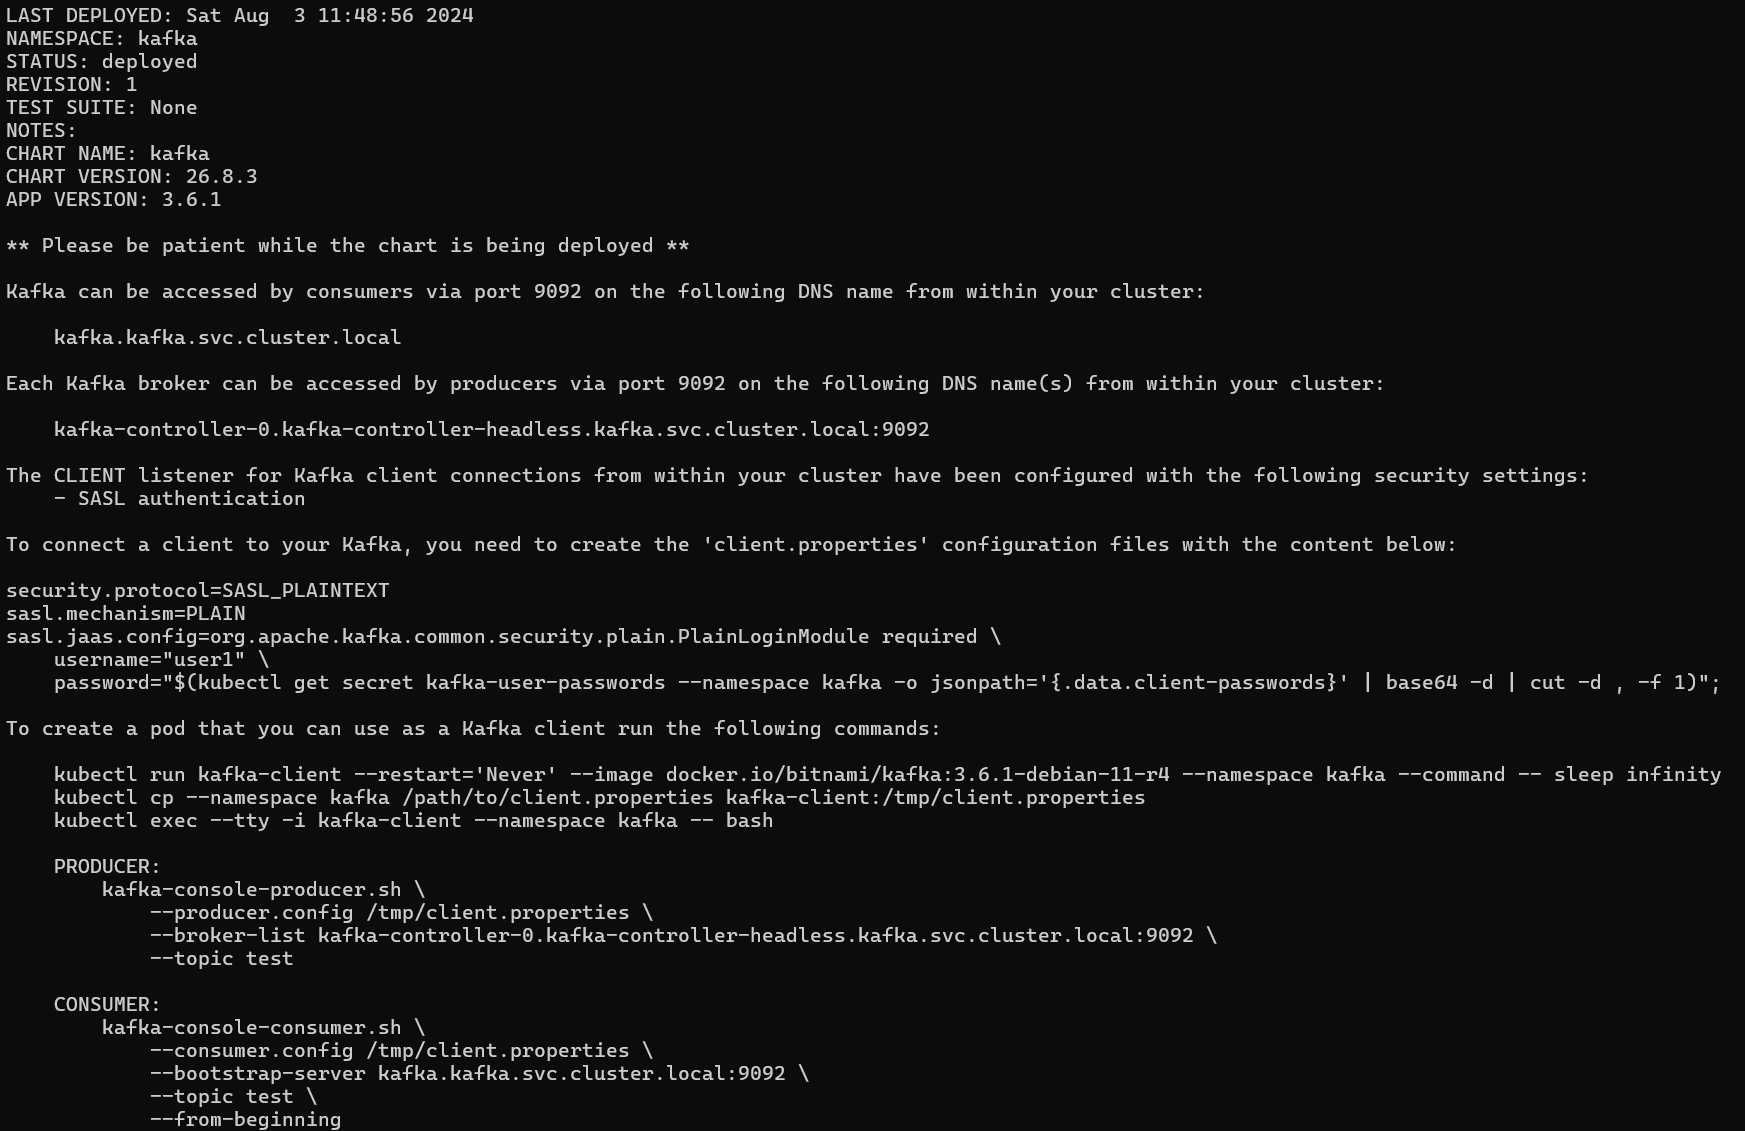
- Create a single-node Kafka pod in KRaft mode with:
kubectl create namespace kafka
helm install kafka bitnami/kafka --namespace kafka --version 26.8.3 -f values.yaml

# Uninstall Kafka
helm uninstall kafka --namespace kafka
Kafka-UI
Next, I will install the UI for Apache Kafka using the Quick start guide:
git clone https://github.com/provectus/kafka-ui-charts.git

cd kafka-ui-charts
Based on the output from the Kafka installation, here is my modified values.yaml:
yamlApplicationConfig:
  kafka:
    clusters:
      - name: yaml
        bootstrapServers: kafka-controller-0.kafka-controller-headless.kafka.svc.cluster.local:9092
        dynamicConfigEnabled: true
        properties:
          security.protocol: SASL_PLAINTEXT
          sasl.mechanism: PLAIN
          sasl.jaas.config: org.apache.kafka.common.security.plain.PlainLoginModule required username="user1" password="password1";
  auth:
    type: disabled
  management:
    health:
      ldap:
        enabled: false
service:
  type: NodePort
  nodePort: 30808
This is the command to extract the password. For this post, I hard-coded it for convenience:
password="$(kubectl get secret kafka-user-passwords --namespace kafka -o jsonpath='{.data.client-passwords}' | base64 -d | cut -d , -f 1)"
echo $password
Install Kafka-UI with:
# In the kafka//kafka-ui-charts folder
helm install kafka-ui charts/kafka-ui -f ./values.yaml --namespace kafka

# Uninstall Kafka-UI
helm uninstall kafka-ui --namespace kafka
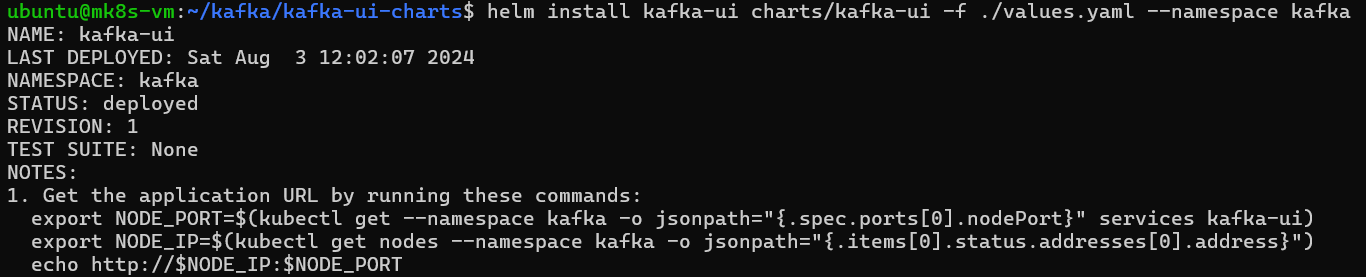
These are commands for extracting the URL:
export NODE_PORT=$(kubectl get --namespace kafka -o jsonpath="{.spec.ports[0].nodePort}" services kafka-ui)
export NODE_IP=$(kubectl get nodes --namespace kafka -o jsonpath="{.items[0].status.addresses[0].address}")
echo http://$NODE_IP:$NODE_PORT
The Kafka-UI dashboard is accessible via http://172.22.155.81:30808:

Produce and Consume Messages
First, create the client.properties file (using the same password as above):
security.protocol=SASL_PLAINTEXT
sasl.mechanism=PLAIN
sasl.jaas.config=org.apache.kafka.common.security.plain.PlainLoginModule required \
    username="user1" \
    password="password1";
Next, create a Kafka client pod:
kubectl run kafka-client --restart='Never' --image docker.io/bitnami/kafka:3.6.1-debian-11-r4 --namespace kafka --command -- sleep infinity
kubectl cp --namespace kafka client.properties kafka-client:/tmp/client.properties

# Enter the Kafka-client pod to proceed to the next steps; Ctrl-C to exit the pod
kubectl exec --tty -i kafka-client --namespace kafka -- bash

# Delete Kafka-client pod if needed
kubectl delete pod kafka-client -n kafka
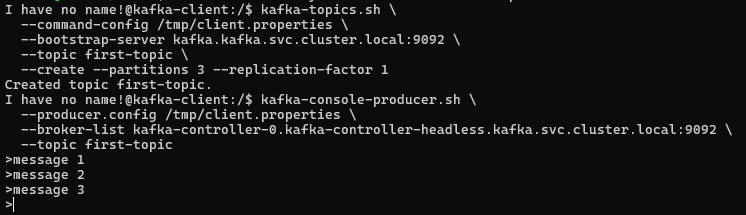
From within the kafka-client pod, create a Kafka topic:
kafka-topics.sh \
  --command-config /tmp/client.properties \
  --bootstrap-server kafka.kafka.svc.cluster.local:9092 \
  --topic first-topic \
  --create --partitions 3 --replication-factor 1
Produce messages to the topic:
# Type in the message followed by enter key to send message; Ctrl-C to exit the producer script
kafka-console-producer.sh \
  --producer.config /tmp/client.properties \
  --broker-list kafka-controller-0.kafka-controller-headless.kafka.svc.cluster.local:9092 \
  --topic first-topic
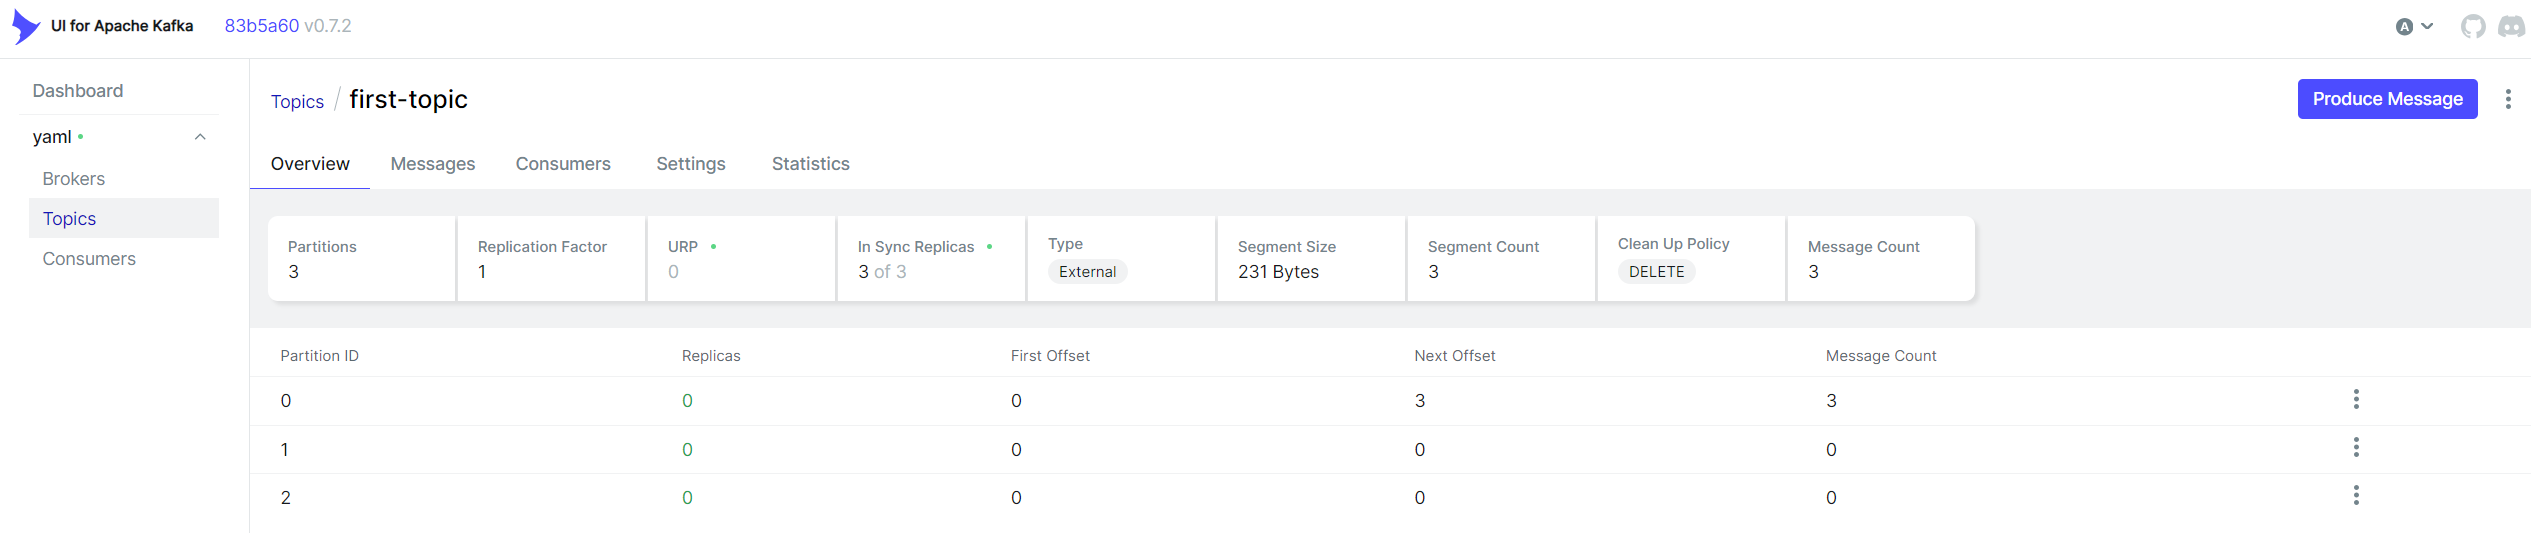
View the topic in Kafka-UI:
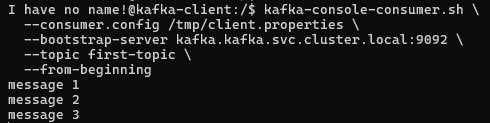
Consume messages from the topic:
kafka-console-consumer.sh \
  --consumer.config /tmp/client.properties \
  --bootstrap-server kafka.kafka.svc.cluster.local:9092 \
  --topic first-topic \
  --from-beginning
Consumer Group
To create a consumer group named my-group:
kafka-console-consumer.sh \
  --consumer.config /tmp/client.properties \
  --bootstrap-server kafka.kafka.svc.cluster.local:9092 \
  --topic first-topic \
  --group my-group

Interact with your consumer group using these commands:
# Check the consumer group state
kafka-consumer-groups.sh \
  --command-config /tmp/client.properties \
  --bootstrap-server kafka.kafka.svc.cluster.local:9092 \
  --describe --group my-group --state

# Deletion of a group is allowed if the state is empty
kafka-consumer-groups.sh \
  --command-config /tmp/client.properties \
  --bootstrap-server kafka.kafka.svc.cluster.local:9092 \
  --delete --group my-group
Kubernetes Dashboard
Launch the kubernetes dashboard:
microk8s dashboard-proxy

From the Windows command prompt, run multipass list to find the VM’s IP address (e.g., 172.22.155.81). Access the dashboard via https://172.22.155.81:10443.
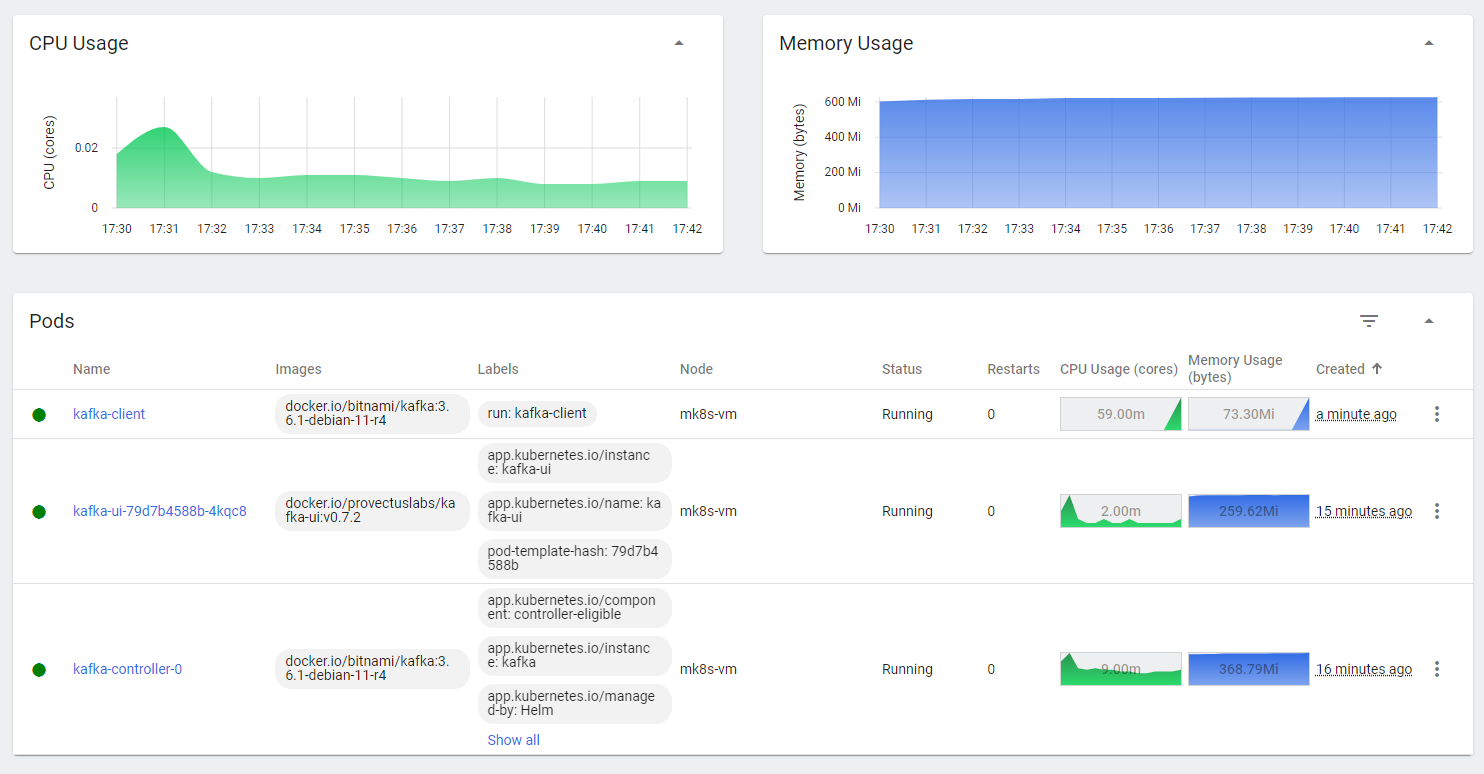
Here is the view from the Kubernetes dashboard:
Troubleshooting
Launch failed: Remote " is unknown or unreachable."
If you encounter this issue, try running:
multipass find --force-update
TLS: Failed to verify certificate: x509
If you encounter this issue:
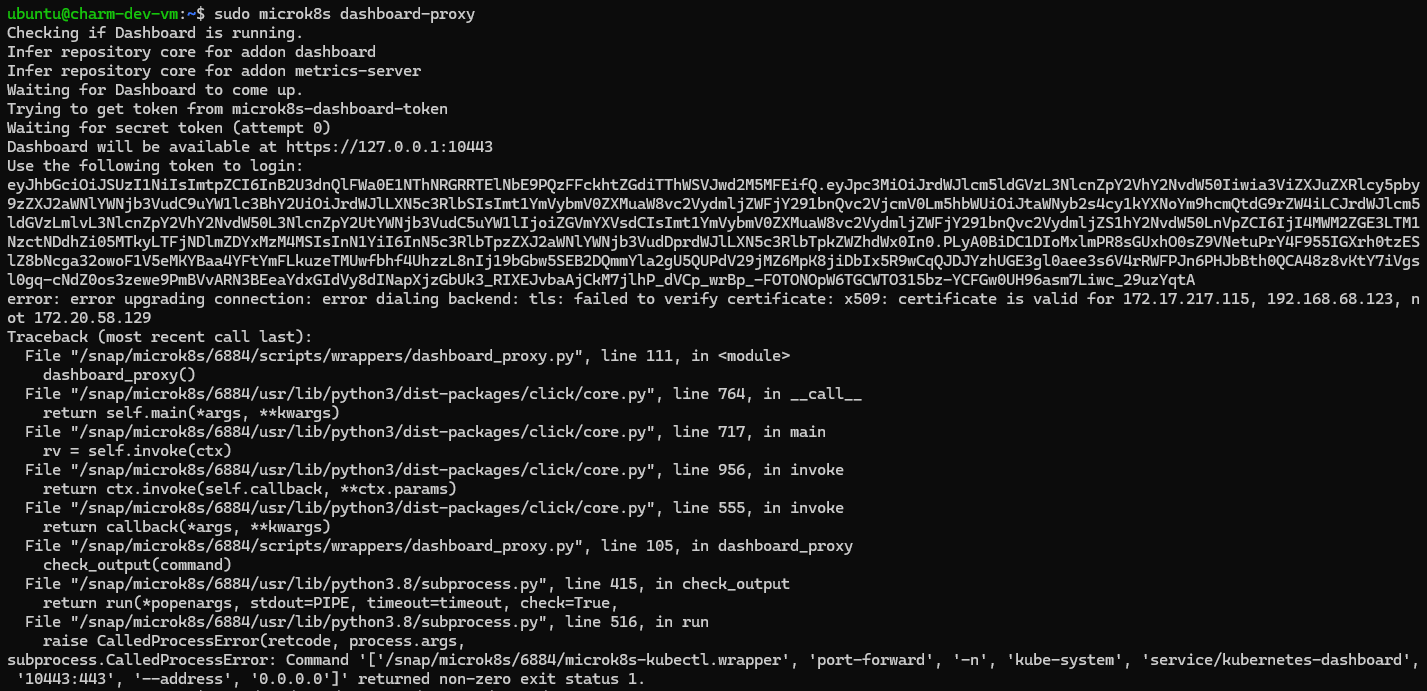
Follow the refresh certs guide:
sudo microk8s refresh-certs -e ca.crt
Timed out waiting for a node assignment. Call: describeGroups(api=FIND_COORDINATOR)
Referencing the Notable changes section, the default is 3. For my case, I had to set it in the values.yaml:
extraConfig: |
  offsets.topic.replication.factor=1
  transaction.state.log.replication.factor=1
Without the above setting, add –partition 0 to consume messages:
kafka-console-consumer.sh \
  --consumer.config /tmp/client.properties \
  --bootstrap-server kafka.kafka.svc.cluster.local:9092 \
  --topic first-topic \
  --from-beginning \
  --partition 0