Integration of Kong into AI Workflow
This post will guide you through the process of configuring Kong Gateway OSS and Kong Ingress Controller (KIC) separately and integrating Kong into our AI workflow.
Integrate via Kong Gateway OSS Configuration
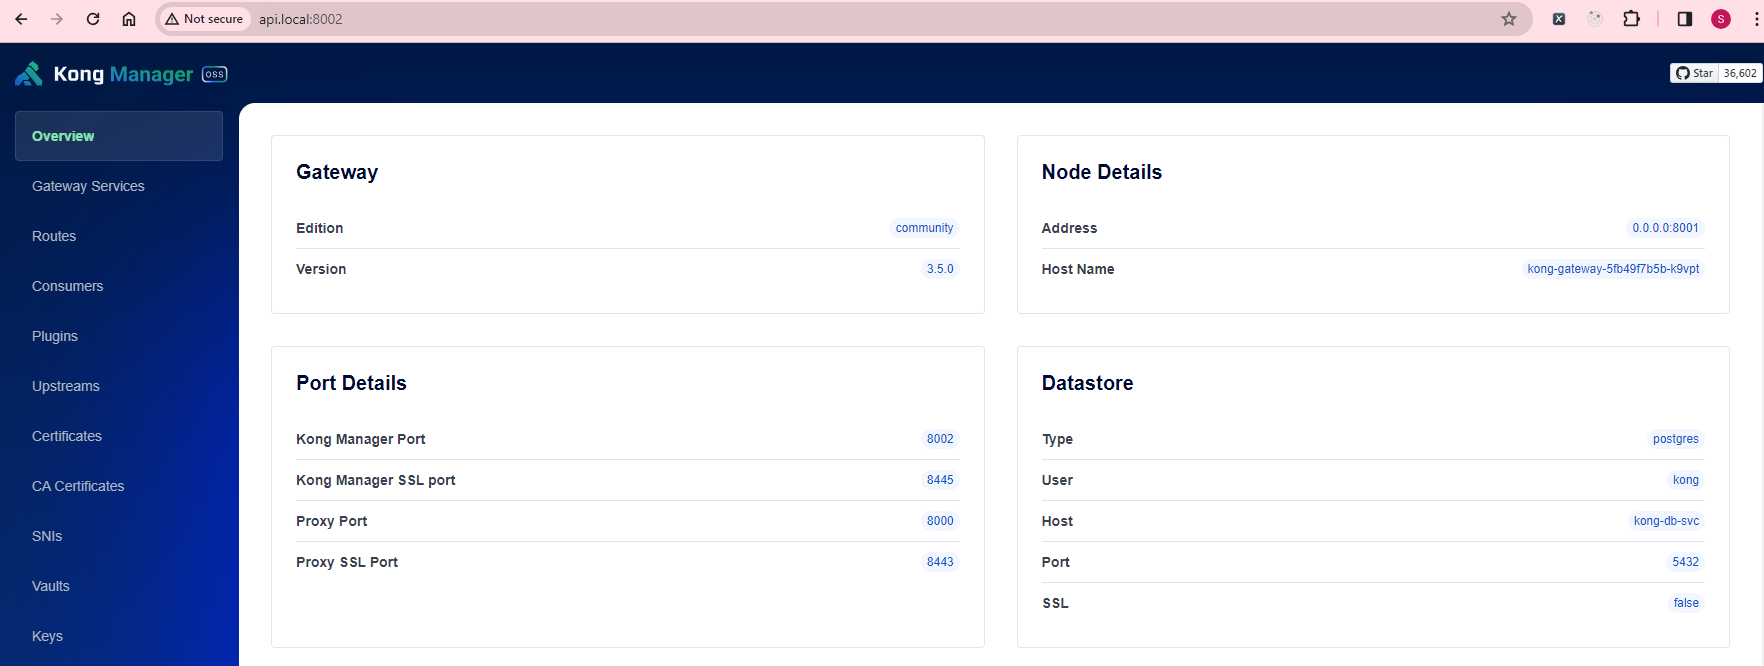
If you followed my earlier guide on setting up Kong Gateway setup, you likely use api.local:8000 to access the API.
Let’s revisit and update KONG_ADMIN_GUI_URL environment variable in the kong-deploy-svc.yaml file:
apiVersion: apps/v1
kind: Deployment
metadata:
  name: kong-gateway
  namespace: llm
spec:
  replicas: 1
  selector:
    matchLabels:
      app: kong-gateway
  template:
    metadata:
      labels:
        app: kong-gateway
    spec:
      initContainers:
        - name: kong-init
          image: 192.168.68.115:30500/kong-image:3.5.0
          command: ["kong", "migrations", "bootstrap"]
          env:
            - name: KONG_DATABASE
              value: "postgres"
            - name: KONG_PG_HOST
              value: "kong-db-svc"
            - name: KONG_PG_PASSWORD
              value: "kongpass"
            - name: KONG_PASSWORD
              value: "test"
      containers:
        - name: kong-gateway
          image: 192.168.68.115:30500/kong-image:3.5.0
          ports:
            - containerPort: 8000
            - containerPort: 8443
            - containerPort: 8001
            - containerPort: 8444
            - containerPort: 8002
            - containerPort: 8445
            - containerPort: 8003
            - containerPort: 8004
          env:
            - name: KONG_DATABASE
              value: "postgres"
            - name: KONG_PG_HOST
              value: "kong-db-svc"
            - name: KONG_PG_USER
              value: "kong"
            - name: KONG_PG_PASSWORD
              value: "kongpass"
            - name: KONG_PROXY_ACCESS_LOG
              value: "/dev/stdout"
            - name: KONG_ADMIN_ACCESS_LOG
              value: "/dev/stdout"
            - name: KONG_PROXY_ERROR_LOG
              value: "/dev/stderr"
            - name: KONG_ADMIN_ERROR_LOG
              value: "/dev/stderr"
            - name: KONG_ADMIN_LISTEN
              value: "0.0.0.0:8001"
            - name: KONG_ADMIN_GUI_URL
              value: "http://api.local:8002"
            - name: KONG_LICENSE_DATA
              value: ""
      nodeSelector:
        kubernetes.io/hostname: hp
The next change involves port 80:
apiVersion: v1
kind: Service
metadata:
  name: kong-gateway-svc
  namespace: llm
spec:
  selector:
    app: kong-gateway
  type: LoadBalancer
  ports:
    - name: http
      protocol: TCP
      port: 80
      targetPort: 8000
    - name: admin
      protocol: TCP
      port: 8001
      targetPort: 8001
    - name: manager
      protocol: TCP
      port: 8002
      targetPort: 8002
Apply the changes:
kca kong-deploy-svc.yaml
That’s it! To access the Kong Manager, navigate to http://api.local:8002

Integration with Langchain4j Application
Let’s modify our previous Langchain4j application codebase. By updating the LOCAL_AI_URL, we can now access our local LLM via Kong path-based API.
@Service
public class ModelService {
    ...
    private static final String LOCAL_AI_URL = "http://api.local/localai/v1";
}
By integrating Kong API to our AI workflow, we can easily add on new path-based API and create any number of local LLM that suits our application needs.

Remember, since we are using the POST HTTP verb here, you need to add the POST method to the route too!

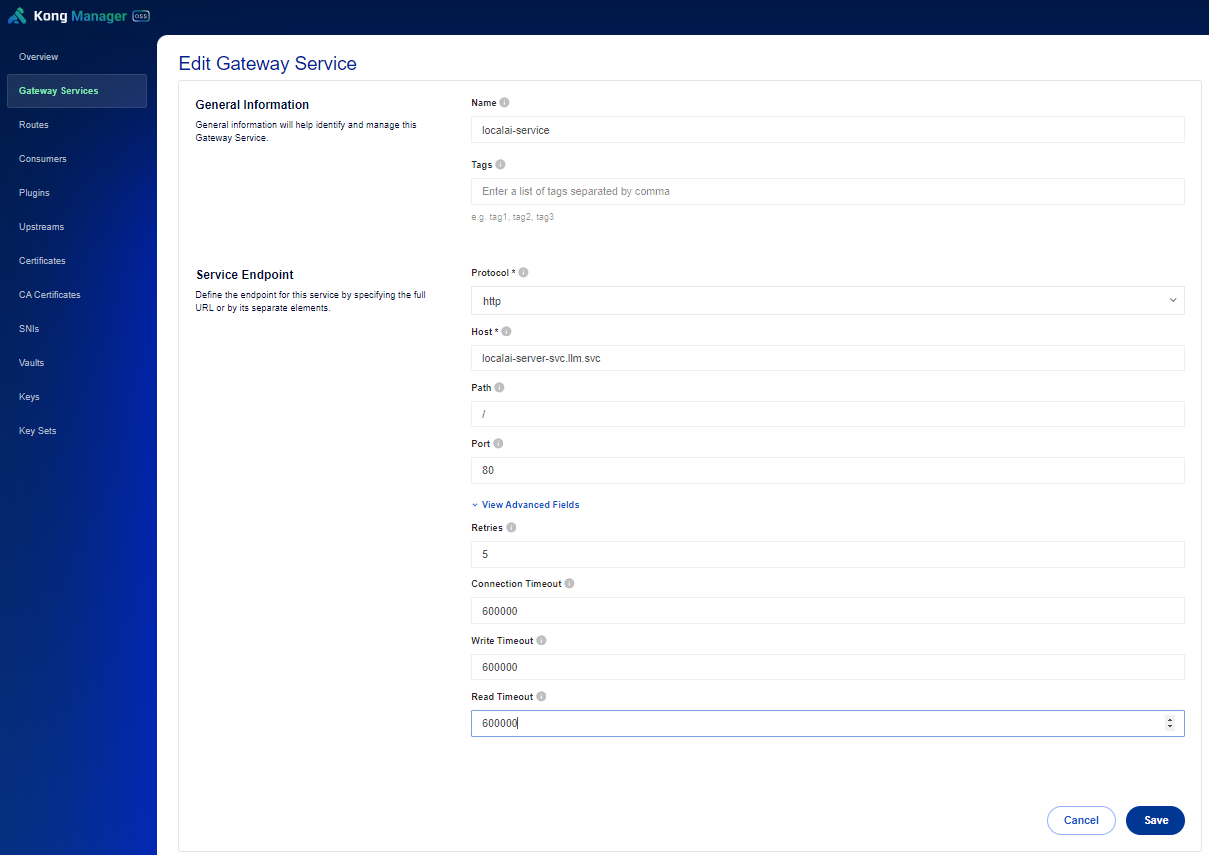
The default connection timeout is 60,000 milliseconds. If you encounter errors like “The upstream server is timing out”:

Increase the timeout setting to, say, 600,000 in Kong Manager by editing your Gateway Services’s advanced fields:

Integration via Kong Ingress Controller (KIC)
Next, I will demonstrate the configuration via KIC. Since there is no GUI along this path, let’s explore how to set things up to achieve similar results.
If you followed my previous exploration of KIC, and attempted to execute the Langchain4j application with following URL, you might encounter the same “The upstream server is timing out” error:
@Service
public class ModelService {
    ...
    private static final String LOCAL_AI_URL = "http://kic.local/localai/v1";
    }
Checking the Kong annotations, it states that konghq.com/connect-timeout should be set at the service resource level.
Here is my updated localai-svc.yml for the localai LLM resource. (you may refer to my previous LLM setup):
apiVersion: v1
kind: Service
metadata:
  name: localai-server-svc
  namespace: llm
  annotations:
    konghq.com/connect-timeout: "600000"
    konghq.com/read-timeout: "600000"
    konghq.com/write-timeout: "600000"
spec:
  selector:
    app: localai-server
  type: NodePort
  ports:
    - name: http
      protocol: TCP
      port: 80
      targetPort: 8080
      nodePort: 30808
Apply the changes:
kca localai-svc.yml
That’s it! You should now be able to access the endpoint. Choose the setting that better suits your application needs based on your use case!