In this post, I will detail the installation of MLflow and Kubeflow on my Talos Homelab cluster.
Preparation
I have decided to reinitialize my homelab. You can follow similar steps in your own environment.
Talos Setup
As outlined in my previous Talos Linux setup, here is my updated control.patch file:
machine:
    network:
      hostname: control
    install:
        disk: /dev/nvme0n1
        image: ghcr.io/siderolabs/installer:v1.7.6
        wipe: true
    kubelet:
        defaultRuntimeSeccompProfileEnabled: false
cluster:
    apiServer:
        admissionControl:
            - name: PodSecurity
              configuration:
                apiVersion: pod-security.admission.config.k8s.io/v1alpha1
                defaults:
                    audit: privileged
                    audit-version: latest
                    enforce: privileged
                    enforce-version: latest
                    warn: privileged
                    warn-version: latest
                exemptions:
                    namespaces: [] # Apply to all namespaces
                    runtimeClasses: []
                    usernames: []
                kind: PodSecurityConfiguration
I encountered an issue (time query error with server “17.253.60.125”) while setting up the latest Talos v1.8.1, which was being resolved with:
# Edit control node talosctl edit machineconfig -n 192.168.68.115machine: time: disabled: false servers: - time.cloudflare.com
For my first worker node, here’s the worker-1.patch:
machine:
  network:
    hostname: worker-1
  install:
      disk: /dev/nvme0n1
      image: ghcr.io/siderolabs/installer:v1.7.6
      wipe: true
  kubelet:
    extraMounts:
      - destination: /var/mnt
        type: bind
        source: /var/mnt
        options:
          - bind
          - rw
The installation steps remain unchanged:
# Single master node
talosctl gen config homelab https://192.168.68.115:6443
talosctl disks --insecure -n 192.168.68.115
talosctl machineconfig patch controlplane.yaml --patch @control.patch --output control.yaml
talosctl apply-config --insecure -n 192.168.68.115 --file control.yaml
talosctl bootstrap --nodes 192.168.68.115 --endpoints 192.168.68.115 --talosconfig talosconfig

# Worker nodes
talosctl machineconfig patch worker.yaml --patch @worker-1.patch --output worker-1.yaml
talosctl apply-config --insecure -n 192.168.68.117 --file worker-1.yaml
Local Path Provisioner
Local-path will serve as the default storageClass for ReadWriteOnce access modes. Follow these steps:
curl https://raw.githubusercontent.com/rancher/local-path-provisioner/v0.0.28/deploy/local-path-storage.yaml -O
Edit the local-path-storage.yaml file to set it as the default:
---
apiVersion: storage.k8s.io/v1
kind: StorageClass
metadata:
  name: local-path
  annotations:
        storageclass.kubernetes.io/is-default-class: "true" # around line 120
---
kind: ConfigMap
apiVersion: v1
metadata:
  name: local-path-config
  namespace: local-path-storage
data: # below section around line 131
  config.json: |-
    {
            "nodePathMap":[
            {
                    "node":"DEFAULT_PATH_FOR_NON_LISTED_NODES",
                    "paths":["/var/mnt"]
            }
            ]
    }
NFS
To support ReadWriteMany access modes, follow these steps:
helm repo add nfs-subdir-external-provisioner https://kubernetes-sigs.github.io/nfs-subdir-external-provisioner/
helm repo update

helm install nfs-subdir-external-provisioner nfs-subdir-external-provisioner/nfs-subdir-external-provisioner \
    --set nfs.server=192.168.68.111 \
    --set nfs.path=/mnt/public
Metallb
To install Metallb, execute the following:
curl https://raw.githubusercontent.com/metallb/metallb/v0.14.8/config/manifests/metallb-native.yaml -O
kubectl apply -f metallb-native.yaml

kubectl apply -f metallb-ipaddresspool.yaml
kubectl apply -f metallb-l2advertisement.yaml
metallb-ipaddresspool.yaml example:
apiVersion: metallb.io/v1beta1
kind: IPAddressPool
metadata:
  name: first-pool
  namespace: metallb-system
spec:
  addresses:
  - 192.168.68.220-192.168.68.240
metallb-l2advertisement.yaml example:
apiVersion: metallb.io/v1beta1
kind: L2Advertisement
metadata:
  name: first-advert
  namespace: metallb-system
spec:
  ipAddressPools:
  - first-pool
Kubeflow
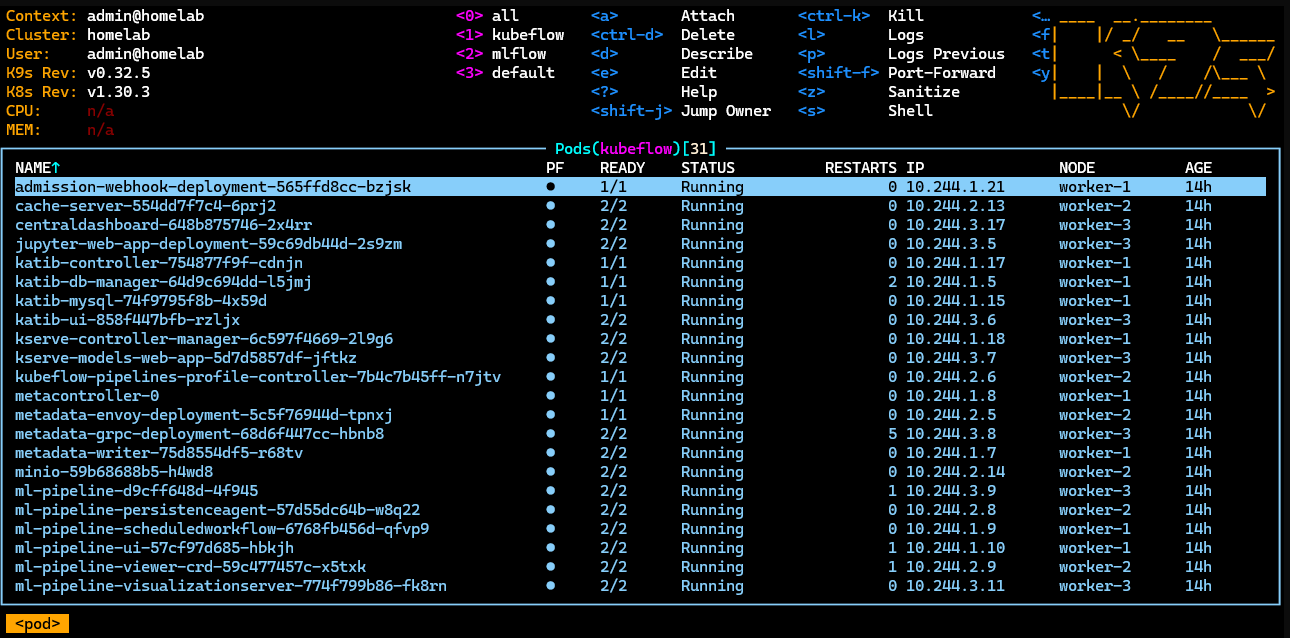
To install Kubeflow, follow the steps from my previous Kubeflow setup:
git clone https://github.com/kubeflow/manifests.git

cd manifests
while ! kustomize build example | kubectl apply -f -; do echo "Retrying to apply resources"; sleep 20; done
MLflow
MLflow is an open-source platform designed to streamline the machine learning lifecycle, ensuring that all phases are manageable and reproducible.
To install MLflow on my Talos HomeLab cluster:
helm install mlflow oci://registry-1.docker.io/bitnamicharts/mlflow --namespace mlflow --create-namespace

# Sample output
# CHART NAME: mlflow
# CHART VERSION: 2.0.2
# APP VERSION: 2.17.0
#
# ** Please be patient while the chart is being deployed **
# You didn't specify any entrypoint to your code.
# To run it, you can either deploy again using the `source.launchCommand` option to specify your entrypoint, or # # execute it manually by jumping into the pods:
#
# 1. Get the running pods
#     kubectl get pods --namespace mlflow -l "app.kubernetes.io/name=mlflow,app.kubernetes.io/instance=mlflow"
#
# 2. Get into a pod
#     kubectl exec -ti [POD_NAME] bash
#
# 3. Execute your script as you would normally do.
# MLflow Tracking Server can be accessed through the following DNS name from within your cluster:
#
#     mlflow-tracking.mlflow.svc.cluster.local (port 80)
#
# To access your MLflow site from outside the cluster follow the steps below:
#
# 1. Get the MLflow URL by running these commands:
#
#   NOTE: It may take a few minutes for the LoadBalancer IP to be available.
#         Watch the status with: 'kubectl get svc --namespace mlflow -w mlflow-tracking'
#
#    export SERVICE_IP=$(kubectl get svc --namespace mlflow mlflow-tracking --template "{{ range (index .status.# # loadBalancer.ingress 0) }}{{ . }}{{ end }}")
#    echo "MLflow URL: http://$SERVICE_IP/"
#
# 2. Open a browser and access MLflow using the obtained URL.
# 3. Login with the following credentials below to see your blog:
#
#   echo Username: $(kubectl get secret --namespace mlflow mlflow-tracking -o jsonpath="{ .data.admin-user }" | base64 -d)
#   echo Password: $(kubectl get secret --namespace mlflow mlflow-tracking -o jsonpath="{.data.admin-password }" | base64 -d)
Launching MLflow
Using K9s, you can check the external IP exposed via Metallb.
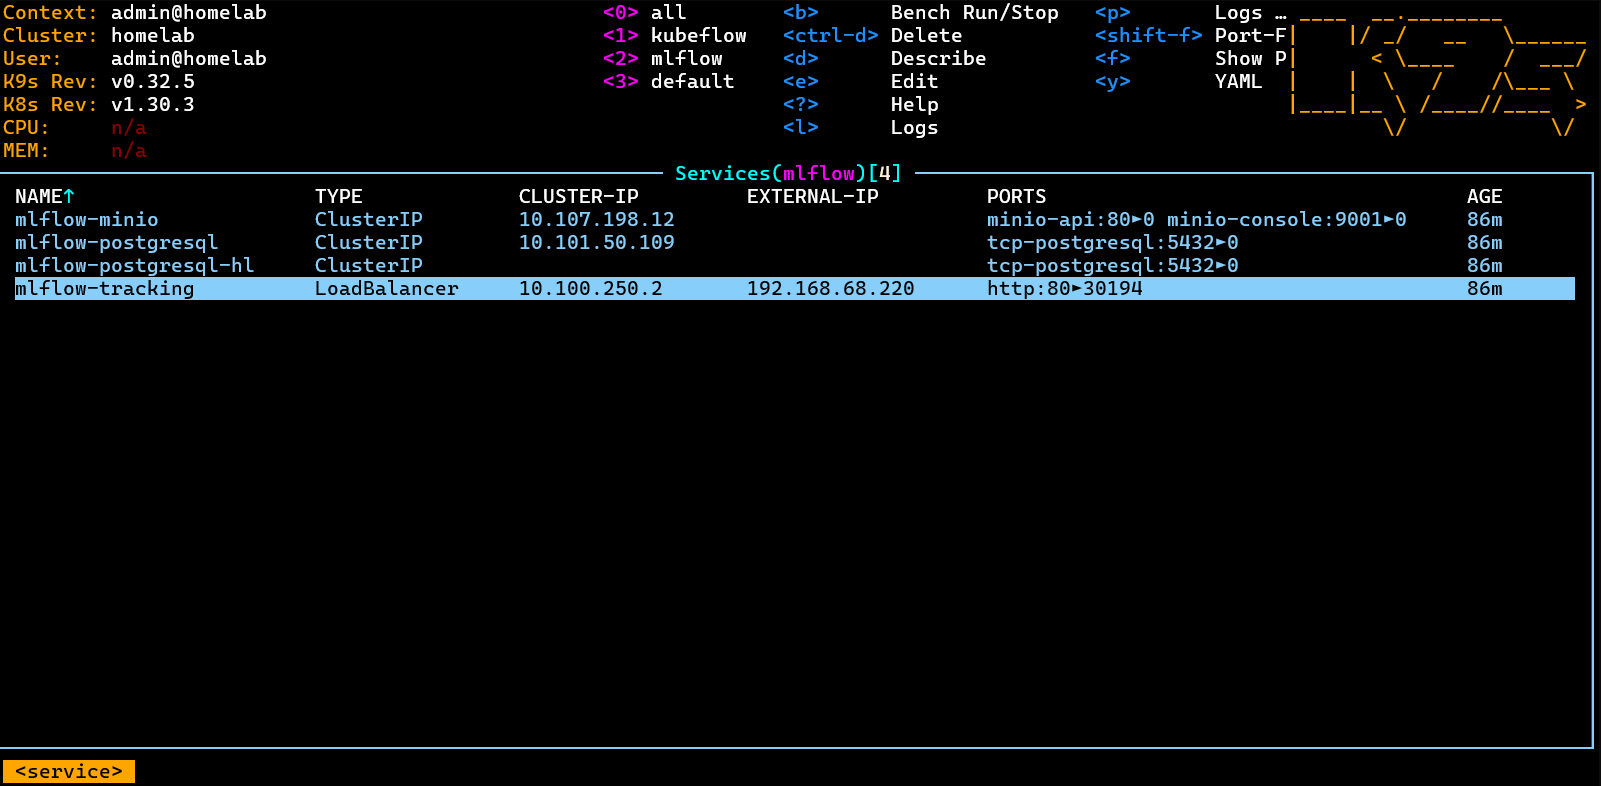
Navigate to http://192.168.68.220 and log in with:
echo Username: $(kubectl get secret --namespace mlflow mlflow-tracking -o jsonpath="{ .data.admin-user }" | base64 -d)
echo Password: $(kubectl get secret --namespace mlflow mlflow-tracking -o jsonpath="{.data.admin-password }" | base64 -d)

Launching Jupyter Notebook
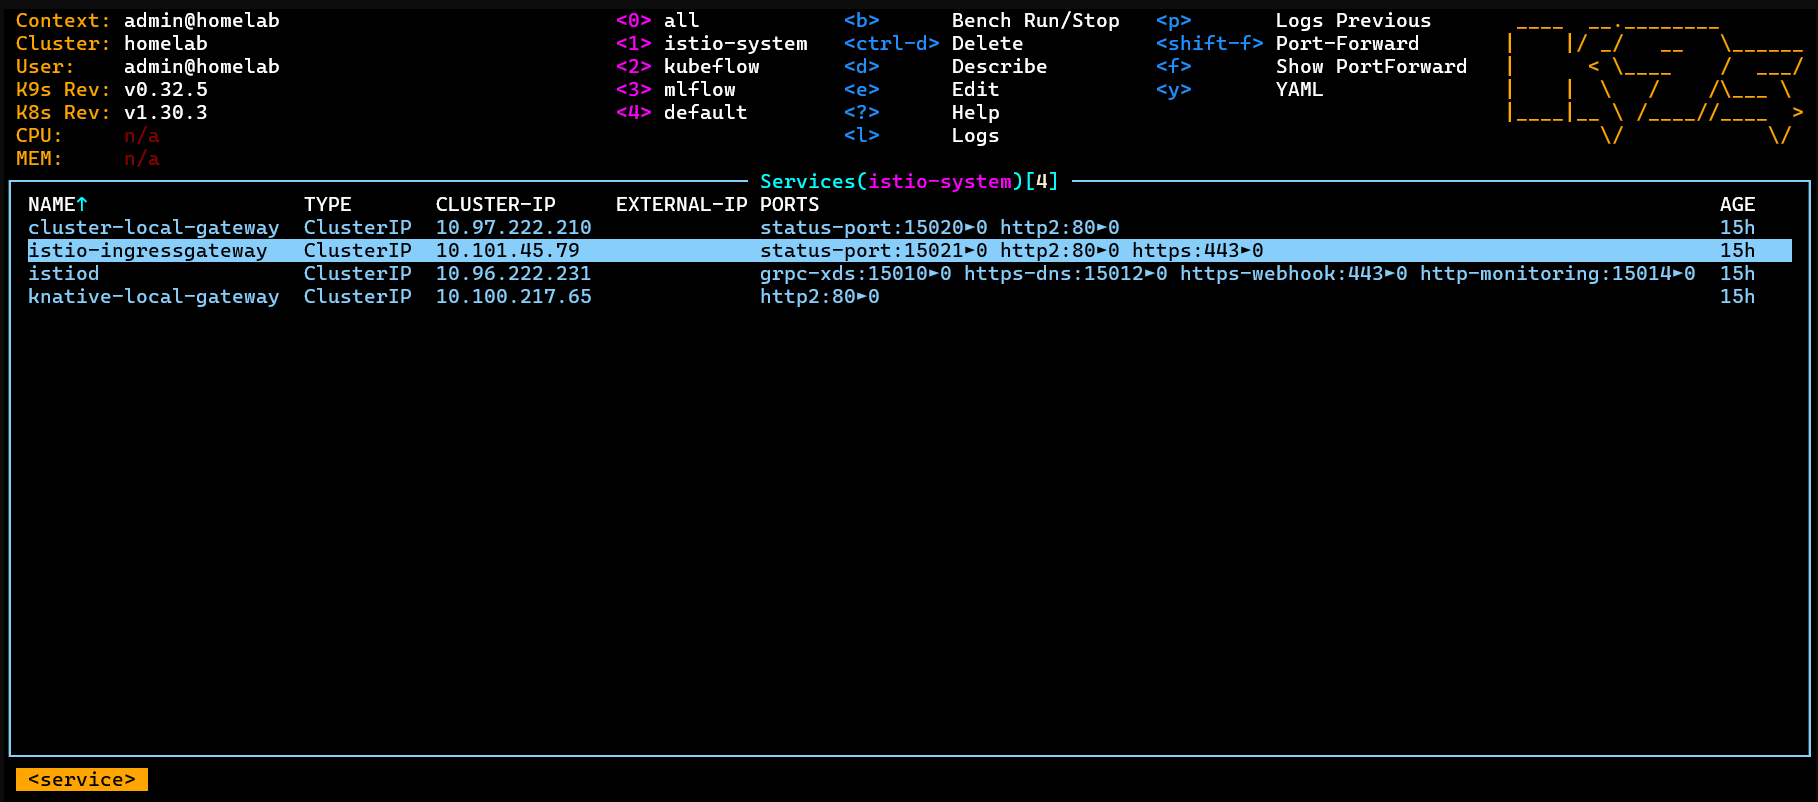
For the default Kubeflow installation, port-forward the istio-ingressgateway to port 8080:
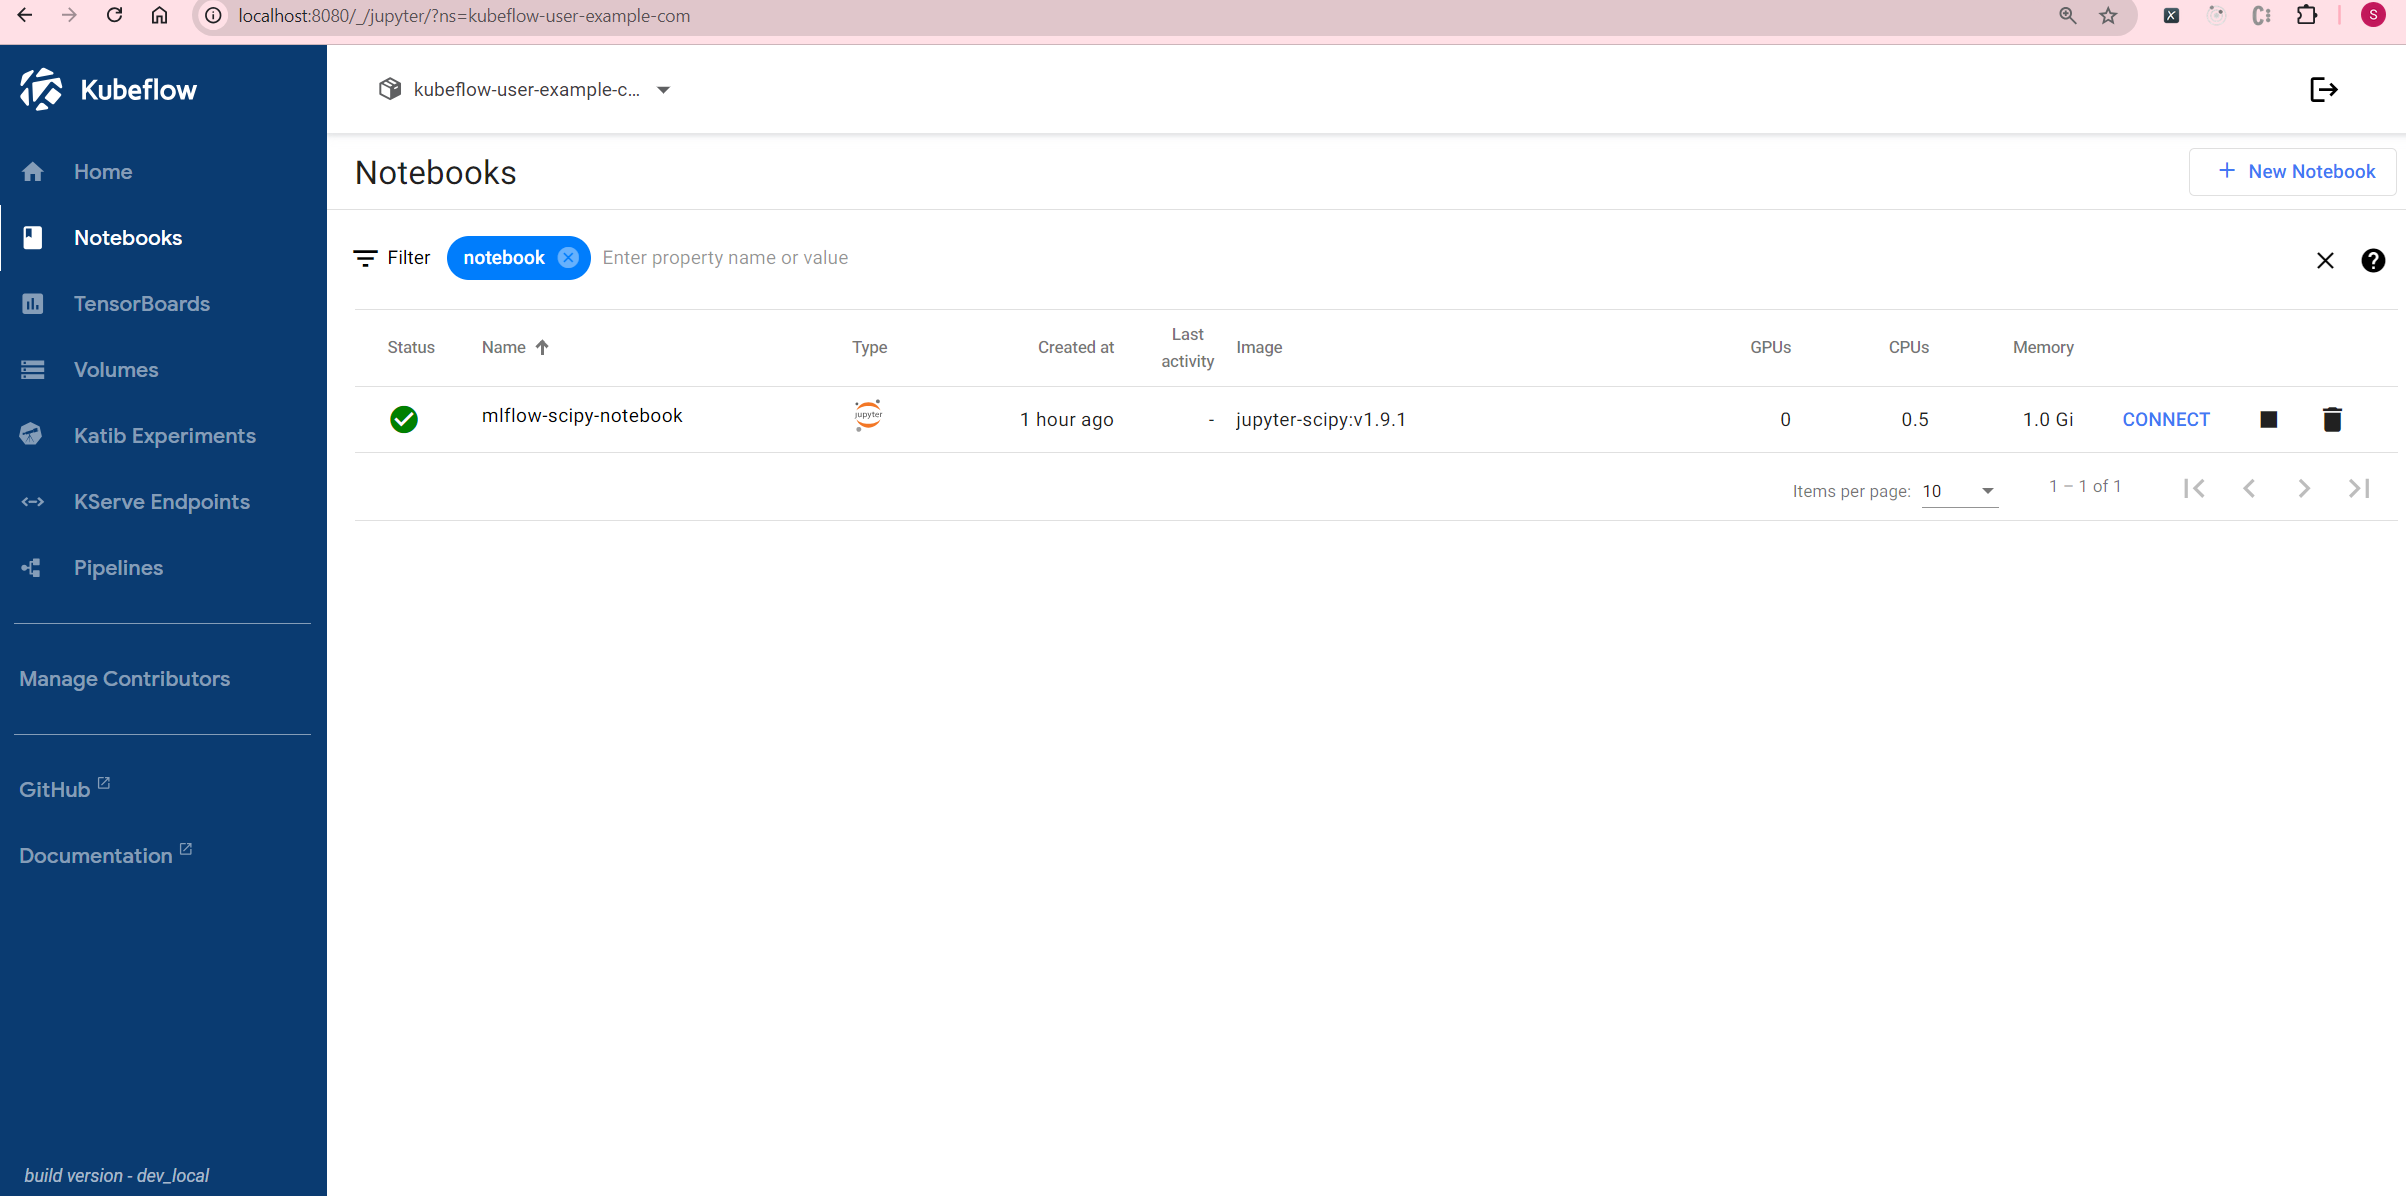
I created a new notebook using the default jupyter-scipy:v1.9.1 image.
Getting Started with MLflow
Following the official MLflow Tracking Quickstart, here are the steps:
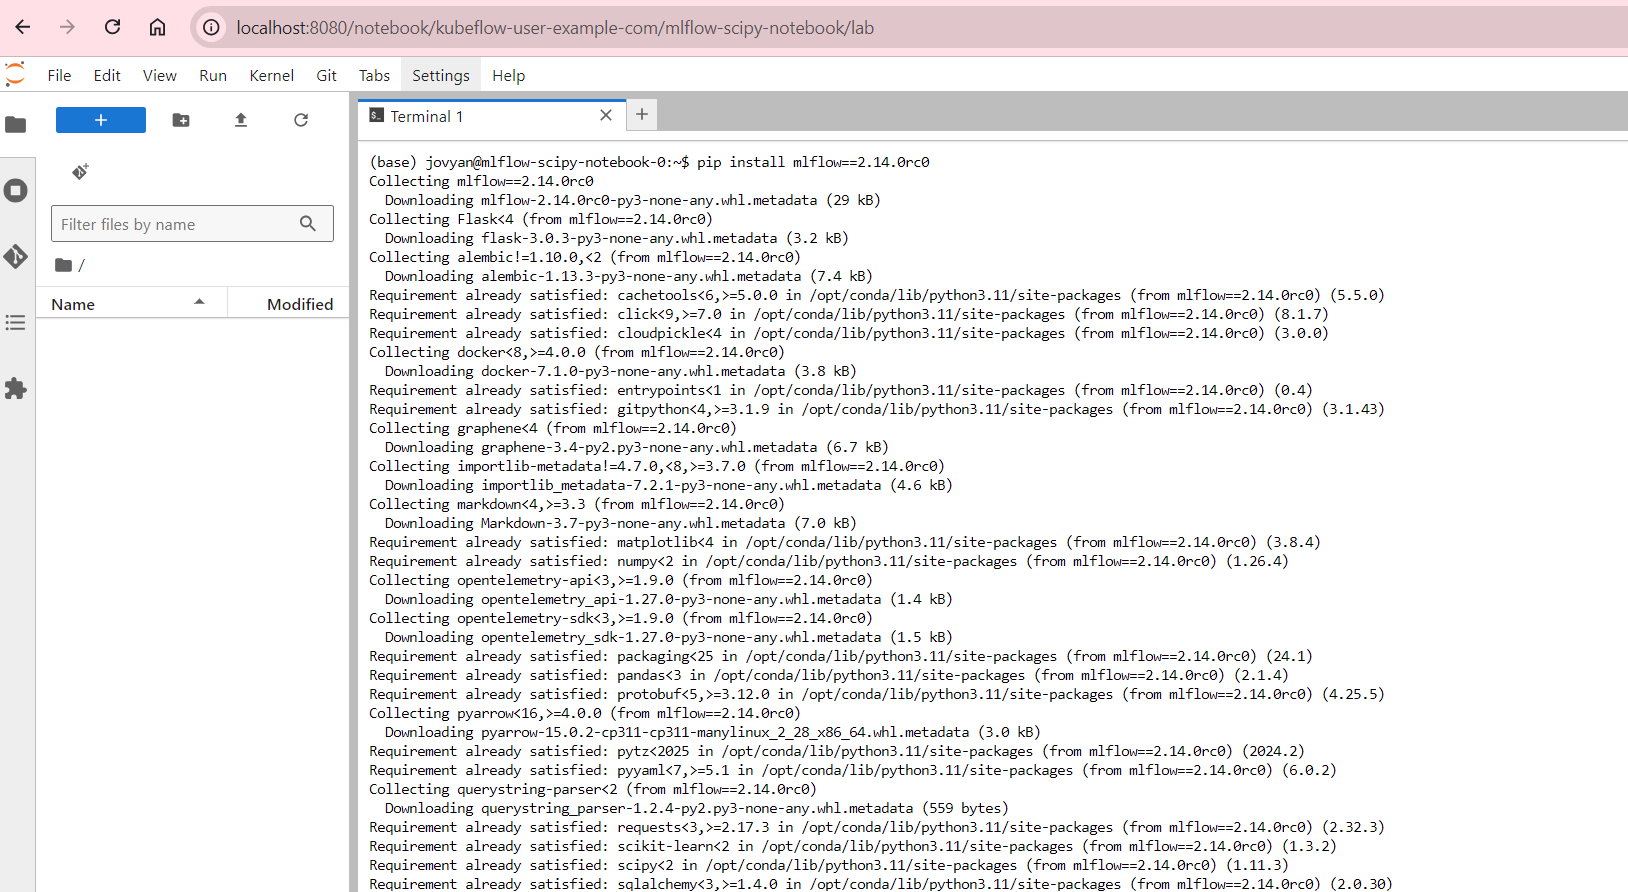
- Install MLflow:
pip install mlflow==2.14.0rc0
- Set the Tracking Server URI:
import mlflow

mlflow.set_tracking_uri(uri="http://mlflow-tracking.mlflow")
- Train a model and log metadata:
import mlflow
from mlflow.models import infer_signature

import pandas as pd
from sklearn import datasets
from sklearn.model_selection import train_test_split
from sklearn.linear_model import LogisticRegression
from sklearn.metrics import accuracy_score, precision_score, recall_score, f1_score


# Load the Iris dataset
X, y = datasets.load_iris(return_X_y=True)

# Split the data into training and test sets
X_train, X_test, y_train, y_test = train_test_split(
    X, y, test_size=0.2, random_state=42
)

# Define the model hyperparameters
params = {
    "solver": "lbfgs",
    "max_iter": 1000,
    "multi_class": "auto",
    "random_state": 8888,
}

# Train the model
lr = LogisticRegression(**params)
lr.fit(X_train, y_train)

# Predict on the test set
y_pred = lr.predict(X_test)

# Calculate metrics
accuracy = accuracy_score(y_test, y_pred)
- Log the model and metadata to MLflow:
# Set our tracking server uri for logging
mlflow.set_tracking_uri(uri="http://mlflow-tracking.mlflow")

# Create a new MLflow Experiment
mlflow.set_experiment("MLflow Quickstart")

# Start an MLflow run
with mlflow.start_run():
    # Log the hyperparameters
    mlflow.log_params(params)

    # Log the loss metric
    mlflow.log_metric("accuracy", accuracy)

    # Set a tag that we can use to remind ourselves what this run was for
    mlflow.set_tag("Training Info", "Basic LR model for iris data")

    # Infer the model signature
    signature = infer_signature(X_train, lr.predict(X_train))

    # Log the model
    model_info = mlflow.sklearn.log_model(
        sk_model=lr,
        artifact_path="iris_model",
        signature=signature,
        input_example=X_train,
        registered_model_name="tracking-quickstart",
    )
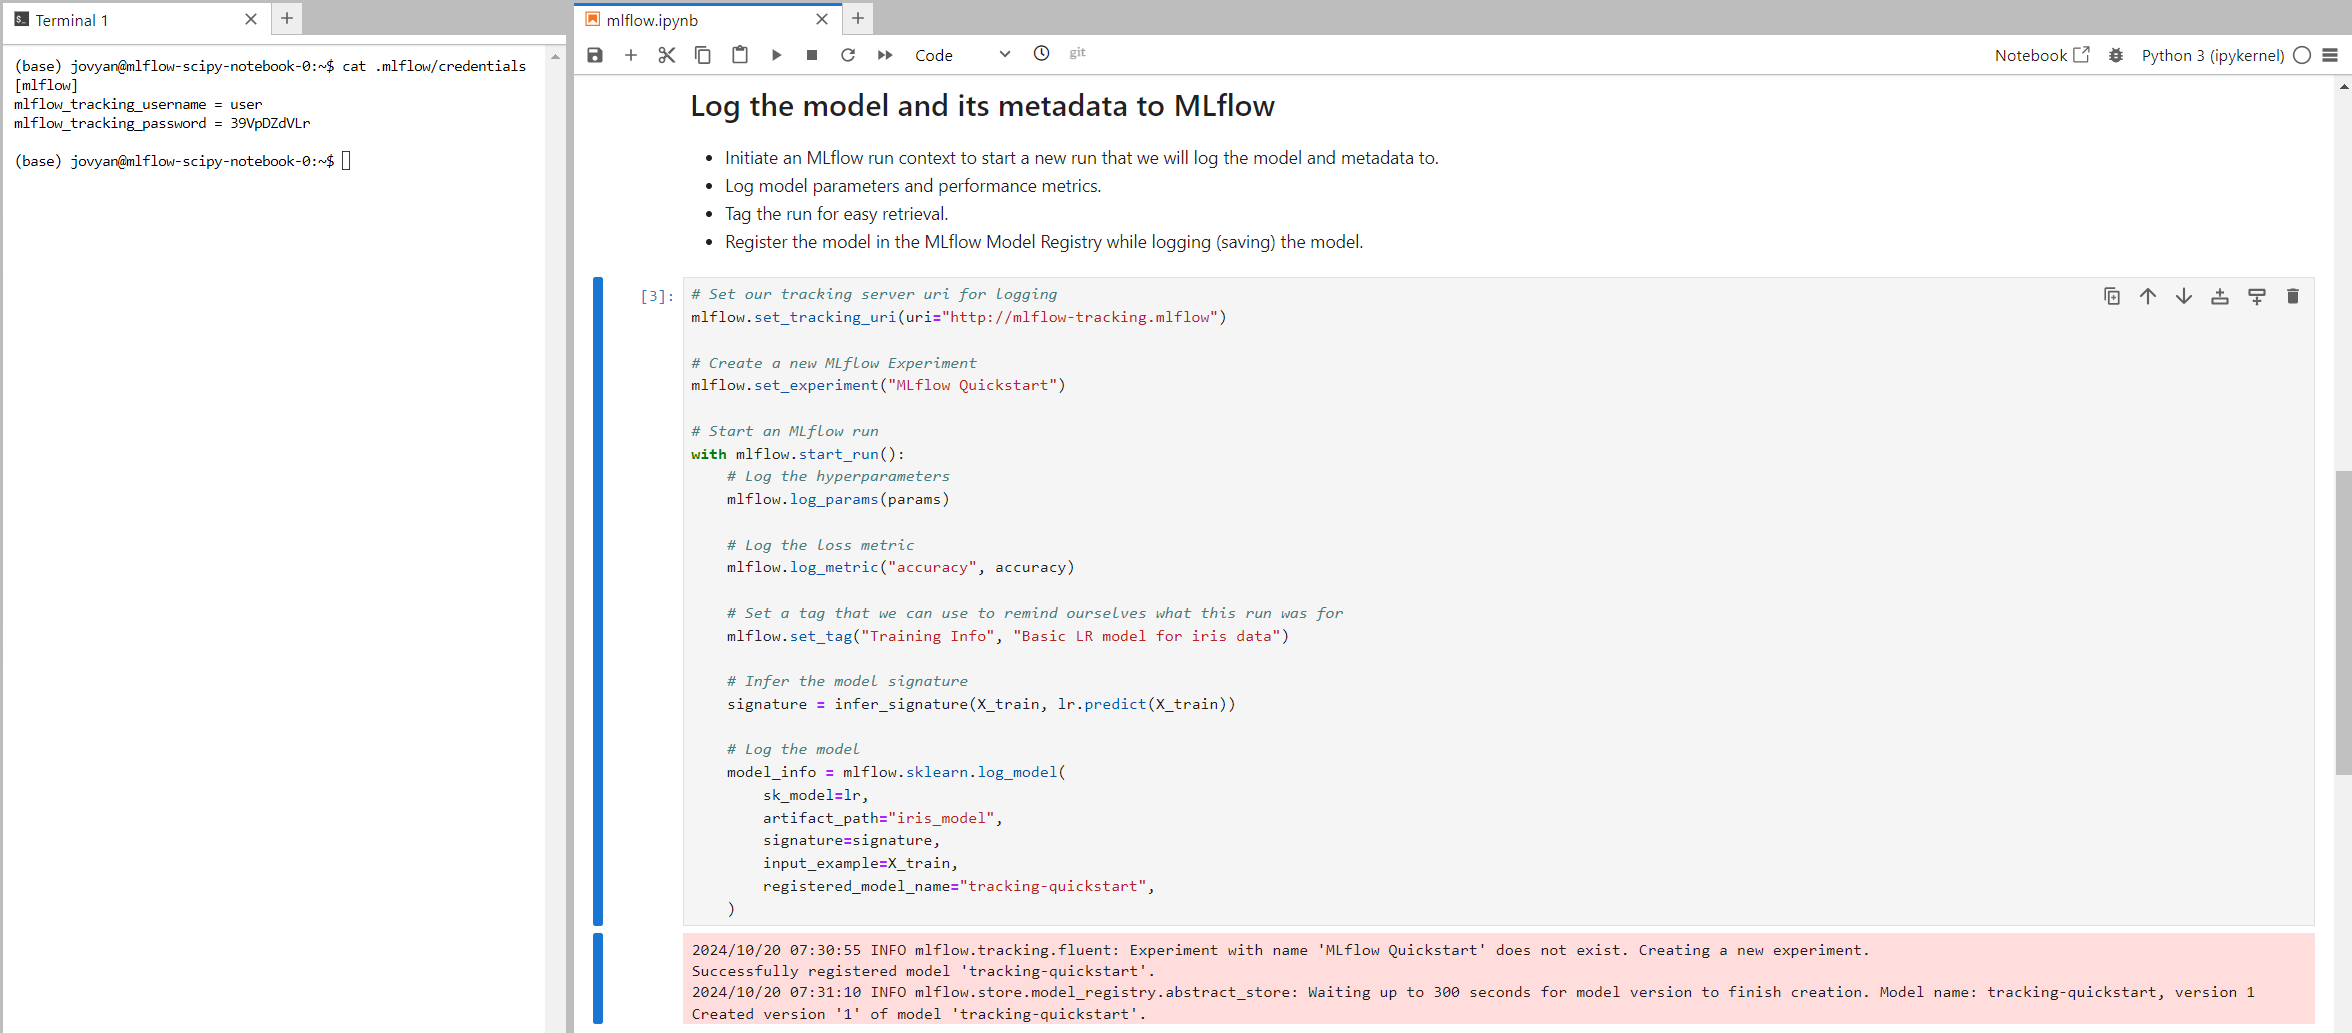
- To authenticate with MLflow, create a .mlflow/credentials file and run the above code:
mkdir ~/.mlflow
echo "[mlflow]" > ~/.mlflow/credentials
echo "mlflow_tracking_username = user" >> ~/.mlflow/credentials
echo "mlflow_tracking_password = 39VpDZdVLr" >> ~/.mlflow/credentials
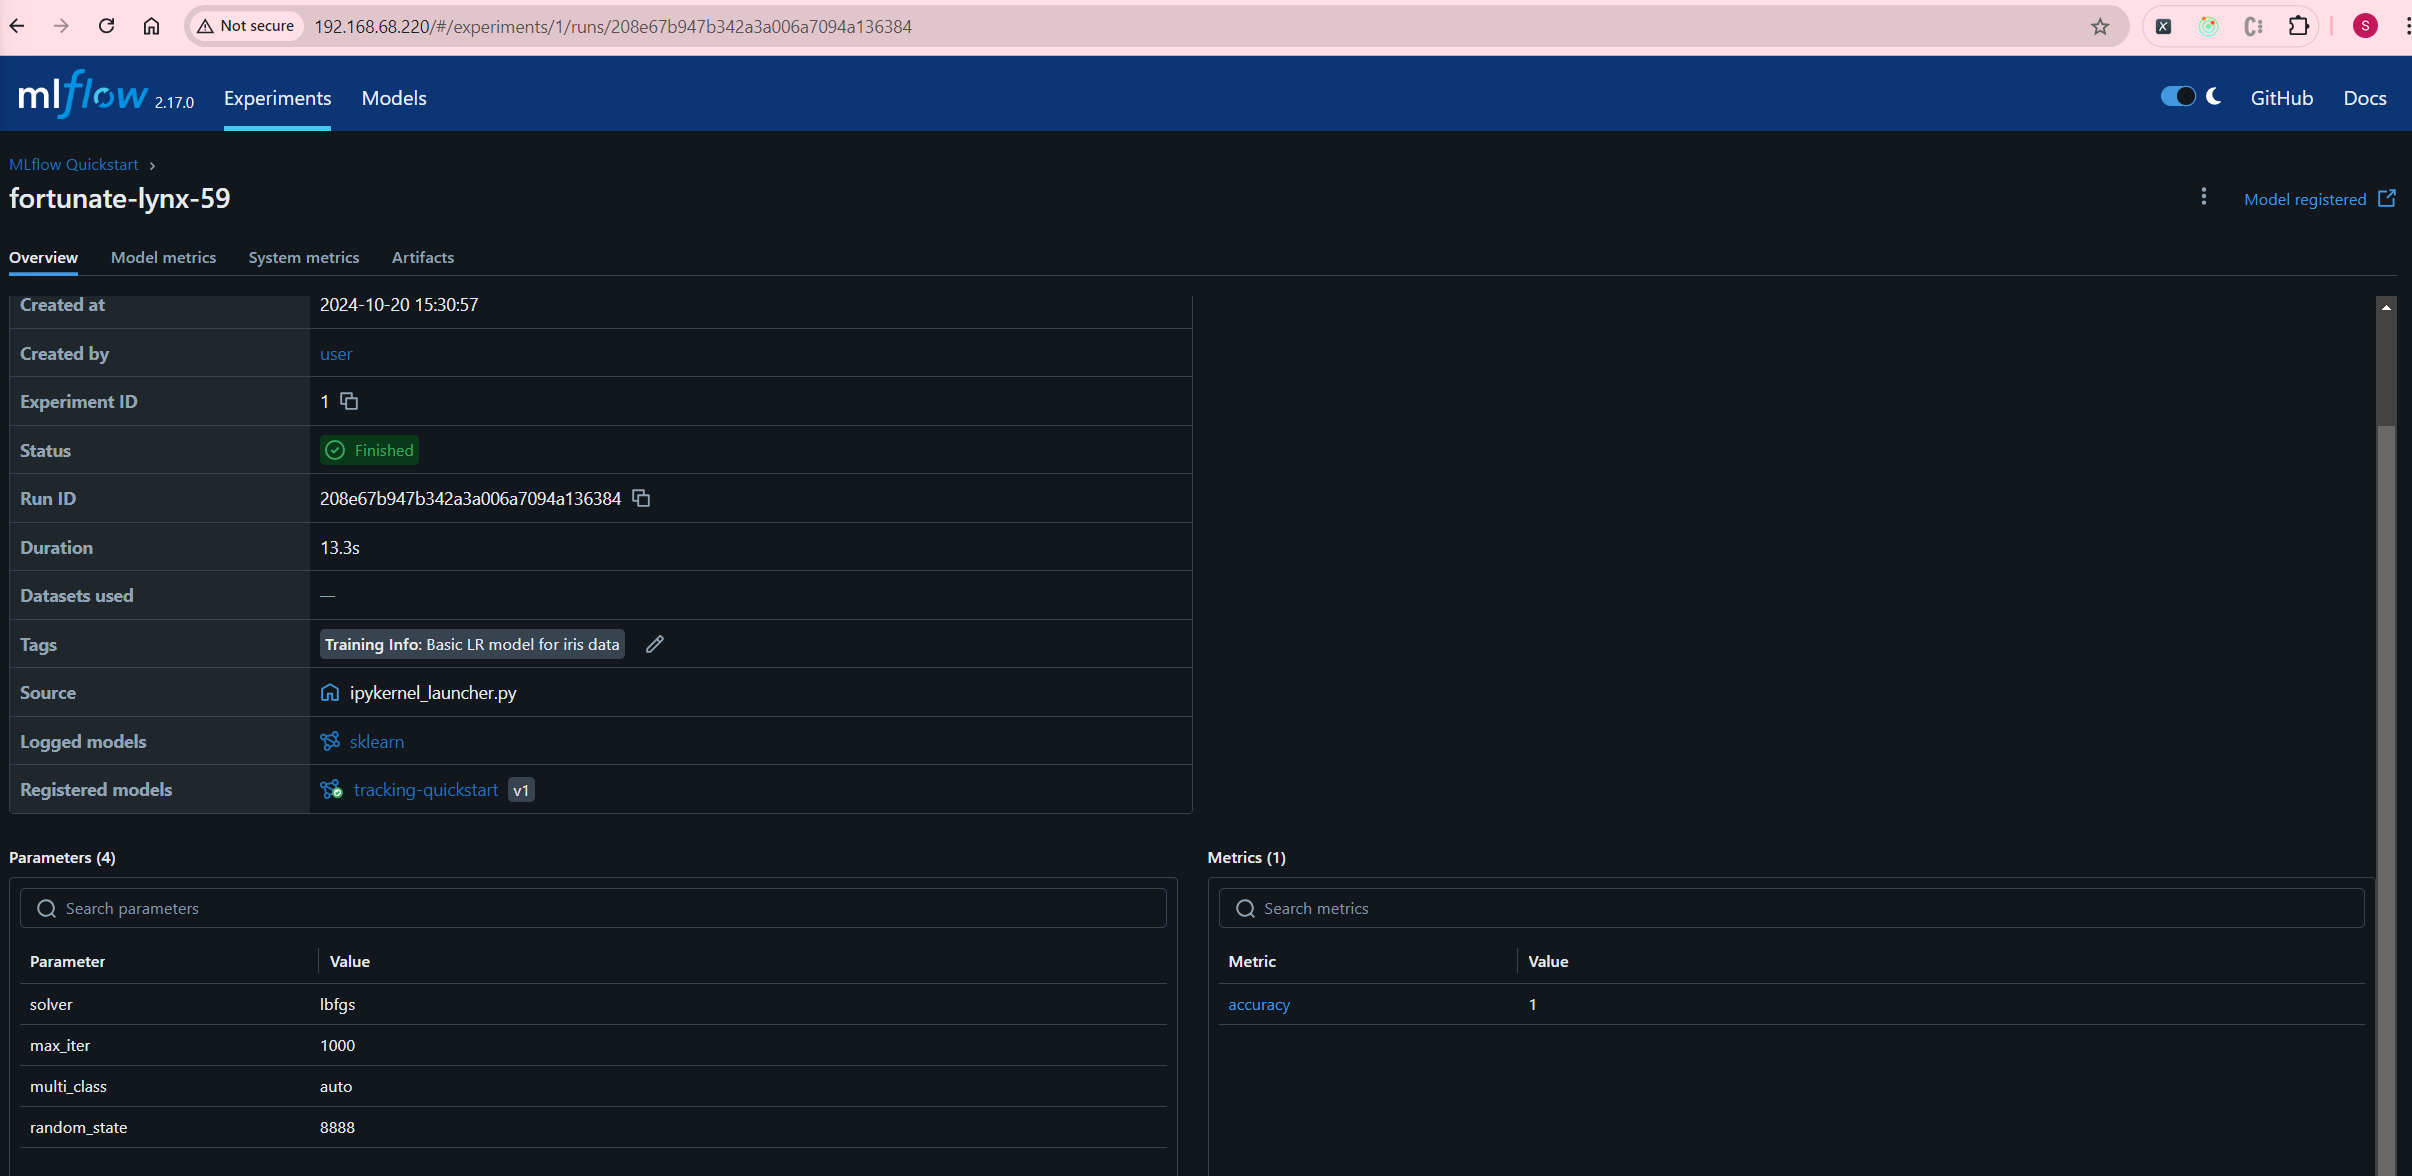
You should see the new experiment logged in MLflow:
- Load the model for inference:
# Load the model back for predictions as a generic Python Function model
loaded_model = mlflow.pyfunc.load_model(model_info.model_uri)

predictions = loaded_model.predict(X_test)

iris_feature_names = datasets.load_iris().feature_names

result = pd.DataFrame(X_test, columns=iris_feature_names)
result["actual_class"] = y_test
result["predicted_class"] = predictions

result[:4]
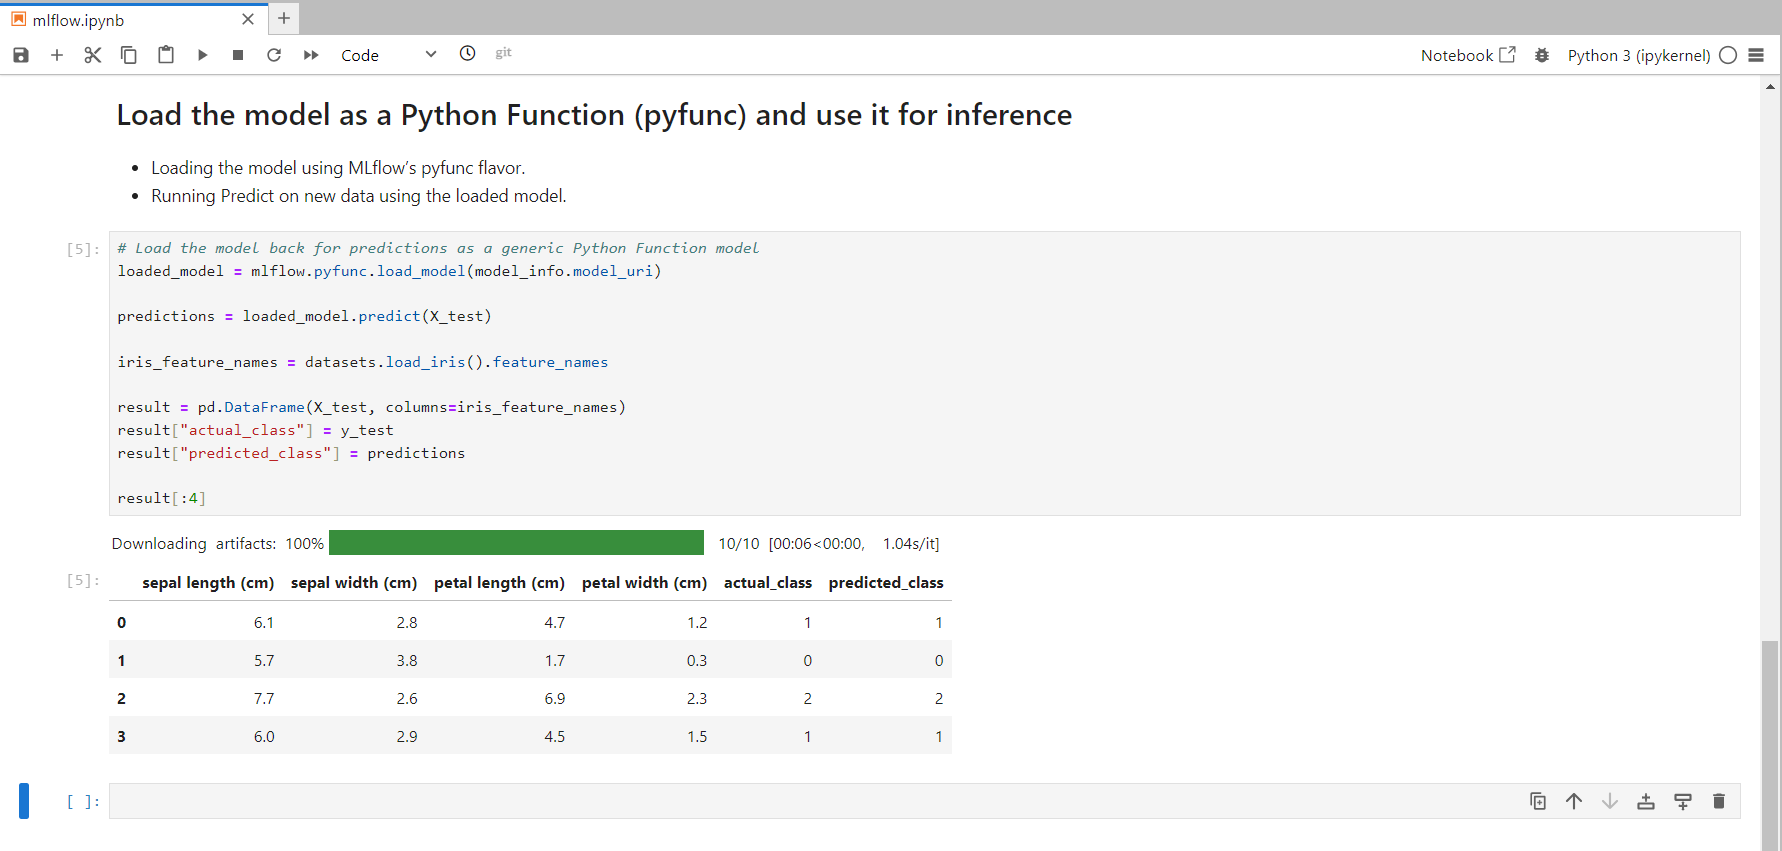
With a commendable 100% accuracy, your predictions should look like this:
This concludes the installation and setup of MLflow and Kubeflow in your Talos HomeLab cluster. You can now effectively manage your machine learning lifecycle, leveraging both platforms for optimal productivity.